Education
Convert 28 Degree C to F: Quick Temperature Conversion Guide

Converting temperatures can sometimes feel like a math puzzle, especially when you’re switching between Celsius and Fahrenheit. If you’ve ever found yourself wondering how to turn 28 degree C to F in a flash, you’re not alone! This quick guide will help you effortlessly navigate the conversion process so that you can impress your friends or make accurate plans for your next outdoor adventure. Whether you’re traveling abroad or just curious about weather reports, mastering temperature conversions opens up a world of understanding. Let’s dive in and transform those degrees quickly and easily!
Quick Guide: How to Convert 28 Degree C to F in Seconds!
Temperature conversions can be a breeze once you get the hang of them. If you’re looking to convert 28 degree C to F quickly, you’ve come to the right place. With just a few simple steps, you’ll be able to make this conversion in seconds.
First, it’s good to know that Fahrenheit and Celsius are two different scales used for measuring temperature. Celsius is commonly used around the world, while Fahrenheit primarily reigns in the United States. This difference makes it essential to familiarize yourself with how they compare.
The formula for converting Celsius to Fahrenheit is straightforward: multiply by 9/5 and then add 32. Sounds complicated? Not at all! Let’s break it down together using our target temperature of 28°C.
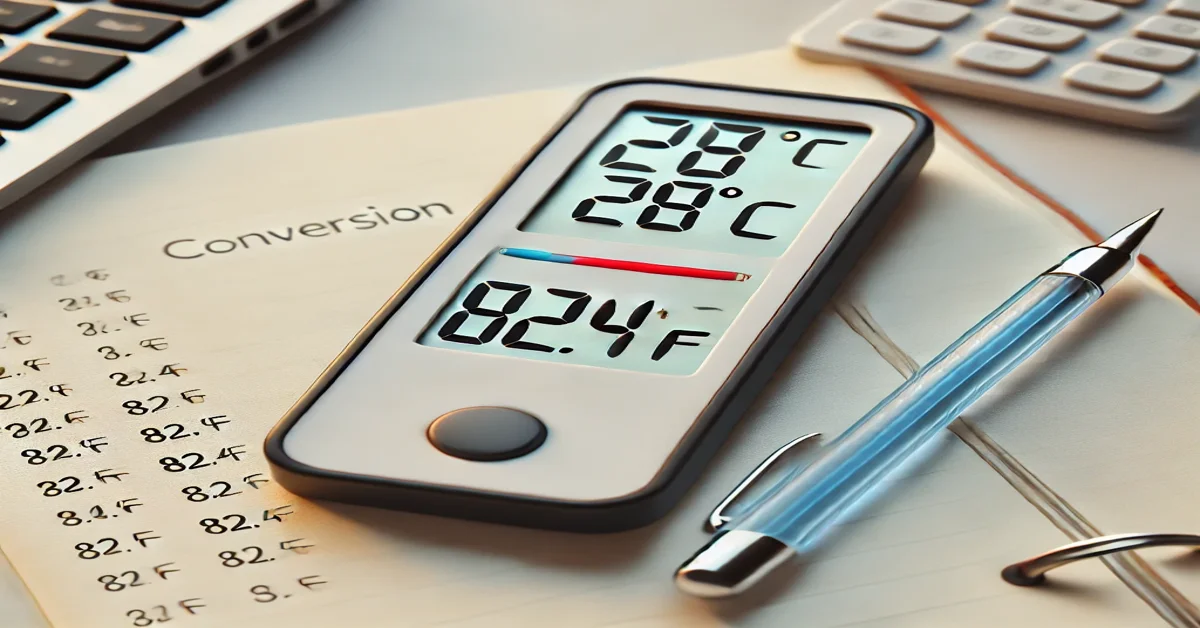
Start by taking your degrees in Celsius—in this case, that’s 28. Next, multiply by 9/5 (or simply 1.8) which gives you approximately 50.4 when calculated (28 x 1.8).
Now comes the final step: adding 32 to that number from before—50.4 plus 32 equals about 82.4°F! So there you have it; just like that, you’ve converted warm weather from Celsius into Fahrenheit without breaking a sweat.
This method works well not only for converting one specific temperature but also for any other degree you’d like to change over time—making it a handy skill indeed!
Remembering this simple process will save you time during those moments when temperatures start fluctuating or when planning activities dependent on weather conditions becomes crucial.
Celsius to Fahrenheit Conversion Basics
Understanding temperature scales is essential for anyone who travels or communicates internationally. Celsius (°C) and Fahrenheit (°F) are two of the most commonly used systems. Most countries use Celsius, while the United States primarily relies on Fahrenheit. This difference can lead to confusion.
Celsius measures temperature based on the freezing point of water at 0°C and its boiling point at 100°C under standard atmospheric conditions. It’s a straightforward scale that reflects our everyday experiences with heat and cold.
Fahrenheit, however, uses a different reference system. In this scale, water freezes at 32°F and boils at 212°F. The increments in Fahrenheit are smaller than those in Celsius, making it feel more granular but also more complex for conversions.
To convert from Celsius to Fahrenheit, you need to understand a simple formula: multiply the Celsius value by nine-fifths (or 1.8), then add 32 to the result. This equation helps bridge these two differing scales seamlessly.
For example, if you want to convert standard room temperature—usually around 20°C—you would calculate: \(20 \times \frac{9}{5} + 32 = 68°F\). Easy enough!
Being familiar with both scales offers practical benefits when discussing weather forecasts or cooking temperatures across different regions. You don’t have to feel lost in translation anymore.
With practice, converting between these two units becomes second nature! Knowing how many degrees correspond lets you interact confidently whether you’re planning travel or trying out recipes from abroad.
The Conversion Process
The conversion from Celsius to Fahrenheit might seem tricky at first, but it’s quite straightforward once you get the hang of it. To convert 28 degree C to F, you need a simple formula: multiply by 9/5 and then add 32.
Start with your temperature in Celsius. In this case, that’s 28. Next, take that number and multiply it by 9. The result will be 252.
Now, divide that product by 5. When you do this calculation with our example, you’ll find that dividing gives you exactly 50.4.
From here, all that’s left is to add the constant value of 32 to your previous result. So now we have: \(50.4 + 32\).
When you perform this final addition step, the total comes out to be an impressive 82.4°F! It’s as easy as pie when broken down into these manageable steps.
This method works for any temperature conversion between Celsius and Fahrenheit; just plug in different numbers where needed!
Using online calculators or smartphone apps can also speed up the process if you’re ever in a rush or want confirmation on your manual calculations.
Example: Calculating 28 degree C to F
To convert 28 degree C to F, we start with a simple formula. The formula is: multiply the Celsius temperature by 1.8 and then add 32. This process allows us to make quick conversions without any hassle.
Let’s break this down step by step. First, take your 28°C and multiply it by 1.8. Doing the math gives you a total of 50.4. This number represents the heat from Celsius but isn’t yet in Fahrenheit.
Next, you need to add the constant value of 32 to that result. So now we have: 50.4 + 32 = 82.4°F! There you have it—28 degree C to F equals an impressive figure of 82.4°F.
It’s interesting how straightforward this calculation can be once you get used to it! You don’t need sophisticated tools or apps; just a basic understanding of multiplication and addition will do the trick.
This conversion becomes especially handy when traveling or cooking recipes that specify temperatures in different units! Knowing how warm or cool something feels in familiar terms can really enhance your experience.
With practice, converting between these two scales will feel second nature for anyone dealing with weather reports or culinary instructions regularly!
Many people find themselves needing these conversions more often than they expect, so keep this method handy as part of your toolkit for everyday life!
Additional Resources and Tools
When it comes to converting temperatures, having the right resources can make all the difference. There are numerous tools available online that simplify temperature conversions like 28 degree C to F.
First, there are mobile apps dedicated solely to unit conversions. Apps such as “Unit Converter” or “ConvertPad” allow you to quickly switch between Celsius and Fahrenheit with just a few taps. These handy tools are often free and perfect for on-the-go calculations.
Websites also offer instant conversion calculators. Simply type in your desired temperature, hit enter, and voilà! You’ll have the result in seconds. Websites like RapidTables or Calculator Soup provide user-friendly interfaces that make finding your answer easy and efficient.
For those who prefer traditional methods, keep a conversion chart handy at home or work. This visual aid can be particularly useful if you’re regularly dealing with cooking recipes or scientific experiments where precise measurements matter.
If you’re looking for more detailed explanations about temperature scales, consider exploring educational websites such as Khan Academy or HowStuffWorks. They not only explain how these conversions work but also delve into their historical context—adding depth to your understanding of temperatures.
Social media platforms can be surprisingly resourceful too; many science educators share quick tips and tricks for conversion through engaging posts or videos. Engaging content is readily available via platforms like Instagram and TikTok under hashtags related to science education.
Don’t underestimate the power of community forums like Reddit’s r/askscience or specialized Facebook groups focused on cooking and DIY projects. Here, members often share personal insights that could enhance your knowledge about temperature conversions beyond basic numbers.
Share Your Experience
When it comes to converting temperatures, everyone’s experience can vary. Perhaps you regularly encounter Celsius and Fahrenheit in your daily life—whether you’re traveling abroad or simply checking the weather app on your phone.
Have you ever needed to convert 28 degree C to F quickly? It’s a common scenario for many people, especially if you’re not accustomed to using one scale over the other. Maybe you’ve had that awkward moment at a family gathering where someone mentions how hot it is outside in degrees Celsius, and you find yourself lost trying to calculate what that means in Fahrenheit.
Sharing tips and tricks about temperature conversion can make these moments easier for everyone involved. Did you learn any methods that help speed up your calculations? Have handy tools like mobile apps helped streamline this process?
Feel free to share your thoughts! Your experiences could help others who may be looking for quick solutions when dealing with conversions between Celsius and Fahrenheit. Whether it’s through clever mnemonics or reliable online calculators, sharing knowledge fosters community learning.
Remember, those small insights often lead to big improvements in our everyday lives! So don’t hesitate—join the conversation about transforming temperatures from 28 degrees C to F effectively.
Education
12mm to Inches: Quick Conversion & Practical Guide

The metric system and the imperial system are the two most commonly used measurement systems worldwide. While millimeters (mm) are standard in scientific and engineering fields, inches (in) are commonly used in the United States and a few other countries. If you’ve ever needed to convert 12mm to inches, this guide will help you understand the process, provide useful conversion formulas, and explore real-world applications of this measurement.
How to Convert 12mm to Inches
The Conversion Formula
To convert millimeters to inches, you use the following formula:
Applying this to 12mm:
Thus, 12mm is approximately 0.472 inches.
Quick Millimeter to Inch Conversion Table
If you frequently work with millimeter measurements, here’s a quick reference table for similar conversions:
Millimeters (mm) | Inches (in) |
---|---|
10mm | 0.3937 |
12mm | 0.4724 |
15mm | 0.5906 |
20mm | 0.7874 |
25mm | 0.9842 |
30mm | 1.1811 |
Why Convert 12mm to Inches?
1. Industrial and Engineering Use
Industries like manufacturing, automotive, and construction often require conversions between metric and imperial systems. Many blueprints and product dimensions are provided in both mm and inches, making conversions crucial.
2. DIY and Home Improvement Projects
If you’re purchasing screws, nails, or bolts, you might find that the store lists measurements in inches rather than millimeters. Understanding 12mm to inches ensures you get the right size components.
3. Jewelry and Accessories
- Many jewelry measurements, such as beads, rings, and watch bands, use millimeters.
- If you’re shopping for a 12mm bracelet, knowing it’s about 0.472 inches wide helps when comparing sizes.
4. Medical and Optical Fields
Medical devices, such as lens sizes for eyeglasses, are often measured in millimeters. Understanding conversions helps professionals and patients make informed choices.
How to Convert Inches Back to Millimeters
If you need to convert inches back to millimeters, use this formula:
For example, converting 0.472 inches back to millimeters:
This confirms that 12mm is indeed 0.472 inches.
Tools for Easy Conversion
1. Online Conversion Calculators
Many websites offer free unit conversion tools where you can input millimeters and get the corresponding inches instantly.
2. Mobile Apps
Conversion apps like Unit Converter and Google’s built-in calculator allow quick conversions without manual calculations.
3. Rulers and Measuring Tape
Some rulers feature both metric (mm) and imperial (inches) scales, making conversions easy without any calculations.
Common Mistakes When Converting 12mm to Inches
1. Rounding Errors
- Some people round 0.472 inches to 0.5 inches, which can cause inaccuracies in precision-based fields like engineering.
2. Mixing Up Metric and Imperial Units
- If you’re working on a home project or assembling furniture, ensure you’re using the right measurement system to avoid errors.
3. Using the Wrong Conversion Factor
- Always use 1mm = 0.03937 inches rather than an incorrect approximation.
Conclusion
Converting 12mm to inches is simple using the conversion factor 1mm = 0.03937 inches. Whether you’re working on a DIY project, purchasing jewelry, or handling professional measurements, understanding this conversion helps avoid errors and ensures precision. Now that you know 12mm is approximately 0.472 inches, you can confidently make conversions in various applications.
FAQs About 12mm to Inches
1. How many inches is exactly 12mm?
12mm is approximately 0.472 inches.
2. Is 12mm the same as 1/2 inch?
No, 12mm is slightly less than 1/2 inch. One-half inch is equal to 12.7mm.
3. What objects are around 12mm in size?
- A standard marble is about 12mm in diameter.
- A small dice used in board games is typically around 12mm on each side.
- A thick marker tip might measure approximately 12mm.
4. Why is it important to know millimeter to inch conversions?
Conversions are necessary for fields like manufacturing, engineering, home improvement, jewelry, and medicine where measurements must be precise.
5. Can I use a standard ruler to measure 12mm?
Yes! A metric ruler will have millimeter markings, while an imperial ruler will show inches divided into 16ths or 32nds.
Education
Easy Sunflower Drawing: Step-by-Step Guide for Beginners

Sunflowers are a timeless and beautiful subject for artists of all levels. Their bright petals and intricate centers make them an exciting challenge to draw. Whether you are a beginner or an experienced artist, this step-by-step guide will help you create a stunning sunflower drawing while improving your sketching and shading skills.
Why Draw a Sunflower?
Sunflowers symbolize happiness, warmth, and positivity, making them a popular subject in art. Drawing sunflowers can help improve your observation skills, enhance your understanding of symmetry, and refine your shading techniques.
Essential Tools for Sunflower Drawing
Before you start, gather the necessary tools:
- Pencils: HB for sketching, 2B-6B for shading
- Erasers: Kneaded and precision erasers for highlights
- Paper: Medium to smooth texture for finer details
- Blending Tools: Cotton swabs, blending stumps, or tissue
- Reference Images: Photos or artwork for accuracy
Step-by-Step Guide to Drawing a Sunflower
Step 1: Sketch the Basic Shape
- Draw a circle for the center of the sunflower
- Lightly sketch a larger circle around it to define the petal area
- Use guidelines to divide the center evenly for better symmetry
Step 2: Add the Petals
- Sketch elongated, slightly curved petals around the center
- Vary petal sizes and angles for a natural look
- Overlap some petals to add depth and realism
Step 3: Draw the Center Details
- Add a smaller inner circle for the sunflower’s disk
- Use tiny dots and curved lines to create texture
- Shade the center gradually for a realistic effect
Step 4: Outline the Stem and Leaves
- Draw a slightly curved stem extending from the base
- Sketch broad, serrated leaves along the stem
- Add veins inside the leaves for more detail
Step 5: Add Shading and Final Details
- Shade the petals lightly, keeping the edges brighter
- Darken the base of each petal for depth
- Use blending tools for smooth shading
- Add final highlights to enhance the realistic effect
Tips for Improving Your Sunflower Drawing
- Study Real Sunflowers: Observing live or photo references improves accuracy.
- Use Layered Shading: Build up shading gradually for a more natural look.
- Experiment with Different Angles: Try drawing sunflowers from different perspectives.
- Practice Petal Overlaps: Overlapping petals add realism and depth.
Conclusion
Drawing a sunflower is a rewarding artistic exercise that enhances your skills in shading, texture, and composition. Follow this step-by-step guide to create a beautiful sunflower drawing, and don’t forget to practice different techniques to refine your art further!
Frequently Asked Questions (FAQs)
1. How do I make my sunflower drawing look realistic? Focus on shading, petal variations, and detailed texture in the center.
2. What pencil is best for shading sunflowers? Use a combination of HB, 2B, and 4B pencils for depth and contrast.
3. How can I draw a sunflower without a reference? Memorize its structure—round center, layered petals, and textured details.
Education
Wolf Drawing: Techniques for Realistic and Easy Sketches

Drawing a wolf can be a rewarding artistic challenge, whether you’re a beginner or an experienced artist. Wolves have a majestic, powerful appearance, making them a favorite subject for wildlife drawings. This guide will walk you through the essential steps, techniques, and tips to create a realistic wolf drawing. From sketching basic shapes to refining fur details and expressive eyes, you’ll learn how to bring your wolf artwork to life.
Tools and Materials for Wolf Drawing
Before starting your wolf drawing, gather the right materials. The choice of tools depends on your preferred drawing style, whether it’s pencil sketching, ink drawing, or digital art.
Recommended Tools:
- Pencils: HB, 2B, 4B, and 6B for shading and depth.
- Erasers: Kneaded erasers for soft corrections and precision erasers for fine details.
- Blending tools: Tortillons, tissue paper, or cotton swabs for smooth shading.
- Fine liners or ink pens: For a defined, stylized look.
- Digital drawing tablet: If working in Procreate, Photoshop, or another digital medium.
Step-by-Step Guide to Drawing a Wolf
Step 1: Sketch Basic Shapes
Start with simple shapes to define the wolf’s structure. Use:
- A large oval for the head.
- A slightly elongated oval for the snout.
- Triangle shapes for the ears.
- Basic circles for the body structure.
Step 2: Outline the Wolf’s Features
- Sketch light guidelines for facial symmetry.
- Define the placement of the eyes, nose, and mouth.
- Adjust the ears for accurate positioning.
Step 3: Refine the Face and Add Details
- Draw the almond-shaped eyes with an intense gaze.
- Add the nose with slight shading for a wet, reflective look.
- Sketch the mouth slightly open or closed for expression.
Step 4: Define the Fur Texture
- Use short, directional pencil strokes to simulate fur.
- Layer different shades to create depth and realism.
- Focus on fur flow, especially around the neck and face.
Step 5: Add Shading and Depth
- Identify a light source to guide your shading.
- Use a blending tool for smooth transitions.
- Darken shadows around the snout, ears, and fur creases for dimension.
Step 6: Final Touches
- Erase unnecessary guidelines.
- Deepen dark areas for contrast.
- Add highlights to the eyes and nose for a lifelike effect.
Tips for a Realistic Wolf Drawing
1. Study Wolf Anatomy
- Observe real-life wolf photos.
- Understand their skeletal and muscular structure.
- Pay attention to fur patterns and density.
2. Experiment with Different Poses
- A standing wolf shows strength and alertness.
- A howling wolf adds drama and emotion.
- A resting wolf captures calmness and serenity.
3. Use References
- Look at wildlife photography.
- Study other artists’ techniques.
- Practice sketching from different angles.
4. Digital vs. Traditional Drawing
- Digital tools offer easier corrections and layering.
- Pencil drawings provide texture and depth through shading.
- Experiment with both to find your style.
Conclusion
Drawing a wolf requires patience and practice, but with the right techniques, anyone can create stunning artwork. By mastering anatomy, fur texture, and shading, you can bring your wolf drawings to life. Grab your sketchpad, follow these steps, and start drawing today!
Frequently Asked Questions (FAQs)
- 1. How can I make my wolf drawing look more realistic?
Focus on accurate proportions, detailed fur texture, and expressive eyes.
- 2. What is the hardest part of drawing a wolf?
Capturing the fur texture and facial expression can be challenging but improves with practice.
- 3. Can beginners draw wolves easily?
Yes! Start with basic shapes, practice shading, and gradually refine details.
- 4. What’s the best way to learn wolf drawing?
Use reference images, follow step-by-step guides, and practice regularly.
- Entertainment2 months ago
Celebrity Movie Archives: Hidden Gems and Iconic Performance
- Entertainment2 months ago
Javrank: Guide to Adult Entertainment & Innovative Features
- Games2 months ago
Snokido: The Ultimate Online Gaming Hub for All Ages
- Technology4 weeks ago
InfluencersGineWuld: Revolutionizing Influencer Marketing for Brands
- LifeStyle2 months ago
CumonPrintedPics: Personalized Prints and Creative Platform
- Business2 months ago
Fintechzoom.com dax40 : Insights & Trends and Updates
- Technology4 weeks ago
BeTechIT.com Contacts: For 24/7 Effortless Tech Solutions
- Food & Drinks4 weeks ago
Çeciir: A Hearty Turkish Chickpea Stew with Rich Flavors