
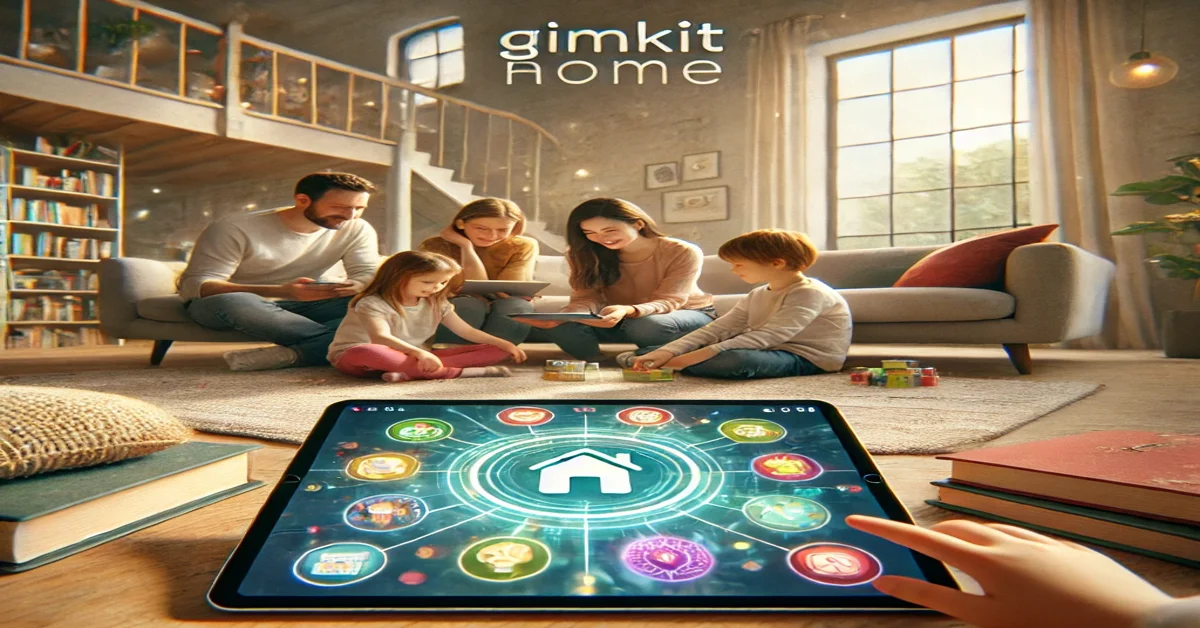
Imagine transforming your living room into a vibrant classroom where learning feels like an adventure. With Gimkit Home, this dream becomes reality. This innovative platform blends fun and education, making it easier for students to engage with concepts while families join in on the excitement. Say goodbye to traditional study routines and hello to interactive learning experiences that can captivate minds of all ages. Let’s dive into the top features of Gimkit Home that are revolutionizing how we approach education from our very own homes.
Top Features of Gimkit Home: Revolutionizing Education from Your Living Room
Gimkit Home is redefining how families approach education by offering a unique blend of interactive learning tools. With engaging activities designed for various age groups, it invites students to explore subjects in playful ways that keep their interest alive.
The platform encourages collaboration among family members, fostering teamwork and making learning a shared experience. This innovative approach not only enhances knowledge retention but also strengthens bonds as everyone works together towards educational goals.
Introduction
The world of education is evolving, and technology plays a crucial role in this transformation. Gimkit Home stands at the forefront, offering innovative solutions that bridge learning gaps right from your living room.
Designed to empower students and engage families, Gimkit Home creates an interactive environment. It leverages game-based learning to make education not just effective but also enjoyable. Let’s explore the exciting features that set Gimkit Home apart as a valuable tool for modern learners.
READ MORE:Lessons from the Art: Insights, Growth, and Creativity
Overview of Gimkit
Gimkit is an innovative learning platform designed to make education more engaging and interactive. It transforms traditional study methods into fun, game-like experiences that encourage active participation.
Students can compete in real-time quizzes while teachers track their progress seamlessly. The platform combines technology with classroom dynamics, creating a unique environment for learners of all ages. With its user-friendly interface, Gimkit fosters collaboration and excitement around academic subjects like never before.
AI Literacy and Training
AI literacy is becoming essential in today’s digital landscape. Gimkit Home provides comprehensive training resources tailored for students and educators alike. This helps them understand artificial intelligence concepts effectively.
The focus on AI literacy fosters critical thinking skills, preparing learners to navigate an increasingly tech-driven world. With engaging content, users can explore the fundamentals of AI while enhancing their overall educational experience at home.
AI Literacy for Grades 6-12
Gimkit Home offers an exciting approach to AI literacy for students in grades 6-12. This age group is at a crucial stage of development, where understanding technology can shape their future.
With interactive lessons and engaging activities, Gimkit makes learning about artificial intelligence accessible and fun. Students will explore key concepts while developing critical thinking skills that are essential in today’s digital landscape. This hands-on experience fosters curiosity and encourages learners to embrace the world of AI confidently.
AI Foundations for Educators
AI Foundations for Educators equips teachers with essential skills to navigate the evolving educational landscape. Understanding AI’s role in learning helps educators create a more engaging and effective classroom environment.
By incorporating AI tools, teachers can personalize instruction for diverse learners. This foundational knowledge empowers them to foster critical thinking and innovation among students, ensuring they remain relevant in today’s tech-driven world. Embracing these advancements enhances both teaching strategies and student outcomes significantly.
Family Engagement and Tech Planning
Family engagement is essential in today’s tech-driven education landscape. Gimkit Home provides tools to help families navigate learning at home effectively. Parents can access resources that make educational technology manageable and enjoyable.
Tech planning becomes a collaborative effort with Gimkit’s platform, allowing families to set goals and develop skills together. This approach not only strengthens bonds but also empowers students by involving their loved ones in the learning process. It creates an environment where curiosity thrives and exploration is encouraged.
Family Tech Planners
Family Tech Planners are essential tools for organizing and managing technology use in the home. They help families set clear guidelines, ensuring that screen time is balanced with other activities. This keeps kids engaged while preventing tech overload.
These planners also foster communication among family members about digital habits. By involving everyone in discussions around tech usage, families can create a supportive environment that enhances learning through Gimkit Home and beyond. It’s all about teamwork!
Family and Community Engagement Program
Gimkit Home fosters strong connections between families and their communities. The Family and Community Engagement Program encourages parents to participate actively in their children’s education. By involving families, it creates a supportive learning environment that extends beyond the classroom.
This initiative offers resources to help families engage with educational content effectively. It also promotes collaboration among community members, enhancing the overall learning experience for students. Such involvement empowers everyone to contribute positively to a child’s academic journey.
Ratings and Privacy
Gimkit Home prioritizes the safety and privacy of its users. It provides clear ratings that inform parents and educators about content appropriateness, ensuring a secure learning environment. This transparency builds trust among families engaging with the platform.
Additionally, Gimkit’s commitment to data privacy means user information is protected. They implement strict measures to keep personal details confidential while creating an enjoyable educational experience. With such safeguards in place, families can feel confident using Gimkit at home without concerns over security risks.
Learning, Community, and Privacy Ratings
Gimkit Home prioritizes learning while ensuring a safe environment for students. With robust ratings focused on educational effectiveness, users can easily assess how well the platform meets their needs.
Community engagement is also emphasized; parents and educators are encouraged to share feedback. This collaboration fosters trust and transparency. Privacy ratings further protect user data, making it clear that safety comes first in every interaction with Gimkit Home.
READ MORE:Leolulu: Authentic Adult Content Revolutionizing Industry
Game-style Learning
Game-style learning transforms the educational experience into an engaging adventure. With Gimkit Home, students can dive into interactive quizzes that feel more like games than traditional tests. This approach boosts motivation and retention.
The competitive element keeps learners on their toes while reinforcing concepts in a fun way. Gamifying education encourages collaboration and healthy competition among family members, making learning enjoyable for all ages. It’s about turning knowledge acquisition into an exciting challenge everyone can enjoy together.
Game-show styled learning
Gimkit Home introduces an exciting way to engage students through game-show styled learning. This interactive format turns lessons into fun challenges that capture attention and motivate participation.
Students can compete in real-time, answer questions, and earn rewards for their efforts. The thrill of competition fosters a lively atmosphere that encourages collaboration while reinforcing educational content. With this approach, learning becomes less about rote memorization and more about active engagement, making education enjoyable from the comfort of home.
Top Tech Tools for Formative Assessment
Formative assessment is crucial for understanding student progress. With the right tech tools, educators can gather instant feedback and adjust their teaching strategies accordingly. Tools like Gimkit Home allow real-time assessments through engaging game formats.
These platforms create an interactive learning environment where students feel comfortable expressing their knowledge gaps. By leveraging technology, teachers can foster a more responsive approach to education that meets each learner’s needs effectively while keeping them motivated and involved.
Gimkit Home Overview
Gimkit Home transforms the way families engage with learning. Designed to make education fun, it brings interactive game-based experiences right into your living room. This platform encourages collaboration and friendly competition among family members.
With a focus on academic growth, Gimkit Home offers personalized content tailored to individual needs. It equips learners of all ages with essential skills while making the process enjoyable and effective. Parents can easily track progress, fostering an environment where everyone thrives together.
What is Gimkit Home?
Gimkit Home is an innovative platform designed to transform learning experiences in the comfort of your own home. It offers interactive, game-based tools that engage students while enhancing their understanding of various subjects.
With a focus on fun and educational gameplay, Gimkit Home allows families to participate together. This creates opportunities for collaborative learning and deeper connections among family members as they explore topics through quizzes and challenges. It’s education reimagined for the modern household.
How Does Gimkit Work for Home Learning?
Gimkit Home transforms traditional learning by combining technology with fun. Parents can create customized quizzes tailored to their child’s needs, making education interactive and engaging right from the living room.
Students can play at their own pace while parents track progress through real-time analytics. This allows for targeted support in areas where a child might struggle, ensuring that learning is personalized and effective. The game-like environment keeps motivation high while reinforcing key concepts efficiently.
Why Gimkit is Perfect for Home Learning
Gimkit Home transforms traditional learning into an engaging experience. Its interactive platform encourages students to explore subjects at their own pace, making education enjoyable and effective.
With game-like quizzes and real-time feedback, learners stay motivated while mastering concepts. Parents can easily get involved by tracking progress, ensuring a supportive home environment for academic growth. This unique blend of fun and functionality makes Gimkit the ideal choice for families seeking innovative educational tools.
Using Gimkit at Home
Using Gimkit at home transforms learning into an enjoyable experience. Families can engage in interactive quizzes that enhance understanding while keeping students motivated. With a variety of subjects and customizable games, it caters to individual learning needs.
Parents can easily set up accounts for their kids, making it simple to track progress and performance. The platform encourages healthy competition among family members or friends, fostering collaboration even from the comfort of your living room.
How to Use Gimkit at Home
Using Gimkit at home is a breeze. Start by signing up for an account and exploring the various games available. You can join existing kits or create your own tailored to your child’s learning needs.
Encourage participation by inviting family members to play together. This creates a fun, competitive atmosphere while reinforcing concepts learned in school. Regularly check progress and celebrate achievements to keep motivation high and make learning enjoyable for everyone involved!
Gimkit Home Alternatives for Enhanced Learning
For families exploring diverse educational tools, several Gimkit Home alternatives can enhance learning experiences. Quizlet offers interactive flashcards and study games, while Kahoot! excels in creating engaging quizzes that spark friendly competition.
Another excellent option is Nearpod, which combines lessons with real-time assessments. Each platform has unique features that cater to different learning styles, ensuring students remain motivated and engaged throughout their home education journey. These alternatives complement the innovative approach of Gimkit Home beautifully.
Teacher Training and Support
Gimkit Home offers robust resources for teacher training and support, ensuring educators feel confident using the platform. Self-paced professional development courses allow teachers to learn at their convenience, fitting into busy schedules.
Additionally, GimKit provides tutorials that guide users through various features. This hands-on approach helps educators reflect on their experiences while integrating innovative strategies into their teaching. With comprehensive support, teachers can enhance learning outcomes effectively in any home environment.
Self-paced PD Course Overview
The self-paced professional development course offered by Gimkit Home empowers educators to enhance their teaching strategies. Participants can dive into a variety of engaging modules designed to improve understanding and application of game-based learning.
Educators can learn at their own speed, fitting the training seamlessly into their busy schedules. This flexibility allows them to revisit challenging concepts and fully absorb the material, ensuring they are well-prepared to implement Gimkit effectively in their classrooms or homes.
GimKit Tutorials and Experience Reflection
GimKit offers a range of tutorials designed to enhance user experience. These resources are tailored for students and educators alike, making it easy to navigate the platform effectively.
Through engaging video content and step-by-step guides, users can quickly grasp how to maximize their learning potential. Reflecting on these experiences allows families to assess progress and adjust strategies as needed, fostering a deeper connection with educational goals at home.
READ MORE:Convert 40 Degrees Celsius to Fahrenheit: Complete Guide
Conclusion
Gimkit Home truly transforms the way families engage with education. It brings interactive learning right into your living room, making knowledge both fun and accessible.
With its unique features designed for various age groups, Gimkit caters to students, educators, and families alike. This innovative approach not only enhances learning but also fosters a sense of community, allowing everyone to share in the educational journey together.
Why Gimkit Home is a Game-Changer
Gimkit Home is truly a game-changer in the realm of education. It combines interactive learning with family engagement, making it easier for students to grasp complex concepts from home. With its focus on AI literacy and community involvement, Gimkit creates a supportive learning environment.
The platform’s unique features foster collaboration between families and educators, enhancing the overall learning experience. By integrating game-style elements into assessments, it keeps learners engaged while providing valuable feedback to parents and teachers alike.
With all these benefits rolled into one innovative tool, Gimkit Home stands out as an essential resource for modern education at home.


