Education
Converting 48 Celsius to Fahrenheit: Insights and Impacts

Converting temperatures between Celsius and Fahrenheit is a common task in various fields, from cooking to scientific research. Understanding how to convert 48 Celsius to Fahrenheit is particularly crucial in regions where high temperatures play a significant role in environmental and human health. This article provides an in-depth exploration of the conversion process, the significance of 48 Celsius, and its global implications.
Understanding Temperature Scales
The Celsius scale, part of the International System of Units (SI), is widely used globally, especially in scientific contexts. It designates 0°C as the freezing point and 100°C as the boiling point of water under standard atmospheric pressure. In contrast, the Fahrenheit scale, primarily used in the United States, sets the freezing point of water at 32°F and the boiling point at 212°F. These differing reference points necessitate a formula to convert temperatures between the two scales accurately.
READ MORE:Convert 30 Degrees C to F: Comprehensive Temperature Guide
The Conversion Formula
To convert a temperature from Celsius to Fahrenheit, apply the following formula:
°F = (°C × 9/5) + 32
This formula multiplies the Celsius temperature by 9/5 (or 1.8) and then adds 32 to adjust for the offset in the Fahrenheit scale.
Applying the Formula: 48 Celsius to Fahrenheit
Let’s convert 48 Celsius to Fahrenheit using the formula:
- Multiply 48 by 9/5: 48 Ă— 9/5 = 86.4
- Add 32 to the result: 86.4 + 32 = 118.4
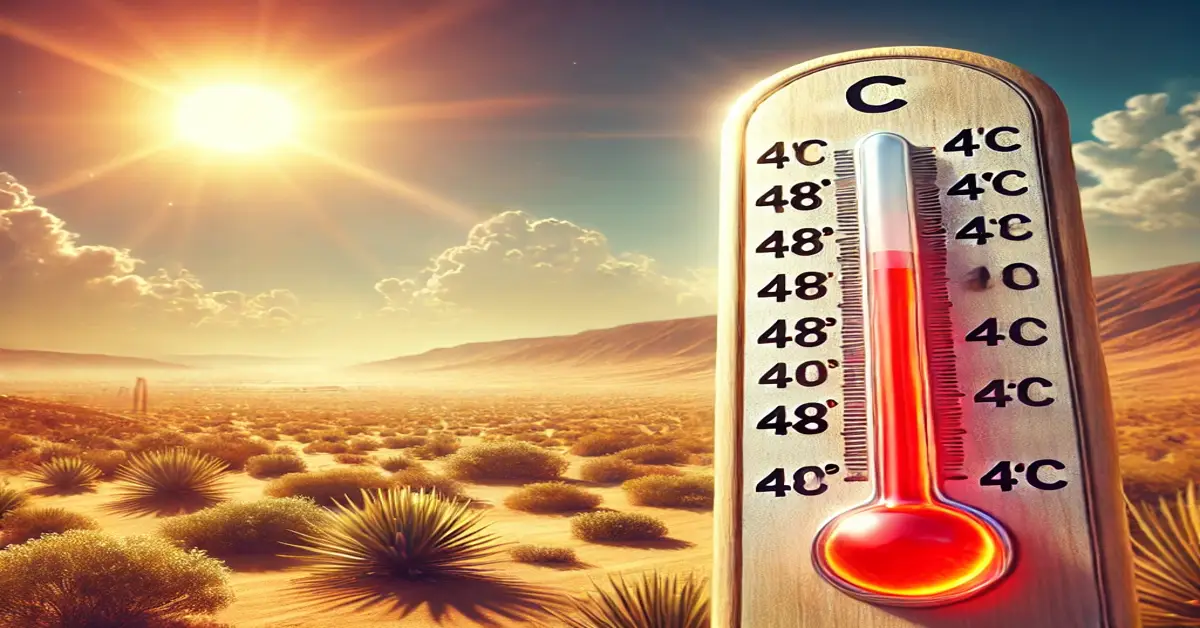
Therefore, 48 Celsius equals 118.4 Fahrenheit.
Significance of 48 Celsius
A temperature of 48 Celsius to Fahrenheit is extremely high and can have significant effects on both the environment and human health.
1. Environmental Impact
Such high temperatures can lead to heatwaves, causing droughts, wildfires, and other ecological disruptions. For instance, regions experiencing 48 Celsius may face challenges in agriculture due to soil moisture loss and increased evaporation rates. These effects can ripple through ecosystems, impacting flora, fauna, and human livelihoods.
2. Human Health
Exposure to temperatures as high as 48 Celsius can result in heat-related illnesses, including heat exhaustion and heat stroke. It’s crucial to stay hydrated, seek shade, and avoid strenuous activities during peak heat periods to mitigate health risks. Vulnerable populations, such as the elderly and young children, are particularly at risk.
READ MORE:40 Celsius to Fahrenheit: Learn to Convert A Complete Guide
Global Occurrences of 48 Celsius to Fahrenheit
While 48 Celsius to Fahrenheit is uncommon in many parts of the world, certain regions, such as parts of the Middle East, South Asia, and Australia, have recorded such extreme temperatures. These occurrences highlight the importance of understanding and preparing for extreme heat conditions.
1. The Middle East
Countries like Kuwait and Iraq frequently experience temperatures around 48 Celsius during the summer months. Infrastructure, energy consumption, and water resources in these regions are often strained under such conditions.
2. South Asia
India and Pakistan have recorded temperatures exceeding 48 Celsius in recent years. Such heatwaves have led to widespread health crises and agricultural losses.
3. Australia
Known for its harsh summers, parts of Australia regularly face temperatures nearing 48 Celsius, prompting discussions about climate adaptation strategies.
Historical Context and Future Trends
The frequency of temperatures reaching 48 Celsius has increased due to global warming. Historical data shows that extreme heat events are becoming more common, underscoring the need for robust climate action. Scientists predict that if current trends continue, more regions may experience such high temperatures, impacting millions of lives.
READ MORE:Convert 20°C to Fahrenheit: Formula, Applications, and More
Practical Applications of Temperature Conversion
Understanding how to convert 48 Celsius to Fahrenheit has practical implications in various fields:
1. Meteorology
Weather forecasts often include temperature conversions to cater to audiences using different scales. For instance, international travelers or expatriates benefit from understanding these conversions.
2. Medicine
In medical contexts, precise temperature conversions are essential, especially when dealing with fever thresholds or laboratory conditions.
3. Cooking
Many recipes require temperature adjustments based on the equipment’s calibration, which may use either Celsius or Fahrenheit.
READ MORE:23 Celsius to Fahrenheit: Easy Conversion Guide For You
Tips for Coping with 48 Celsius Temperatures
1. Stay Hydrated
Drink plenty of water to compensate for fluid loss due to sweating. Avoid sugary or caffeinated beverages.
2. Seek Shelter
Stay indoors during the hottest parts of the day. Use fans or air conditioning to cool down.
3. Wear Appropriate Clothing
Opt for lightweight, loose-fitting, and light-colored clothes to reflect sunlight and allow better air circulation.
4. Monitor Vulnerable Individuals
Keep an eye on the elderly, children, and those with pre-existing health conditions to ensure their safety.
5. Educate Yourself
Understanding how to convert 48 Celsius to Fahrenheit can help you interpret weather forecasts and take appropriate precautions.
Conclusion
Converting 48 Celsius to Fahrenheit yields 118.4 Fahrenheit, a temperature indicative of extreme heat with substantial environmental and health implications. Whether for practical applications, personal safety, or climate awareness, understanding 48 Celsius to Fahrenheit conversion is essential. The significance of 48 Celsius extends beyond mere numbers, emphasizing the need for preparedness and adaptation in a warming world.
FAQs
1. What is the formula to convert Celsius to Fahrenheit? The formula is °F = (°C × 9/5) + 32.
2. Why is it important to understand temperature conversions? Understanding temperature conversions is crucial for interpreting weather data, cooking instructions, and scientific information across different regions.
3. Is 48 Celsius a common temperature? While uncommon globally, 48 Celsius can occur in specific regions known for extreme heat, such as parts of the Middle East and South Asia.
4. What are the health risks associated with 48 Celsius temperatures? Exposure to 48 Celsius can lead to heat-related illnesses like heat exhaustion and heat stroke.
5. How can one stay safe in extreme heat conditions? To stay safe, remain hydrated, seek shade, wear lightweight clothing, and avoid strenuous activities during peak heat hours.
6. How do Celsius and Fahrenheit scales differ? The Celsius scale sets the freezing point of water at 0°C and boiling at 100°C, while the Fahrenheit scale sets freezing at 32°F and boiling at 212°F.
Education
12mm to Inches: Quick Conversion & Practical Guide

The metric system and the imperial system are the two most commonly used measurement systems worldwide. While millimeters (mm) are standard in scientific and engineering fields, inches (in) are commonly used in the United States and a few other countries. If you’ve ever needed to convert 12mm to inches, this guide will help you understand the process, provide useful conversion formulas, and explore real-world applications of this measurement.
How to Convert 12mm to Inches
The Conversion Formula
To convert millimeters to inches, you use the following formula:
Applying this to 12mm:
Thus, 12mm is approximately 0.472 inches.
Quick Millimeter to Inch Conversion Table
If you frequently work with millimeter measurements, here’s a quick reference table for similar conversions:
Millimeters (mm) | Inches (in) |
---|---|
10mm | 0.3937 |
12mm | 0.4724 |
15mm | 0.5906 |
20mm | 0.7874 |
25mm | 0.9842 |
30mm | 1.1811 |
Why Convert 12mm to Inches?
1. Industrial and Engineering Use
Industries like manufacturing, automotive, and construction often require conversions between metric and imperial systems. Many blueprints and product dimensions are provided in both mm and inches, making conversions crucial.
2. DIY and Home Improvement Projects
If you’re purchasing screws, nails, or bolts, you might find that the store lists measurements in inches rather than millimeters. Understanding 12mm to inches ensures you get the right size components.
3. Jewelry and Accessories
- Many jewelry measurements, such as beads, rings, and watch bands, use millimeters.
- If you’re shopping for a 12mm bracelet, knowing it’s about 0.472 inches wide helps when comparing sizes.
4. Medical and Optical Fields
Medical devices, such as lens sizes for eyeglasses, are often measured in millimeters. Understanding conversions helps professionals and patients make informed choices.
How to Convert Inches Back to Millimeters
If you need to convert inches back to millimeters, use this formula:
For example, converting 0.472 inches back to millimeters:
This confirms that 12mm is indeed 0.472 inches.
Tools for Easy Conversion
1. Online Conversion Calculators
Many websites offer free unit conversion tools where you can input millimeters and get the corresponding inches instantly.
2. Mobile Apps
Conversion apps like Unit Converter and Google’s built-in calculator allow quick conversions without manual calculations.
3. Rulers and Measuring Tape
Some rulers feature both metric (mm) and imperial (inches) scales, making conversions easy without any calculations.
Common Mistakes When Converting 12mm to Inches
1. Rounding Errors
- Some people round 0.472 inches to 0.5 inches, which can cause inaccuracies in precision-based fields like engineering.
2. Mixing Up Metric and Imperial Units
- If you’re working on a home project or assembling furniture, ensure you’re using the right measurement system to avoid errors.
3. Using the Wrong Conversion Factor
- Always use 1mm = 0.03937 inches rather than an incorrect approximation.
Conclusion
Converting 12mm to inches is simple using the conversion factor 1mm = 0.03937 inches. Whether you’re working on a DIY project, purchasing jewelry, or handling professional measurements, understanding this conversion helps avoid errors and ensures precision. Now that you know 12mm is approximately 0.472 inches, you can confidently make conversions in various applications.
FAQs About 12mm to Inches
1. How many inches is exactly 12mm?
12mm is approximately 0.472 inches.
2. Is 12mm the same as 1/2 inch?
No, 12mm is slightly less than 1/2 inch. One-half inch is equal to 12.7mm.
3. What objects are around 12mm in size?
- A standard marble is about 12mm in diameter.
- A small dice used in board games is typically around 12mm on each side.
- A thick marker tip might measure approximately 12mm.
4. Why is it important to know millimeter to inch conversions?
Conversions are necessary for fields like manufacturing, engineering, home improvement, jewelry, and medicine where measurements must be precise.
5. Can I use a standard ruler to measure 12mm?
Yes! A metric ruler will have millimeter markings, while an imperial ruler will show inches divided into 16ths or 32nds.
Education
Easy Sunflower Drawing: Step-by-Step Guide for Beginners

Sunflowers are a timeless and beautiful subject for artists of all levels. Their bright petals and intricate centers make them an exciting challenge to draw. Whether you are a beginner or an experienced artist, this step-by-step guide will help you create a stunning sunflower drawing while improving your sketching and shading skills.
Why Draw a Sunflower?
Sunflowers symbolize happiness, warmth, and positivity, making them a popular subject in art. Drawing sunflowers can help improve your observation skills, enhance your understanding of symmetry, and refine your shading techniques.
Essential Tools for Sunflower Drawing
Before you start, gather the necessary tools:
- Pencils: HB for sketching, 2B-6B for shading
- Erasers: Kneaded and precision erasers for highlights
- Paper: Medium to smooth texture for finer details
- Blending Tools: Cotton swabs, blending stumps, or tissue
- Reference Images: Photos or artwork for accuracy
Step-by-Step Guide to Drawing a Sunflower
Step 1: Sketch the Basic Shape
- Draw a circle for the center of the sunflower
- Lightly sketch a larger circle around it to define the petal area
- Use guidelines to divide the center evenly for better symmetry
Step 2: Add the Petals
- Sketch elongated, slightly curved petals around the center
- Vary petal sizes and angles for a natural look
- Overlap some petals to add depth and realism
Step 3: Draw the Center Details
- Add a smaller inner circle for the sunflower’s disk
- Use tiny dots and curved lines to create texture
- Shade the center gradually for a realistic effect
Step 4: Outline the Stem and Leaves
- Draw a slightly curved stem extending from the base
- Sketch broad, serrated leaves along the stem
- Add veins inside the leaves for more detail
Step 5: Add Shading and Final Details
- Shade the petals lightly, keeping the edges brighter
- Darken the base of each petal for depth
- Use blending tools for smooth shading
- Add final highlights to enhance the realistic effect
Tips for Improving Your Sunflower Drawing
- Study Real Sunflowers: Observing live or photo references improves accuracy.
- Use Layered Shading: Build up shading gradually for a more natural look.
- Experiment with Different Angles: Try drawing sunflowers from different perspectives.
- Practice Petal Overlaps: Overlapping petals add realism and depth.
Conclusion
Drawing a sunflower is a rewarding artistic exercise that enhances your skills in shading, texture, and composition. Follow this step-by-step guide to create a beautiful sunflower drawing, and don’t forget to practice different techniques to refine your art further!
Frequently Asked Questions (FAQs)
1. How do I make my sunflower drawing look realistic? Focus on shading, petal variations, and detailed texture in the center.
2. What pencil is best for shading sunflowers? Use a combination of HB, 2B, and 4B pencils for depth and contrast.
3. How can I draw a sunflower without a reference? Memorize its structure—round center, layered petals, and textured details.
Education
Wolf Drawing: Techniques for Realistic and Easy Sketches

Drawing a wolf can be a rewarding artistic challenge, whether you’re a beginner or an experienced artist. Wolves have a majestic, powerful appearance, making them a favorite subject for wildlife drawings. This guide will walk you through the essential steps, techniques, and tips to create a realistic wolf drawing. From sketching basic shapes to refining fur details and expressive eyes, you’ll learn how to bring your wolf artwork to life.
Tools and Materials for Wolf Drawing
Before starting your wolf drawing, gather the right materials. The choice of tools depends on your preferred drawing style, whether it’s pencil sketching, ink drawing, or digital art.
Recommended Tools:
- Pencils: HB, 2B, 4B, and 6B for shading and depth.
- Erasers: Kneaded erasers for soft corrections and precision erasers for fine details.
- Blending tools: Tortillons, tissue paper, or cotton swabs for smooth shading.
- Fine liners or ink pens: For a defined, stylized look.
- Digital drawing tablet: If working in Procreate, Photoshop, or another digital medium.
Step-by-Step Guide to Drawing a Wolf
Step 1: Sketch Basic Shapes
Start with simple shapes to define the wolf’s structure. Use:
- A large oval for the head.
- A slightly elongated oval for the snout.
- Triangle shapes for the ears.
- Basic circles for the body structure.
Step 2: Outline the Wolf’s Features
- Sketch light guidelines for facial symmetry.
- Define the placement of the eyes, nose, and mouth.
- Adjust the ears for accurate positioning.
Step 3: Refine the Face and Add Details
- Draw the almond-shaped eyes with an intense gaze.
- Add the nose with slight shading for a wet, reflective look.
- Sketch the mouth slightly open or closed for expression.
Step 4: Define the Fur Texture
- Use short, directional pencil strokes to simulate fur.
- Layer different shades to create depth and realism.
- Focus on fur flow, especially around the neck and face.
Step 5: Add Shading and Depth
- Identify a light source to guide your shading.
- Use a blending tool for smooth transitions.
- Darken shadows around the snout, ears, and fur creases for dimension.
Step 6: Final Touches
- Erase unnecessary guidelines.
- Deepen dark areas for contrast.
- Add highlights to the eyes and nose for a lifelike effect.
Tips for a Realistic Wolf Drawing
1. Study Wolf Anatomy
- Observe real-life wolf photos.
- Understand their skeletal and muscular structure.
- Pay attention to fur patterns and density.
2. Experiment with Different Poses
- A standing wolf shows strength and alertness.
- A howling wolf adds drama and emotion.
- A resting wolf captures calmness and serenity.
3. Use References
- Look at wildlife photography.
- Study other artists’ techniques.
- Practice sketching from different angles.
4. Digital vs. Traditional Drawing
- Digital tools offer easier corrections and layering.
- Pencil drawings provide texture and depth through shading.
- Experiment with both to find your style.
Conclusion
Drawing a wolf requires patience and practice, but with the right techniques, anyone can create stunning artwork. By mastering anatomy, fur texture, and shading, you can bring your wolf drawings to life. Grab your sketchpad, follow these steps, and start drawing today!
Frequently Asked Questions (FAQs)
- 1. How can I make my wolf drawing look more realistic?
Focus on accurate proportions, detailed fur texture, and expressive eyes.
- 2. What is the hardest part of drawing a wolf?
Capturing the fur texture and facial expression can be challenging but improves with practice.
- 3. Can beginners draw wolves easily?
Yes! Start with basic shapes, practice shading, and gradually refine details.
- 4. What’s the best way to learn wolf drawing?
Use reference images, follow step-by-step guides, and practice regularly.
- Entertainment2 months ago
Celebrity Movie Archives: Hidden Gems and Iconic Performance
- Entertainment2 months ago
Javrank: Guide to Adult Entertainment & Innovative Features
- Games2 months ago
Snokido: The Ultimate Online Gaming Hub for All Ages
- Technology4 weeks ago
InfluencersGineWuld: Revolutionizing Influencer Marketing for Brands
- LifeStyle2 months ago
CumonPrintedPics: Personalized Prints and Creative Platform
- Business2 months ago
Fintechzoom.com dax40 : Insights & Trends and Updates
- Technology4 weeks ago
BeTechIT.com Contacts: For 24/7 Effortless Tech Solutions
- Food & Drinks4 weeks ago
Çeciir: A Hearty Turkish Chickpea Stew with Rich Flavors