Connect with us

Education

Convert 39 Celsius to Fahrenheit: Comprehensive Guide

Published

on

39 Celsius to Fahrenheit

Understanding temperature conversions, especially for “39 Celsius to Fahrenheit,” is essential for navigating various aspects of daily life, from interpreting weather forecasts to scientific applications. This comprehensive article explores the origins of temperature scales, their practical uses, and a step-by-step guide to converting 39 degrees Celsius to Fahrenheit accurately. Whether you’re cooking, traveling, or studying science, mastering this fundamental skill is invaluable.

The Historical Development of Temperature Scales

The Celsius and Fahrenheit scales have unique histories, each shaped by the scientific endeavors of their creators.

Celsius Scale

The Celsius scale was developed by Swedish astronomer Anders Celsius in 1742. Originally, he defined 0°C as the boiling point and 100°C as the freezing point of water. Later, the scale was reversed by Carolus Linnaeus for better practicality. Today, the Celsius scale is widely adopted globally and is the standard in most scientific disciplines and metric-using countries.

Fahrenheit Scale

Daniel Gabriel Fahrenheit introduced the Fahrenheit scale in 1724. His scale set 0°F as the freezing point of a saltwater mixture, 32°F as the freezing point of water, and 212°F as the boiling point of water. Although predominantly used in the United States and a few other nations, it remains significant in industries like meteorology and medicine.

Why Learn Temperature Conversion?

Accurate temperature conversion is critical in several fields and everyday scenarios:

  1. Weather Forecasting: Travelers moving between regions that use different scales need to understand the conversion.
  2. Culinary Practices: Recipes often specify oven temperatures in either Celsius or Fahrenheit.
  3. Medical Applications: Human body temperatures are measured differently based on regional practices.
  4. Scientific Research: Global collaboration often requires proficiency in converting temperature readings.

The Formula for Conversion

Converting Celsius to Fahrenheit is straightforward using this formula:

°F = (°C × 9/5) + 32

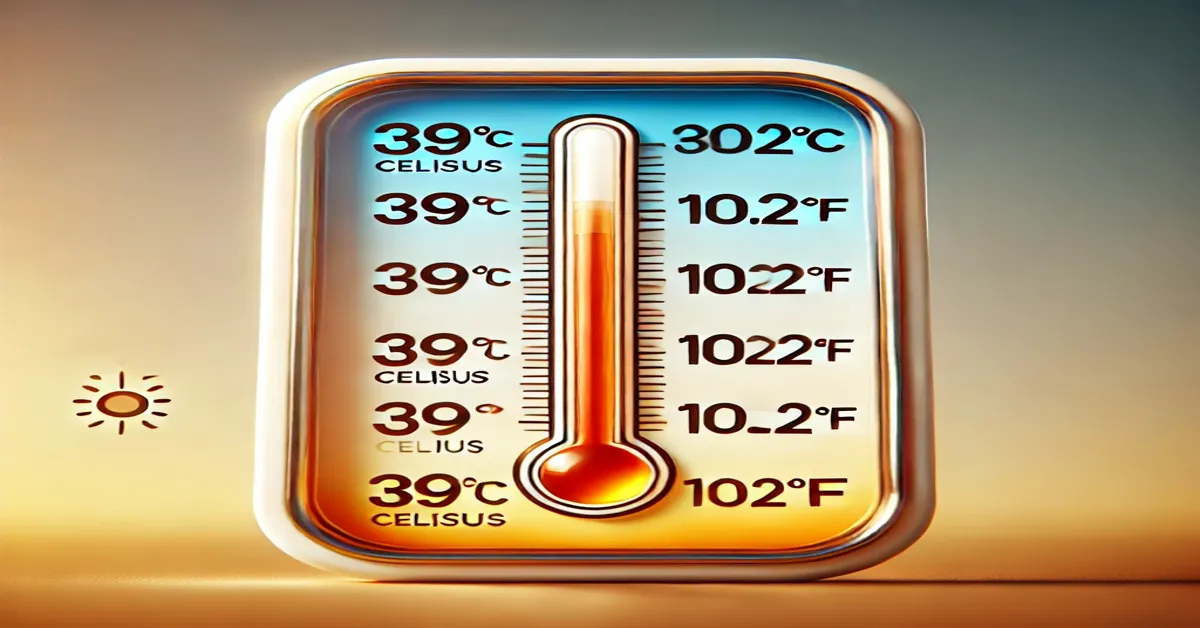
This formula accounts for the difference in scale increments and the offset in freezing points. Let’s apply it to 39 Celsius to Fahrenheit:

  1. Multiply 39 by 9/5: 39 × 9/5 = 70.2
  2. Add 32: 70.2 + 32 = 102.2

Therefore, 39°C equals 102.2°F. (39 degrees Celsius to Fahrenheit)

Practical Applications of Converting 39 Celsius to Fahrenheit

Weather Interpretations

If a weather report in Celsius states 39°C, understanding that it equals 102.2°F helps grasp the temperature’s intensity. Such knowledge is crucial for planning activities in extreme weather.

Medical Scenarios

In medicine, a body temperature of 39°C (102.2°F) is classified as a high fever. Prompt medical intervention is advised when encountering such readings.

Industrial Uses

In industrial processes like chemical manufacturing, precise temperature measurements are vital. Understanding conversions ensures global compliance and safety standards.

Tools and Resources for Conversion

While manual calculations are valuable, modern tools simplify conversions:

  1. Online Calculators: Websites offer instantaneous conversions.
  2. Mobile Apps: Handy for travelers and professionals.
  3. Conversion Charts: A quick reference for commonly used values.

Simplifying the Conversion Process

For quick estimations, a rule of thumb is doubling the Celsius value and adding 30. While this method is approximate, it’s helpful for non-critical scenarios.

Example: Doubling 39 (78) and adding 30 gives 108°F, slightly overestimating the accurate 102.2°F but still close.

Real-Life Examples

Cooking and Baking

When a recipe specifies an oven temperature of 39°C, converting it to Fahrenheit ensures precision in baking or roasting.

Academic Settings

Students studying physics or chemistry often encounter the need to convert temperatures for experiments or assignments. Knowing the accurate conversion of 39 Celsius to Fahrenheit simplifies such tasks.

Travel and Relocation

Travelers from Celsius-using regions visiting Fahrenheit-using areas benefit from understanding conversions to interpret local weather and adjust their clothing or plans accordingly.

Common Conversion Reference Points

Knowing a few standard conversion points aids quick calculations:

  • 0°C = 32°F (Freezing point of water)
  • 20°C = 68°F (Room temperature)
  • 39°C = 102.2°F
  • 100°C = 212°F (Boiling point of water)

Benefits of Accurate Conversions

Precision in temperature conversion contributes to:

  1. Safety: Prevents errors in industrial and culinary processes.
  2. Quality Control: Ensures consistent outcomes in manufacturing.
  3. Scientific Accuracy: Maintains the integrity of experimental data.

Enhancing Skills in Temperature Conversion

Practicing with different values improves proficiency. Try converting these examples:

  1. Convert 25°C to Fahrenheit.
  2. Convert 50°C to Fahrenheit.

By applying the formula, these exercises reinforce understanding.

Conclusion

Mastering the conversion of 39 Celsius to Fahrenheit is more than an academic exercise. It’s a practical skill applicable to everyday life and professional settings. By understanding the historical context, learning the formula, and utilizing modern tools, one can confidently navigate between these temperature scales.

FAQs

  1. What is the formula for converting Celsius to Fahrenheit? The formula is °F = (°C × 9/5) + 32.
  2. Why is temperature conversion important? It ensures accuracy in weather forecasting, cooking, medicine, and scientific research.
  3. What is 39°C in Fahrenheit? 39°C equals 102.2°F.
  4. Are there tools for quick conversions? Yes, online calculators, mobile apps, and conversion charts are readily available.
  5. Is there a quick way to estimate Celsius to Fahrenheit? Doubling the Celsius value and adding 30 provides an approximate Fahrenheit value.
  6. How is 39°C significant in medical contexts? A body temperature of 39°C (102.2°F) is a high fever, often requiring medical attention.

Continue Reading
Click to comment

Leave a Reply

Your email address will not be published. Required fields are marked *

Education

Cute Easy Drawings for Beginners: Fun & Creative Ideas

Published

on

Cute Easy Drawings

Drawing doesn’t have to be intimidating. Whether you’re a child doodling for fun or an adult looking for a calming hobby, cute easy drawings offer a perfect starting point. These fun, simple sketches don’t require professional skills—they just need a dash of creativity and a pinch of inspiration.

In this guide, we’ll explore beginner-friendly drawing ideas, essential tools, easy tutorials, and tips to level up your artistic journey, even if you’re just starting.

Why Cute Easy Drawings Are So Popular

Cute easy drawings appeal to people of all ages for a reason:

  • Stress-relief: Drawing cute characters like kittens, bunnies, or smiling suns is therapeutic.
  • Beginner-friendly: You don’t need technical knowledge—just basic shapes and imagination.
  • Instagrammable: Simple doodles often go viral on social media platforms.
  • Fun & approachable: Great for kids, art therapy, or just passing time creatively.

Plus, the rise of aesthetic journals and bullet journaling has made easy cute doodles a must-try trend.

Tools You’ll Need to Get Started

Getting into drawing doesn’t require expensive materials. Here’s what you need:

  • Pencils (HB, 2B): For sketching soft outlines
  • Eraser: Preferably a kneaded eraser to avoid smudging
  • Sketchbook or plain paper
  • Fine liners or markers: For inking outlines
  • Color pencils or markers: To bring your drawings to life

Optional:

  • Drawing apps like Procreate or Sketchbook if you’re going digital

Top 10 Cute Easy Drawings You Can Try Today

Here are some adorable and simple ideas for cute easy drawings to get your sketching journey started:

  1. Baby animals (puppies, kittens, bunnies)
  2. Chibi characters (tiny anime-style people)
  3. Food with faces (kawaii sushi, donuts, fruits)
  4. Cartoon clouds, stars, and moons
  5. Tiny dinosaurs or dragons
  6. Cute seasonal items (pumpkin with a face, snowman, ice cream)
  7. Sleeping cats and dogs
  8. Penguins in scarves
  9. Magical creatures (unicorns, fairies)
  10. Cactus with smiley faces

These ideas use basic shapes like circles and ovals, so they’re great for all skill levels.

Step-by-Step Drawing Tutorials

Let’s go through a few easy tutorials for popular cute doodles.

Easy Cat Drawing

  1. Draw a round head.
  2. Add two triangle ears.
  3. Sketch two circles for eyes.
  4. Add a tiny “3” shape for the mouth.
  5. Finish with whiskers and a little tail.

Cute Donut with a Face

  1. Draw a large circle with a smaller one inside.
  2. Create wavy frosting on top.
  3. Add small dots for sprinkles.
  4. Draw two big oval eyes and a tiny “u” for the mouth.
  5. Use soft colors to shade.

Kawaii Rainbow

  1. Draw three to four arcs to form a rainbow.
  2. Add a fluffy cloud on each end.
  3. Give the clouds little smiling faces.
  4. Color the rainbow with pastel tones.

Tips to Improve Your Drawing Skills

You don’t need to be born an artist to get better. Here’s how:

  • Draw daily, even if it’s just 5 minutes
  • Use references from Pinterest or YouTube tutorials
  • Break objects into simple shapes (circle, square, triangle)
  • Try tracing first to understand proportion
  • Join online drawing challenges (like Inktober or Doodlewash)

Most importantly: don’t aim for perfection—aim for progress.

Real-Life Examples & Inspiration

Real people are turning cute easy drawings into passion projects and businesses:

  • Instagram artists like @doodlemeeple post viral simple art daily.
  • Teachers use simple sketches for student engagement.
  • Parents doodle with kids for bonding and motor skill development.
  • Freelancers sell cute illustrations on Etsy as stickers, prints, and coloring pages.

You can even use your sketches in bullet journals, greeting cards, or as digital art for social media.

Conclusion

Cute easy drawings are more than just doodles—they’re a doorway into creativity, mindfulness, and personal expression. Whether you’re an aspiring artist or just doodling for fun, these drawings offer a relaxing way to explore your imagination.

So grab your sketchbook, start with a smiling donut or sleepy kitten, and let your creative journey begin. Remember, it’s not about perfection—it’s about having fun.

FAQs

Q1: What are the easiest things to draw for beginners?
A: Start with basic shapes like hearts, stars, clouds, and cartoon animals like cats, bunnies, or pandas.

Q2: How can I make my cute easy drawings?
A: Use round shapes, big eyes, pastel colors, and simple smiling faces. The “kawaii” style is a great reference.

Q3: Are there apps for learning cute drawings?
A: Yes! Try Procreate (iPad), Sketchbook (Android), or How to Draw Cute Things app for guided tutorials.

Q4: Can I turn my cute drawings into a business?
A: Absolutely. Many artists sell their art as digital prints, stickers, or even NFTs.

Q5: How often should I practice to get better?
A: Even 10 minutes daily can help build consistency and improve your sketching skills over time.

Call-To-Action

Ready to start your drawing adventure?
Share your favorite sketch in the comments or tag us on social media using #CuteEasyDrawings!
Want more art tips and tutorials? Subscribe to our newsletter for weekly creative inspiration.

Continue Reading

Education

8mm to Inches Conversion Guide: Quick & Accurate Tips

Published

on

8mm to Inches

Whether you’re working on a DIY project, buying hardware, dealing with product specs, or sewing a garment, precise measurements matter. Many countries use the metric system (millimeters, centimeters, meters), while the U.S. and a few others rely on the imperial system (inches, feet). This often creates confusion, especially with small measurements like 8mm. Understanding how to convert 8mm to inches bridges this gap and ensures accuracy.

The Quick Answer: What is 8mm to Inches?

8 millimeters = 0.31496 inches (rounded to 5 decimal places)

To make it simpler: 8mm ≈ 0.315 inches

This tiny number can make a big difference, especially in technical or professional settings. Let’s dive deeper into the math behind this conversion.

Understanding the Metric vs. Imperial Systems

The metric system is decimal-based and used by most of the world. It’s precise, consistent, and based on powers of 10. The imperial system, on the other hand, is rooted in older measurements and is still commonly used in the U.S.

SystemUnitEquivalent
MetricMillimeter (mm)1/1000 of a meter
ImperialInch1/12 of a foot

When dealing with small measurements like 8 millimeters, the differences between these systems become more noticeable.

Conversion Formula: 8mm to Inches Explained

To convert 8mm to inches, use this simple formula:

inches = millimeters ÷ 25.4

Example:

CopyEdit8 ÷ 25.4 = 0.31496 inches

So, 8mm is equal to 0.31496 inches.

Here are a few other useful conversions for context:

  • 1 mm = 0.03937 inches
  • 5 mm = 0.19685 inches
  • 10 mm = 0.39370 inches

8mm to Inches Chart for Quick Reference

Millimeters (mm)Inches (in)
1 mm0.03937 in
5 mm0.19685 in
8 mm0.31496 in
10 mm0.39370 in
12 mm0.47244 in
15 mm0.59055 in

Having a chart like this saves time when you’re converting on the go.

Common Uses of 8mm in Daily Life

You’d be surprised how often 8mm shows up in everyday situations:

  • Jewelry sizes: Chains, rings, and earrings often list sizes in mm.
  • Camera lenses: 8mm lenses are popular in vintage or action cameras.
  • Bolts and nuts: Many metric fasteners are 8mm in diameter.
  • Pens and tools: Pen barrel diameters and drill bits often measure 8mm.
  • Home improvement: Tiles, spacers, or wood panels may come in 8mm thickness.

8mm in Inches: Real-Life Object Comparisons

To give you a better feel for what 8mm looks like, here are some relatable comparisons:

  • Standard pencil lead = approx. 7–8mm in diameter
  • A stack of 8 sheets of paper = close to 8mm thick
  • Two stacked nickels = around 7.9mm thick
  • A woman’s wedding band = often around 6–8mm wide

These visuals help make the abstract number more tangible.

Digital Tools for Conversion

While it’s great to understand the manual formula, you can also use:

Conversion Tools:

  • Google Search: Just type “8mm to inches” and Google gives the answer instantly.
  • Online Calculators: Tools like RapidTables or UnitConverters.net.
  • Mobile Apps: Apps like “Unit Converter” or “ConvertPad” are handy on the go.

These tools are helpful when dealing with odd values like 8.4mm, 8.75mm, or precision measurements in engineering or crafting.

Why Precision Matters in Measurement

Accurate conversion isn’t just about numbers—it’s about avoiding costly errors.

Here’s how incorrect conversions can affect real-life scenarios:

  • Construction: An error of even 1mm can throw off the alignment of tiles or panels.
  • Mechanical engineering: An 8mm bolt won’t fit into a 5/16″ (7.9375mm) hole.
  • Fashion design: Small sizing mistakes can alter how a garment fits.
  • 3D printing: Precision down to the millimeter ensures your model prints correctly.

Bottom line: Don’t round too much unless it’s for casual purposes.

Conclusion: Measure Smart, Stay Accurate

Converting 8mm to inches may seem minor, but it plays a significant role in accurate measurements across many industries. Knowing that 8mm equals approximately 0.315 inches helps you bridge the gap between the metric and imperial systems confidently.

Whether you’re building, crafting, or shopping online, always double-check your measurements!

FAQs: 8mm to Inches Conversion

Q1: Is 8mm less than half an inch?

Yes, 8mm is about 0.315 inches, which is less than 0.5 inches (1/2 inch).

Q2: How do I convert 8mm to inches without a calculator?

Use the rule of thumb:
1 mm ≈ 0.04 inches
So, 8mm ≈ 8 x 0.04 = 0.32 inches

Q3: Why is the conversion factor 25.4?

Because 1 inch is defined as exactly 25.4 millimeters by international agreement since 1959.

Q4: What’s the difference between 8mm and 5/16 inch?

  • 8mm = 0.315 inches
  • 5/16 inch = 0.3125 inches
    They are very close but not identical. Use the right one for exact fits.

Q5: Can I use 8mm and 5/16 inch interchangeably?

In casual use, maybe. But in precision work like carpentry, mechanics, or engineering, use the correct size.

Call-to-Action

Found this guide helpful? Share it with your friends, bookmark it for future use, or leave a comment below!
Want more quick measurement guides? Subscribe to our newsletter for tips, charts, and tools sent to your inbox weekly!

Continue Reading

Education

Wolf Drawing: Techniques for Realistic and Easy Sketches

Published

on

Wolf Drawing

Drawing a wolf can be a rewarding artistic challenge, whether you’re a beginner or an experienced artist. Wolves have a majestic, powerful appearance, making them a favorite subject for wildlife drawings. This guide will walk you through the essential steps, techniques, and tips to create a realistic wolf drawing. From sketching basic shapes to refining fur details and expressive eyes, you’ll learn how to bring your wolf artwork to life.

Tools and Materials for Wolf Drawing

Before starting your wolf drawing, gather the right materials. The choice of tools depends on your preferred drawing style, whether it’s pencil sketching, ink drawing, or digital art.

Recommended Tools:

  • Pencils: HB, 2B, 4B, and 6B for shading and depth.
  • Erasers: Kneaded erasers for soft corrections and precision erasers for fine details.
  • Blending tools: Tortillons, tissue paper, or cotton swabs for smooth shading.
  • Fine liners or ink pens: For a defined, stylized look.
  • Digital drawing tablet: If working in Procreate, Photoshop, or another digital medium.

Step-by-Step Guide to Drawing a Wolf

Step 1: Sketch Basic Shapes

Start with simple shapes to define the wolf’s structure. Use:

  • A large oval for the head.
  • A slightly elongated oval for the snout.
  • Triangle shapes for the ears.
  • Basic circles for the body structure.

Step 2: Outline the Wolf’s Features

  • Sketch light guidelines for facial symmetry.
  • Define the placement of the eyes, nose, and mouth.
  • Adjust the ears for accurate positioning.

Step 3: Refine the Face and Add Details

  • Draw the almond-shaped eyes with an intense gaze.
  • Add the nose with slight shading for a wet, reflective look.
  • Sketch the mouth slightly open or closed for expression.

Step 4: Define the Fur Texture

  • Use short, directional pencil strokes to simulate fur.
  • Layer different shades to create depth and realism.
  • Focus on fur flow, especially around the neck and face.

Step 5: Add Shading and Depth

  • Identify a light source to guide your shading.
  • Use a blending tool for smooth transitions.
  • Darken shadows around the snout, ears, and fur creases for dimension.

Step 6: Final Touches

  • Erase unnecessary guidelines.
  • Deepen dark areas for contrast.
  • Add highlights to the eyes and nose for a lifelike effect.

Tips for a Realistic Wolf Drawing

1. Study Wolf Anatomy

  • Observe real-life wolf photos.
  • Understand their skeletal and muscular structure.
  • Pay attention to fur patterns and density.

2. Experiment with Different Poses

  • A standing wolf shows strength and alertness.
  • A howling wolf adds drama and emotion.
  • A resting wolf captures calmness and serenity.

3. Use References

  • Look at wildlife photography.
  • Study other artists’ techniques.
  • Practice sketching from different angles.

4. Digital vs. Traditional Drawing

  • Digital tools offer easier corrections and layering.
  • Pencil drawings provide texture and depth through shading.
  • Experiment with both to find your style.

Conclusion

Drawing a wolf requires patience and practice, but with the right techniques, anyone can create stunning artwork. By mastering anatomy, fur texture, and shading, you can bring your wolf drawings to life. Grab your sketchpad, follow these steps, and start drawing today!

Frequently Asked Questions (FAQs)

  • 1. How can I make my wolf drawing look more realistic?

Focus on accurate proportions, detailed fur texture, and expressive eyes.

  • 2. What is the hardest part of drawing a wolf?

Capturing the fur texture and facial expression can be challenging but improves with practice.

  • 3. Can beginners draw wolves easily?

Yes! Start with basic shapes, practice shading, and gradually refine details.

  • 4. What’s the best way to learn wolf drawing?

Use reference images, follow step-by-step guides, and practice regularly.

Continue Reading

Trending