Connect with us

Education

Convert 20°C to Fahrenheit: Formula, Applications, and More

Published

on

20°C to F

Temperature is a critical aspect of our daily lives, influencing everything from the weather forecasts we rely on to the cooking recipes we follow. In an increasingly globalized world, where different regions use varying temperature scales, understanding the conversion between Celsius and Fahrenheit becomes essential. For instance, when converting 20°C to F, it is important to understand how each scale works and how to accurately make this conversion. In this article, we will explore the Celsius and Fahrenheit temperature scales, the formula for converting 20°C to F, practical applications, and challenges faced when converting temperatures.

The Basics of Temperature Scales: Celsius and Fahrenheit

Before delving into the specifics of converting 20°C to F, it is essential to understand the origins and differences between the Celsius and Fahrenheit temperature scales. Both scales measure temperature, but they do so differently.

Celsius (°C)

The Celsius scale, also known as the centigrade scale, was introduced by Swedish astronomer Anders Celsius in 1742. This scale is based on the properties of water, with 0°C as the freezing point and 100°C as the boiling point of water under standard atmospheric conditions (1 atmosphere of pressure). Celsius is widely used across the globe and is the standard for scientific measurement in most countries. Its simplicity and alignment with the metric system make it an ideal choice for scientific experiments and global use.

Fahrenheit (°F)

The Fahrenheit scale, developed by German physicist Daniel Gabriel Fahrenheit in 1724, is primarily used in the United States and a few other countries. Fahrenheit’s scale is based on three fixed points: the freezing point of water is 32°F, the boiling point of water is 212°F, and the temperature of a brine solution (a mixture of water and salt) is 0°F. The Fahrenheit scale divides the space between the freezing and boiling points of water into 180 equal parts, while the Celsius scale divides this interval into 100 parts. As a result, each degree Fahrenheit represents a smaller change in temperature than a degree Celsius.

Why Understanding 20°C to F Matters

The conversion between 20°C to F is a common example of how both systems can be used to communicate temperature across different countries. Whether you are traveling, reading weather forecasts, or cooking a recipe from a different country, knowing how to convert between Celsius and Fahrenheit is essential for accurate comprehension. For instance, understanding that 20°C is equivalent to 68°F can help travelers in Fahrenheit-using countries better interpret weather conditions. In cooking, if a recipe calls for an oven temperature in Fahrenheit, knowing the conversion allows you to follow the recipe correctly.

The Formula for Converting 20°C to Fahrenheit (20°C to F)

To convert 20°C to F, there is a simple mathematical formula that involves multiplying the Celsius temperature by 9/5 and then adding 32. This formula accounts for the difference in zero points and the scale of the two systems.

Formula for Conversion

Fahrenheit=(Celsius×95)+32\text{Fahrenheit} = (\text{Celsius} \times \frac{9}{5}) + 32Fahrenheit=(Celsius×59​)+32

Let’s break this formula down:

  1. Multiply the Celsius temperature by 9/5 (or 1.8).
  2. Add 32 to the result.

Now, let’s apply this formula to convert 20°C to F:Fahrenheit=(20×95)+32\text{Fahrenheit} = (20 \times \frac{9}{5}) + 32Fahrenheit=(20×59​)+32

First, calculate the multiplication:20×95=3620 \times \frac{9}{5} = 3620×59​=36

Now, add 32 to the result:36+32=68°F36 + 32 = 68°F36+32=68°F

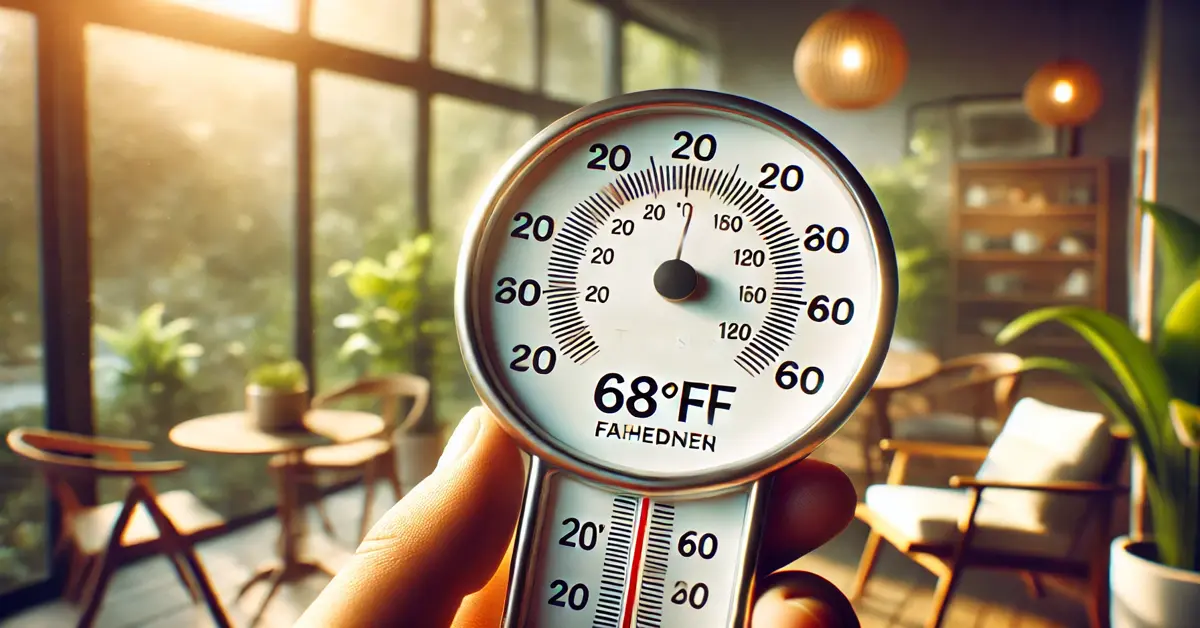
Thus, 20°C equals 68°F. This conversion helps you understand that a temperature of 20°C is considered a mild, comfortable temperature in many regions, similar to a pleasant spring day.

Practical Applications of Converting 20°C to F

The process of converting 20°C to F has several real-world applications across different fields, such as weather forecasting, cooking, scientific research, and healthcare. Let’s explore these applications further:

Weather Forecasting

In meteorology, accurate temperature conversions are essential for reporting weather conditions across different regions. For example, in countries using Fahrenheit (like the United States), weather reports might indicate temperatures like 68°F. However, in many other parts of the world, the same temperature might be reported as 20°C. Understanding the conversion between Celsius and Fahrenheit ensures that travelers, scientists, and locals can interpret weather conditions properly.

For example, a forecast indicating 20°C means a mild temperature of about 68°F in places like the U.S. or Caribbean. Whether you are planning your wardrobe or scheduling outdoor activities, understanding this conversion helps you prepare for weather conditions with greater precision.

Cooking and Baking

Temperature plays a significant role in cooking, especially when following recipes from different countries. In many parts of the world, oven temperatures are given in Celsius, but in the United States, Fahrenheit is often used. If you come across a recipe from Europe that calls for a baking temperature of 200°C, you would need to convert it to Fahrenheit to ensure accurate cooking temperatures.

For example, if you were following a recipe that called for an oven temperature of 20°C, it would be equivalent to about 68°F. While 20°C is far below typical baking temperatures, it might be relevant for preparing certain doughs or storing ingredients that need to be kept at a cool room temperature.

Scientific Research

In scientific research, especially in fields such as chemistry and biology, Celsius is the standard temperature scale used in most countries and research laboratories. However, there may still be times when data needs to be converted to Fahrenheit, particularly when sharing results with colleagues or institutions based in the United States.

Converting 20°C to F might not be critical in scientific experiments involving extremely high or low temperatures, but for day-to-day research involving standard laboratory conditions, such conversions are crucial for data accuracy and communication. For instance, laboratory conditions involving a room temperature of 20°C (68°F) might be necessary for certain biological processes.

Healthcare

Healthcare professionals often measure body temperature in both Celsius and Fahrenheit depending on the region. In the United States, for example, normal body temperature is commonly measured as 98.6°F, while in many other countries, it is measured as 37°C.

In some cases, temperature conversions are needed in healthcare when interpreting readings from medical instruments. Knowing that 20°C equals 68°F could be helpful when discussing body temperature readings or interpreting certain health conditions, especially when collaborating with medical professionals from different countries.

Understanding Common Reference Points Between Celsius and Fahrenheit

To help further with converting 20°C to F and understanding temperature differences, it’s helpful to be aware of common reference points between the two scales:

  • Freezing Point of Water: 0°C = 32°F
  • Boiling Point of Water: 100°C = 212°F
  • Room Temperature: Approximately 20–22°C = 68–72°F
  • Body Temperature: 37°C = 98.6°F

These reference points help make temperature conversions more intuitive. For example, knowing that 20°C is close to room temperature (68°F) can help you understand how moderate or mild this temperature is in everyday settings.

Challenges in Temperature Conversion

While converting temperatures is often straightforward, several challenges can arise during the process:

Rounding and Precision

In scientific and medical contexts, precision is crucial. For instance, a slight rounding error can cause inaccurate results. In casual settings, rounding to the nearest whole number (like 20°C to F = 68°F) is generally sufficient. However, for more precise measurements, it’s important to avoid rounding errors.

Negative Temperatures

Converting temperatures below zero presents unique challenges, as Fahrenheit and Celsius use different zero points. For instance, while 0°C represents the freezing point of water, 0°F represents a much colder temperature (about -17.78°C). Converting temperatures like -10°C to F involves careful attention to the formula to avoid inaccuracies.

Regional Differences in Temperature Preferences

Cultural differences can make it difficult for people to adapt to different temperature scales. People in countries that use Fahrenheit (like the U.S.) may have trouble interpreting Celsius temperatures and vice versa. Adapting to new scales can take time, especially when living or traveling between countries that use different systems.

The Future of Temperature Scales

Although Celsius is the global standard in scientific contexts and many countries have adopted it for everyday use, Fahrenheit remains popular in the United States. There are ongoing discussions about transitioning entirely to Celsius in countries like the U.S., given its simplicity and alignment with the metric system. However, the cultural significance of Fahrenheit means that its use is likely to persist for some time, especially in countries that have deeply entrenched habits around the Fahrenheit scale.

Conclusion

Converting 20°C to F may seem like a simple calculation, but it’s an important skill to have, especially in our interconnected world where temperature data is shared globally. By understanding the differences between Celsius and Fahrenheit and knowing how to convert between the two, you can ensure accurate interpretation of temperature information, whether in daily life, cooking, healthcare, or scientific research.

MORE FROM THE SITE

FAQs

  1. What is 20°C in Fahrenheit? 20°C is equal to 68°F.
  2. How do you convert Celsius to Fahrenheit? Use the formula: Fahrenheit = (Celsius × 9/5) + 32.
  3. Which countries use Fahrenheit? The United States, its territories, and a few Caribbean nations primarily use Fahrenheit.
  4. Why is it important to know how to convert 20°C to Fahrenheit? Conversions are important for weather interpretation, cooking, and scientific research, particularly when dealing with different temperature systems.
  5. What is the equivalent of 20°C in Fahrenheit when cooking? 20°C is 68°F, a typical room temperature for most recipes.
  6. Are Celsius and Fahrenheit interchangeable in scientific contexts? While both scales are used, Celsius is more common in scientific research due to its alignment with the metric system.
Continue Reading
Click to comment

Leave a Reply

Your email address will not be published. Required fields are marked *

Education

Cute Easy Drawings for Beginners: Fun & Creative Ideas

Published

on

Cute Easy Drawings

Drawing doesn’t have to be intimidating. Whether you’re a child doodling for fun or an adult looking for a calming hobby, cute easy drawings offer a perfect starting point. These fun, simple sketches don’t require professional skills—they just need a dash of creativity and a pinch of inspiration.

In this guide, we’ll explore beginner-friendly drawing ideas, essential tools, easy tutorials, and tips to level up your artistic journey, even if you’re just starting.

Why Cute Easy Drawings Are So Popular

Cute easy drawings appeal to people of all ages for a reason:

  • Stress-relief: Drawing cute characters like kittens, bunnies, or smiling suns is therapeutic.
  • Beginner-friendly: You don’t need technical knowledge—just basic shapes and imagination.
  • Instagrammable: Simple doodles often go viral on social media platforms.
  • Fun & approachable: Great for kids, art therapy, or just passing time creatively.

Plus, the rise of aesthetic journals and bullet journaling has made easy cute doodles a must-try trend.

Tools You’ll Need to Get Started

Getting into drawing doesn’t require expensive materials. Here’s what you need:

  • Pencils (HB, 2B): For sketching soft outlines
  • Eraser: Preferably a kneaded eraser to avoid smudging
  • Sketchbook or plain paper
  • Fine liners or markers: For inking outlines
  • Color pencils or markers: To bring your drawings to life

Optional:

  • Drawing apps like Procreate or Sketchbook if you’re going digital

Top 10 Cute Easy Drawings You Can Try Today

Here are some adorable and simple ideas for cute easy drawings to get your sketching journey started:

  1. Baby animals (puppies, kittens, bunnies)
  2. Chibi characters (tiny anime-style people)
  3. Food with faces (kawaii sushi, donuts, fruits)
  4. Cartoon clouds, stars, and moons
  5. Tiny dinosaurs or dragons
  6. Cute seasonal items (pumpkin with a face, snowman, ice cream)
  7. Sleeping cats and dogs
  8. Penguins in scarves
  9. Magical creatures (unicorns, fairies)
  10. Cactus with smiley faces

These ideas use basic shapes like circles and ovals, so they’re great for all skill levels.

Step-by-Step Drawing Tutorials

Let’s go through a few easy tutorials for popular cute doodles.

Easy Cat Drawing

  1. Draw a round head.
  2. Add two triangle ears.
  3. Sketch two circles for eyes.
  4. Add a tiny “3” shape for the mouth.
  5. Finish with whiskers and a little tail.

Cute Donut with a Face

  1. Draw a large circle with a smaller one inside.
  2. Create wavy frosting on top.
  3. Add small dots for sprinkles.
  4. Draw two big oval eyes and a tiny “u” for the mouth.
  5. Use soft colors to shade.

Kawaii Rainbow

  1. Draw three to four arcs to form a rainbow.
  2. Add a fluffy cloud on each end.
  3. Give the clouds little smiling faces.
  4. Color the rainbow with pastel tones.

Tips to Improve Your Drawing Skills

You don’t need to be born an artist to get better. Here’s how:

  • Draw daily, even if it’s just 5 minutes
  • Use references from Pinterest or YouTube tutorials
  • Break objects into simple shapes (circle, square, triangle)
  • Try tracing first to understand proportion
  • Join online drawing challenges (like Inktober or Doodlewash)

Most importantly: don’t aim for perfection—aim for progress.

Real-Life Examples & Inspiration

Real people are turning cute easy drawings into passion projects and businesses:

  • Instagram artists like @doodlemeeple post viral simple art daily.
  • Teachers use simple sketches for student engagement.
  • Parents doodle with kids for bonding and motor skill development.
  • Freelancers sell cute illustrations on Etsy as stickers, prints, and coloring pages.

You can even use your sketches in bullet journals, greeting cards, or as digital art for social media.

Conclusion

Cute easy drawings are more than just doodles—they’re a doorway into creativity, mindfulness, and personal expression. Whether you’re an aspiring artist or just doodling for fun, these drawings offer a relaxing way to explore your imagination.

So grab your sketchbook, start with a smiling donut or sleepy kitten, and let your creative journey begin. Remember, it’s not about perfection—it’s about having fun.

FAQs

Q1: What are the easiest things to draw for beginners?
A: Start with basic shapes like hearts, stars, clouds, and cartoon animals like cats, bunnies, or pandas.

Q2: How can I make my cute easy drawings?
A: Use round shapes, big eyes, pastel colors, and simple smiling faces. The “kawaii” style is a great reference.

Q3: Are there apps for learning cute drawings?
A: Yes! Try Procreate (iPad), Sketchbook (Android), or How to Draw Cute Things app for guided tutorials.

Q4: Can I turn my cute drawings into a business?
A: Absolutely. Many artists sell their art as digital prints, stickers, or even NFTs.

Q5: How often should I practice to get better?
A: Even 10 minutes daily can help build consistency and improve your sketching skills over time.

Call-To-Action

Ready to start your drawing adventure?
Share your favorite sketch in the comments or tag us on social media using #CuteEasyDrawings!
Want more art tips and tutorials? Subscribe to our newsletter for weekly creative inspiration.

Continue Reading

Education

8mm to Inches Conversion Guide: Quick & Accurate Tips

Published

on

8mm to Inches

Whether you’re working on a DIY project, buying hardware, dealing with product specs, or sewing a garment, precise measurements matter. Many countries use the metric system (millimeters, centimeters, meters), while the U.S. and a few others rely on the imperial system (inches, feet). This often creates confusion, especially with small measurements like 8mm. Understanding how to convert 8mm to inches bridges this gap and ensures accuracy.

The Quick Answer: What is 8mm to Inches?

8 millimeters = 0.31496 inches (rounded to 5 decimal places)

To make it simpler: 8mm ≈ 0.315 inches

This tiny number can make a big difference, especially in technical or professional settings. Let’s dive deeper into the math behind this conversion.

Understanding the Metric vs. Imperial Systems

The metric system is decimal-based and used by most of the world. It’s precise, consistent, and based on powers of 10. The imperial system, on the other hand, is rooted in older measurements and is still commonly used in the U.S.

SystemUnitEquivalent
MetricMillimeter (mm)1/1000 of a meter
ImperialInch1/12 of a foot

When dealing with small measurements like 8 millimeters, the differences between these systems become more noticeable.

Conversion Formula: 8mm to Inches Explained

To convert 8mm to inches, use this simple formula:

inches = millimeters ÷ 25.4

Example:

CopyEdit8 ÷ 25.4 = 0.31496 inches

So, 8mm is equal to 0.31496 inches.

Here are a few other useful conversions for context:

  • 1 mm = 0.03937 inches
  • 5 mm = 0.19685 inches
  • 10 mm = 0.39370 inches

8mm to Inches Chart for Quick Reference

Millimeters (mm)Inches (in)
1 mm0.03937 in
5 mm0.19685 in
8 mm0.31496 in
10 mm0.39370 in
12 mm0.47244 in
15 mm0.59055 in

Having a chart like this saves time when you’re converting on the go.

Common Uses of 8mm in Daily Life

You’d be surprised how often 8mm shows up in everyday situations:

  • Jewelry sizes: Chains, rings, and earrings often list sizes in mm.
  • Camera lenses: 8mm lenses are popular in vintage or action cameras.
  • Bolts and nuts: Many metric fasteners are 8mm in diameter.
  • Pens and tools: Pen barrel diameters and drill bits often measure 8mm.
  • Home improvement: Tiles, spacers, or wood panels may come in 8mm thickness.

8mm in Inches: Real-Life Object Comparisons

To give you a better feel for what 8mm looks like, here are some relatable comparisons:

  • Standard pencil lead = approx. 7–8mm in diameter
  • A stack of 8 sheets of paper = close to 8mm thick
  • Two stacked nickels = around 7.9mm thick
  • A woman’s wedding band = often around 6–8mm wide

These visuals help make the abstract number more tangible.

Digital Tools for Conversion

While it’s great to understand the manual formula, you can also use:

Conversion Tools:

  • Google Search: Just type “8mm to inches” and Google gives the answer instantly.
  • Online Calculators: Tools like RapidTables or UnitConverters.net.
  • Mobile Apps: Apps like “Unit Converter” or “ConvertPad” are handy on the go.

These tools are helpful when dealing with odd values like 8.4mm, 8.75mm, or precision measurements in engineering or crafting.

Why Precision Matters in Measurement

Accurate conversion isn’t just about numbers—it’s about avoiding costly errors.

Here’s how incorrect conversions can affect real-life scenarios:

  • Construction: An error of even 1mm can throw off the alignment of tiles or panels.
  • Mechanical engineering: An 8mm bolt won’t fit into a 5/16″ (7.9375mm) hole.
  • Fashion design: Small sizing mistakes can alter how a garment fits.
  • 3D printing: Precision down to the millimeter ensures your model prints correctly.

Bottom line: Don’t round too much unless it’s for casual purposes.

Conclusion: Measure Smart, Stay Accurate

Converting 8mm to inches may seem minor, but it plays a significant role in accurate measurements across many industries. Knowing that 8mm equals approximately 0.315 inches helps you bridge the gap between the metric and imperial systems confidently.

Whether you’re building, crafting, or shopping online, always double-check your measurements!

FAQs: 8mm to Inches Conversion

Q1: Is 8mm less than half an inch?

Yes, 8mm is about 0.315 inches, which is less than 0.5 inches (1/2 inch).

Q2: How do I convert 8mm to inches without a calculator?

Use the rule of thumb:
1 mm ≈ 0.04 inches
So, 8mm ≈ 8 x 0.04 = 0.32 inches

Q3: Why is the conversion factor 25.4?

Because 1 inch is defined as exactly 25.4 millimeters by international agreement since 1959.

Q4: What’s the difference between 8mm and 5/16 inch?

  • 8mm = 0.315 inches
  • 5/16 inch = 0.3125 inches
    They are very close but not identical. Use the right one for exact fits.

Q5: Can I use 8mm and 5/16 inch interchangeably?

In casual use, maybe. But in precision work like carpentry, mechanics, or engineering, use the correct size.

Call-to-Action

Found this guide helpful? Share it with your friends, bookmark it for future use, or leave a comment below!
Want more quick measurement guides? Subscribe to our newsletter for tips, charts, and tools sent to your inbox weekly!

Continue Reading

Education

Wolf Drawing: Techniques for Realistic and Easy Sketches

Published

on

Wolf Drawing

Drawing a wolf can be a rewarding artistic challenge, whether you’re a beginner or an experienced artist. Wolves have a majestic, powerful appearance, making them a favorite subject for wildlife drawings. This guide will walk you through the essential steps, techniques, and tips to create a realistic wolf drawing. From sketching basic shapes to refining fur details and expressive eyes, you’ll learn how to bring your wolf artwork to life.

Tools and Materials for Wolf Drawing

Before starting your wolf drawing, gather the right materials. The choice of tools depends on your preferred drawing style, whether it’s pencil sketching, ink drawing, or digital art.

Recommended Tools:

  • Pencils: HB, 2B, 4B, and 6B for shading and depth.
  • Erasers: Kneaded erasers for soft corrections and precision erasers for fine details.
  • Blending tools: Tortillons, tissue paper, or cotton swabs for smooth shading.
  • Fine liners or ink pens: For a defined, stylized look.
  • Digital drawing tablet: If working in Procreate, Photoshop, or another digital medium.

Step-by-Step Guide to Drawing a Wolf

Step 1: Sketch Basic Shapes

Start with simple shapes to define the wolf’s structure. Use:

  • A large oval for the head.
  • A slightly elongated oval for the snout.
  • Triangle shapes for the ears.
  • Basic circles for the body structure.

Step 2: Outline the Wolf’s Features

  • Sketch light guidelines for facial symmetry.
  • Define the placement of the eyes, nose, and mouth.
  • Adjust the ears for accurate positioning.

Step 3: Refine the Face and Add Details

  • Draw the almond-shaped eyes with an intense gaze.
  • Add the nose with slight shading for a wet, reflective look.
  • Sketch the mouth slightly open or closed for expression.

Step 4: Define the Fur Texture

  • Use short, directional pencil strokes to simulate fur.
  • Layer different shades to create depth and realism.
  • Focus on fur flow, especially around the neck and face.

Step 5: Add Shading and Depth

  • Identify a light source to guide your shading.
  • Use a blending tool for smooth transitions.
  • Darken shadows around the snout, ears, and fur creases for dimension.

Step 6: Final Touches

  • Erase unnecessary guidelines.
  • Deepen dark areas for contrast.
  • Add highlights to the eyes and nose for a lifelike effect.

Tips for a Realistic Wolf Drawing

1. Study Wolf Anatomy

  • Observe real-life wolf photos.
  • Understand their skeletal and muscular structure.
  • Pay attention to fur patterns and density.

2. Experiment with Different Poses

  • A standing wolf shows strength and alertness.
  • A howling wolf adds drama and emotion.
  • A resting wolf captures calmness and serenity.

3. Use References

  • Look at wildlife photography.
  • Study other artists’ techniques.
  • Practice sketching from different angles.

4. Digital vs. Traditional Drawing

  • Digital tools offer easier corrections and layering.
  • Pencil drawings provide texture and depth through shading.
  • Experiment with both to find your style.

Conclusion

Drawing a wolf requires patience and practice, but with the right techniques, anyone can create stunning artwork. By mastering anatomy, fur texture, and shading, you can bring your wolf drawings to life. Grab your sketchpad, follow these steps, and start drawing today!

Frequently Asked Questions (FAQs)

  • 1. How can I make my wolf drawing look more realistic?

Focus on accurate proportions, detailed fur texture, and expressive eyes.

  • 2. What is the hardest part of drawing a wolf?

Capturing the fur texture and facial expression can be challenging but improves with practice.

  • 3. Can beginners draw wolves easily?

Yes! Start with basic shapes, practice shading, and gradually refine details.

  • 4. What’s the best way to learn wolf drawing?

Use reference images, follow step-by-step guides, and practice regularly.

Continue Reading

Trending