Home Improvement
Ceramic Coating: Benefits, Best Products & Maintenance

Are you tired of constantly waxing your car, only to see it lose its shine after a few rains? If so, ceramic coating might be the game-changer you’ve been looking for. This innovative solution not only enhances your vehicle’s appearance but also adds a layer of protection against the elements. In this blog post, we will explore everything about ceramic coatings—from their benefits and how they work to the best products available in 2024. Let’s dive into the world of ceramic coating and discover how it can transform your vehicle’s care routine!
What Is Ceramic Coating?
Ceramic coating is a liquid polymer applied to the exterior of vehicles. It chemically bonds with the factory paint, creating a protective layer. This advanced technology offers far superior durability compared to traditional waxes and sealants.
Made from silicon dioxide (SiO2), ceramic coatings form a hydrophobic surface that repels water and contaminants. This means dirt, grime, and other pollutants slide off more easily, keeping your vehicle cleaner for longer periods.
The result? A long-lasting shine that enhances the overall appearance of your car while providing robust protection against UV rays, chemical stains, and minor scratches. Embracing this cutting-edge solution can elevate your vehicle maintenance game significantly.
Benefits of Ceramic Coating
Ceramic coating offers exceptional protection for your vehicle’s exterior. Its durable layer shields against UV rays, preventing paint fading and oxidation. This means your car maintains its showroom shine longer.
Another advantage is the hydrophobic properties of ceramic coatings. Water beads up and rolls off surfaces easily, carrying dirt and grime with it. This makes washing your vehicle easier and less frequent.
Additionally, ceramic coatings resist chemical stains from acidic contaminants like bird droppings or tree sap. By forming a strong bond with the surface, they provide a level of defense that traditional waxes simply can’t match. Your investment in ceramic coating pays off by enhancing both appearance and longevity.
How Does Ceramic Coating Work?
Ceramic coating works through a chemical polymer solution that bonds to the exterior surfaces of your vehicle. This process creates a protective layer that is both hydrophobic and resistant to environmental contaminants.
When applied, the ceramic molecules fill in microscopic pores on the surface, enhancing shine while providing durability. The result is a smooth finish that repels dirt, water, and UV rays.
As you drive or wash your car, this barrier helps prevent damage from scratches and oxidation. Essentially, it transforms your vehicle’s paint into a shield against everyday wear and tear. With proper application and maintenance, ceramic coatings can last for years without losing their effectiveness.
Exterior Ceramic Coatings
Exterior ceramic coatings offer a robust layer of protection for your vehicle’s paint. They create a hydrophobic surface that repels water, dirt, and other contaminants. This means your car stays cleaner for longer and requires less frequent washing.
These coatings also enhance the depth and gloss of your vehicle’s exterior finish. The reflective properties improve the visual appeal while safeguarding against UV rays that can cause fading.
Additionally, exterior ceramic coatings provide resistance to environmental hazards like bird droppings, tree sap, and industrial fallout. Investing in this protective solution not only elevates your car’s appearance but also prolongs its lifespan by preventing damage from external elements.
Hybrid Solutions Ceramic Wax Spray Coating
Hybrid Solutions Ceramic Wax Spray Coating combines the strengths of traditional wax and advanced ceramic technology. This unique formula provides excellent protection while adding a glossy finish to your vehicle’s surface.
The application process is simple and user-friendly, making it accessible for both DIY enthusiasts and professionals alike. Just spray it on, wipe it off, and enjoy a sleek look that lasts longer than conventional wax.
Moreover, this coating offers enhanced durability against environmental contaminants like UV rays, dirt, and water spots. It ensures your vehicle remains protected while delivering impressive visual appeal that turns heads on the road.
Gyeon Ceramic Coatings
Gyeon Ceramic Coatings have gained a reputation for their exceptional quality and performance. Known for advanced technology, these coatings provide excellent protection against environmental contaminants like dirt, UV rays, and chemical stains.
One notable feature is the hydrophobic effect, which causes water to bead off surfaces effortlessly. This not only enhances the appearance but also makes cleaning significantly easier. Gyeon’s range includes specific products tailored for different surfaces.
Application is straightforward yet requires some expertise to ensure optimal results. The durability of Gyeon coatings often exceeds competitors, providing long-lasting shine and protection that car enthusiasts appreciate.
Gtechniq Ceramic Coatings
Gtechniq ceramic coatings are known for their advanced protective features. These coatings provide a robust shield against environmental contaminants, UV rays, and harsh chemicals. Offering long-lasting durability, they keep your vehicle looking pristine.
The application process ensures an even layer that bonds effectively with the surface. This creates a hydrophobic effect, repelling water and dirt effortlessly. As a result, maintaining your vehicle becomes much simpler.
With various products tailored to different needs, Gtechniq has options suitable for both professional detailers and DIY enthusiasts. Their innovative technology delivers exceptional results that many car owners appreciate. Investing in Gtechniq can elevate the protection of your vehicle’s exterior significantly.
Best Ceramic Coatings for 2024
As we look ahead to 2024, several ceramic coatings stand out for their exceptional durability and performance. Brands like Gyeon continue to impress car enthusiasts with innovative formulations that offer unmatched protection against environmental contaminants.
Another noteworthy contender is Gtechniq’s range of products, known for their advanced technology and long-lasting results. These coatings provide a strong hydrophobic effect, making maintenance easier than ever.
Additionally, many new hybrid solutions are emerging this year. These combine the best aspects of traditional waxes with the benefits of ceramic technology, offering users more options tailored to specific needs and preferences in automotive care.
Testing and Evaluation of Ceramic Coatings
Testing ceramic coatings involves assessing their durability, hydrophobic properties, and resistance to environmental factors. Various methods include abrasion tests that measure surface hardness and scratch resistance. These evaluations help determine how well a coating can withstand daily wear.
Additionally, water contact angle tests reveal the effectiveness of a coating’s hydrophobicity. A higher angle indicates better water-repelling qualities. This is crucial for maintaining the vehicle’s shine and cleanliness.
Long-term exposure studies simulate years of use in diverse conditions. Evaluating performance over time provides insights into longevity and helps consumers choose the right product for their needs. Each test contributes to understanding what makes ceramic coatings stand out in protection technology.
Differences Between Ceramic Coating and Wax
Ceramic coating and wax offer different levels of protection for your vehicle’s surface. Ceramic coatings create a strong, durable layer that bonds with the paint, providing long-lasting defense against scratches, UV rays, and environmental contaminants. This means less frequent applications compared to wax.
On the other hand, traditional car wax provides a temporary shield. It enhances shine but typically lasts only weeks or months before needing reapplication. Wax can bead water effectively but doesn’t offer the same level of durability as ceramic coatings.
When it comes to maintenance, ceramic coatings require specific care routines tailored for their unique properties. Wax is easier to apply at home and offers immediate results but lacks longevity.
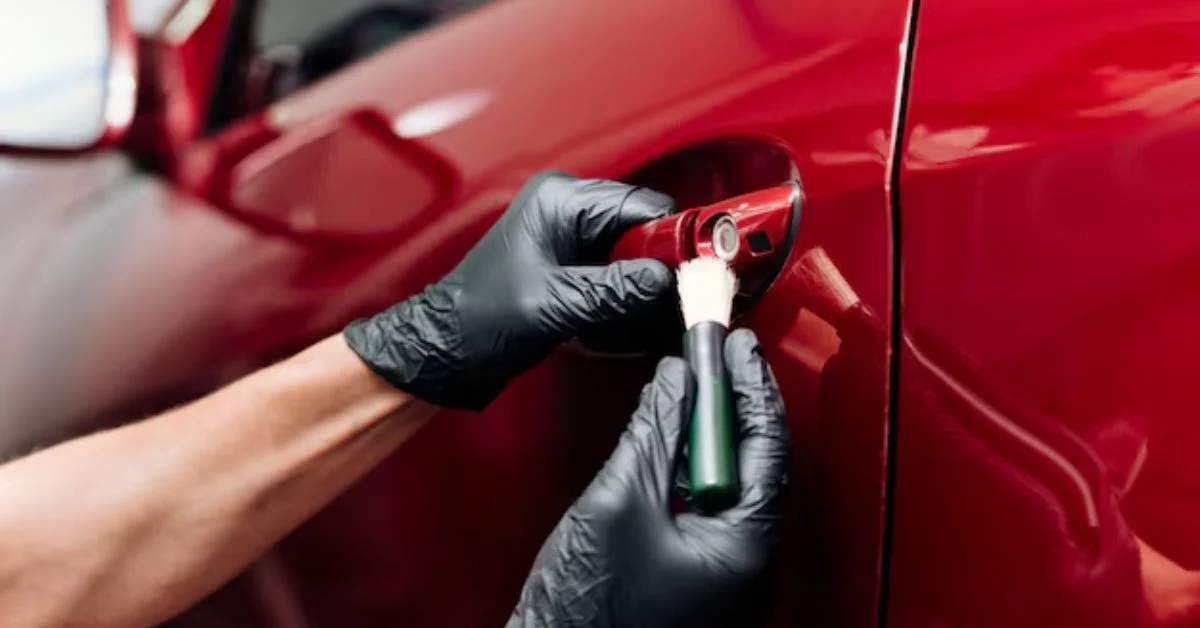
Applying Ceramic Coating
Applying ceramic coating requires careful preparation. Start by thoroughly washing and decontaminating the surface of your vehicle. This ensures that dirt, grime, or old wax does not interfere with the bonding process.
Once clean, dry the surface completely before beginning application. Use a high-quality applicator pad to apply the ceramic coating evenly across small sections at a time. A crosshatch pattern can help ensure complete coverage.
After applying, allow it to cure as per the manufacturer’s instructions. Be mindful of temperature and humidity levels during curing for optimal results. Patience is key; this step significantly enhances durability and shine in the long run.
Maintenance of Ceramic Coatings
Maintaining ceramic coatings is essential for optimal performance. Regular washing with pH-balanced soap helps remove dirt and contaminants without damaging the layer. Avoid harsh chemicals that can degrade the coating’s integrity.
After washing, consider using a dedicated maintenance spray designed for ceramic surfaces. These products enhance hydrophobic properties and provide an additional layer of protection against environmental factors.
Inspect your vehicle periodically for any signs of wear or damage on the coating. If you notice dullness or decreased beading, it may indicate a need for reapplication or professional detailing to restore its brilliance and durability.
Removing Ceramic Coatings
Removing ceramic can be a meticulous process, but it’s essential for maintaining your vehicle’s surface. If you decide to remove the coating, you must use the right techniques and products.
Start by washing the car thoroughly to eliminate dirt and grime. Next, consider using a specialized ceramic coating remover or a strong detailing clay bar that can lift away residues without harming your paint.
For stubborn coatings, polishing may be necessary. A dual-action polisher with an appropriate compound will help restore the surface beneath while eliminating any remnants of the coating. Always follow up with a thorough wash and wax for added protection after removal.
Taking care when removing ceramic coats ensures that your vehicle remains in pristine condition while allowing you to reapply new protective solutions as needed. Regular maintenance is key to keeping your car looking its best!
Uncategorized
Board and Batten Siding: Styles, Costs & Benefits Explained

Board and batten siding has been a popular choice for home exteriors for centuries. Originally used in barns and rural buildings, it has since evolved into a stylish and durable siding option for modern homes. This classic design features alternating wide boards and narrow battens, creating a distinctive vertical pattern that adds depth and texture to any exterior.
If you’re considering board and batten siding, this guide will walk you through its benefits, material options, installation process, costs, and maintenance tips.
What is Board and Batten Siding?
Board and batten siding is a type of vertical siding that consists of wide boards spaced apart with narrow strips (battens) covering the seams. This creates a layered look that enhances the architectural appeal of homes.
Traditionally used in barns and farmhouses, board and batten siding has gained popularity in contemporary home designs due to its rustic charm, durability, and ability to suit a variety of aesthetics.
Benefits of Board and Batten Siding
Choosing board and batten siding offers several advantages:
1. Timeless Aesthetic Appeal
- Creates a rustic yet modern look suitable for farmhouse, craftsman, and contemporary homes.
- The vertical lines add height and visual interest to a building’s exterior.
2. Durability and Strength
- When made from quality materials, board and batten siding can withstand harsh weather conditions.
- Offers excellent insulation when properly installed.
3. Versatile Design Options
- Works well with different architectural styles.
- Can be painted or stained in various colors to match different design preferences.
4. Low Maintenance
- Requires minimal upkeep, especially when using materials like vinyl or fiber cement.
- Resistant to rot, warping, and pests (depending on the material chosen).
Types of Materials for Board and Batten Siding
There are several material options available for board and batten siding, each with unique pros and cons.
1. Wood
- Classic and traditional choice.
- Offers a natural aesthetic but requires regular maintenance (sealing and staining).
- Common types: Cedar, pine, and redwood.
2. Vinyl
- Affordable and low maintenance.
- Resistant to moisture, rot, and insects.
- Available in various colors and textures but may not have the same authentic feel as real wood.
3. Fiber Cement
- Highly durable and weather-resistant.
- Mimics the appearance of wood without requiring frequent maintenance.
- Fire-resistant and pest-proof.
4. Metal
- Modern and industrial aesthetic.
- Extremely durable and resistant to fire, moisture, and pests.
- Higher upfront cost but long-lasting.
5. Composite
- Made from a blend of wood fibers and synthetic materials.
- Resistant to rot, insects, and moisture.
- Provides a natural look with reduced maintenance.
Board and Batten Siding Installation Process
Installing board and batten siding involves the following steps:
1. Preparation
- Measure the exterior walls to determine the amount of material needed.
- Clean and prep the surface for installation.
2. Installing the Boards
- Start by attaching wide vertical boards to the wall with nails or screws.
- Ensure consistent spacing between boards to allow for expansion and contraction.
3. Adding the Battens
- Place the narrow battens over the seams between the boards.
- Secure them with nails to create a watertight barrier.
4. Finishing Touches
- Seal the siding with paint or stain for enhanced durability.
- Add trim pieces around windows and doors for a polished look.
Cost of Board and Batten Siding
The cost of board and batten siding depends on the material used, labor costs, and the size of the project.
Average Costs by Material:
Material | Cost per Square Foot |
---|---|
Wood | $4 – $12 |
Vinyl | $2 – $7 |
Fiber Cement | $5 – $10 |
Metal | $7 – $15 |
Composite | $6 – $12 |
Additional Cost Factors:
- Labor Costs: $2 – $5 per square foot.
- Prep Work: If removing old siding, additional labor costs may apply.
- Painting/Staining: An extra $1 – $4 per square foot.
Maintenance and Longevity
Proper maintenance extends the lifespan of board and batten siding:
- Wood: Requires sealing or staining every 3-5 years.
- Vinyl & Fiber Cement: Only occasional washing needed.
- Metal: Minimal maintenance; occasional repainting.
- Composite: Low-maintenance, occasional cleaning recommended.
Popular Board Siding Colors and Styles
Trending Colors:
- Classic white
- Charcoal gray
- Navy blue
- Earthy tones (beige, brown, sage green)
Style Variations:
- Traditional farmhouse
- Modern minimalist
- Two-tone color contrast for added depth
Final Thoughts
Board and batten siding is a beautiful and durable choice for homeowners seeking a timeless yet modern aesthetic. Whether you choose wood, vinyl, fiber cement, or metal, this siding option enhances curb appeal and provides lasting protection for your home.
If you’re considering a board and batten siding upgrade, consult a professional contractor to explore the best material and design for your home. Share this guide with others looking for exterior siding inspiration!
Frequently Asked Questions (FAQs)
1. Is board and batten siding energy-efficient?
Yes, when properly insulated, it provides excellent energy efficiency.
2. Can batten siding be installed over existing siding?
In some cases, yes, but it depends on the condition of the existing siding.
3. Does board and batten siding work for modern homes?
Absolutely! It’s versatile and works well with both traditional and contemporary designs.
4. How long does board and batten siding last?
With proper maintenance, it can last 20-50 years, depending on the material used.
5. Can I install board and batten siding myself?
Yes, but professional installation ensures longevity and proper sealing against moisture.
Home Improvement
Hiring a General Contractor: A Complete Guide

Hiring a general contractor can transform your construction dreams into reality. Whether you’re planning a simple renovation or a major build, finding the right contractor is crucial. But where do you start? The process might seem daunting, but it doesn’t have to be.
In this guide, we’ll walk you through everything you need to know about hiring a general contractor—from understanding their role in your project to ensuring safety and quality throughout the construction journey. With the right information at hand, you’ll feel empowered to make informed decisions that will lead to successful outcomes for your project. Let’s dive in!
Understanding a General Contractor
A general contractor serves as the project manager for construction or renovation projects. They oversee all aspects, from planning and budgeting to execution and completion. This role is crucial in ensuring that everything runs smoothly.
Typically, a general contractor coordinates between various subcontractors like electricians, plumbers, and carpenters. Their expertise allows them to select skilled professionals while maintaining timelines and budgets. Communication with clients is another essential part of their job.
Understanding what a general contractor does helps you appreciate their value in any building project. They not only bring technical expertise but also ensure compliance with local regulations and safety standards—making your vision come to life efficiently.
Licensing and Qualifications
When hiring a general contractor, verifying their licensing and qualifications is crucial. Each state has specific requirements that contractors must meet to operate legally. These licenses often indicate a level of expertise and adherence to local building codes.
Beyond basic licensing, many contractors hold additional certifications in specialized areas such as project management or safety protocols. This additional training can ensure your project runs smoothly and meets industry standards.
Always ask for proof of these credentials before signing any contracts. A qualified general contractor will be transparent about their licenses and experience, giving you confidence in their ability to manage your construction project efficiently without legal complications.
Responsibilities and Role
A general contractor plays a crucial role in any construction project. They serve as the main point of contact, coordinating all aspects from start to finish. They manage subcontractors, suppliers, and schedules while ensuring that everything adheres to the established timeline.
Communication is key. The general contractor keeps clients informed about progress, challenges, and changes throughout the project lifecycle. They also handle permits and inspections to ensure compliance with local regulations.
Additionally, they oversee quality control on-site. This involves regular checks on workmanship and materials used. By maintaining high standards, they help ensure that projects are completed not only efficiently but also safely and correctly.
Benefits of Hiring a General Contractor
Hiring a general contractor can streamline your construction project significantly. With their expertise, you save time and reduce stress. They manage everything from scheduling to budgeting, allowing you to focus on other priorities.
General contractors have established relationships with subcontractors and suppliers. This network can lead to better pricing and improved quality of work. Their negotiation skills often result in savings that benefit your overall budget.
Additionally, a knowledgeable general contractor ensures adherence to building codes and regulations. This compliance minimizes the risk of costly fines or delays due to legal issues. Their experience brings peace of mind as they handle unforeseen challenges effectively throughout the project lifecycle.
Step-by-Step Guide to Hiring a General Contractor
Hiring a general contractor involves a careful approach. Start by defining your project’s scope and budget. This will help you identify what type of contractor best fits your needs.
Next, seek recommendations from friends or family, or check online reviews to create a shortlist of potential candidates. Make sure they have the necessary experience in projects similar to yours.
Once you’ve narrowed down your options, interview each candidate. Ask about their licensing, insurance, and previous work history. Request references and follow up with them to gauge satisfaction levels. Ensure you get detailed quotes before making your final decision; this will help avoid surprises later on during the project execution.
Tools and Technology for General Contractors
In today’s fast-paced construction industry, tools and technology have transformed how general contractors operate. From project management software to advanced estimating tools, these innovations streamline workflows and enhance productivity. Contractors can easily track budgets, timelines, and resources with just a few clicks.
Mobile apps are also game-changers for on-site communication. They allow real-time updates between team members and clients, ensuring everyone is on the same page regarding progress or changes. This instant connectivity minimizes delays caused by miscommunication.
Moreover, technologies like Building Information Modeling (BIM) enable contractors to visualize projects in 3D before breaking ground. This foresight helps identify potential issues early on, saving time and money while improving accuracy throughout the construction process. Embracing these tools empowers general contractors to deliver superior results efficiently.
Ensuring Safety and Compliance
Ensuring safety and compliance is paramount when hiring a general contractor. Construction sites can be hazardous, so it’s essential that your contractor prioritizes worker safety. A reliable general contractor should have comprehensive safety protocols in place to protect both their team and the surrounding community.
Moreover, adherence to local building codes and regulations cannot be overlooked. Your contractor must stay updated on these guidelines to avoid potential fines or delays. This ensures that all work meets legal standards while safeguarding your investment.
Regular inspections are also crucial for identifying any issues early on. By collaborating with a knowledgeable general contractor who values safety and compliance, you create an environment where quality work flourishes without compromising health or legality in the project’s execution.
Managing Construction Quality
Managing construction quality is crucial for the success of any project. A general contractor plays a pivotal role in ensuring that all work meets established standards and specifications. This involves regular inspections and adherence to building codes throughout the process.
Quality management begins with selecting reliable materials and skilled subcontractors. The contractor should maintain open lines of communication, addressing potential issues before they escalate. Feedback from both clients and workers can help identify areas for improvement.
Documentation is key in tracking progress and maintaining quality benchmarks. Regular reports on inspections, material usage, and labor performance will provide insights into how well the project aligns with its initial goals. By prioritizing these aspects, a general contractor ensures not only compliance but also overall satisfaction for everyone involved.
Tracking Project Progress
Tracking project progress is essential when working with a general contractor. Regular updates provide insights into timelines and milestones, ensuring that the project stays on track. You can use tools like Gantt charts or project management software to visualize progress easily.
Frequent communication between you and your contractor helps address any issues that arise promptly. Weekly check-ins can be beneficial for assessing the current status of work and discussing next steps. This keeps everyone aligned with the project’s goals.
Documenting daily activities also plays a crucial role in tracking progress. Encourage your general contractor to maintain logs detailing labor hours, materials used, and completed tasks. These records will not only help in managing timelines but also serve as evidence if disputes occur later on.
Communication and Stakeholder Involvement
Effective communication is crucial when hiring a general contractor. It helps establish clear expectations from the start, ensuring everyone is on the same page. Regular updates keep stakeholders informed and engaged throughout the project.
Involving key stakeholders early in the process fosters collaboration and trust. This includes homeowners, subcontractors, suppliers, and even local authorities if necessary. When all parties feel heard, it can reduce misunderstandings and conflict later on.
Utilizing technology can enhance communication efforts as well. Project management tools allow for real-time updates and shared access to important documents. This transparency not only streamlines workflows but also ensures accountability among all involved in the construction project.
Resources for General Contractors
For those seeking to hire a general contractor, it’s essential to tap into the right resources. Online directories, such as Angie’s List and HomeAdvisor, can help you find qualified professionals in your area. Additionally, local trade associations often provide listings of licensed contractors.
Don’t underestimate the power of social media groups focused on home improvement or renovation. These platforms allow for real-time feedback and recommendations from community members.
Books and online courses about construction management can offer insights into what makes a good contractor. They also prepare homeowners to ask the right questions during interviews.
Don’t forget about personal referrals from friends or family who have had positive experiences with contractors. Each resource offers unique perspectives that can aid in making an informed decision when hiring a general contractor for your project.
Home Improvement
From 220 C to F: Simple Temperature Conversion for Cooking

Are you trying to perfect your baking skills, only to be stumped by temperature conversions? If you’ve ever found yourself Googling “220 C to F,” you’re not alone. Understanding how to convert Celsius to Fahrenheit is essential for cooking and baking enthusiasts alike. Whether it’s a savory dish or a sweet treat, getting the temperature just right can make all the difference in achieving mouthwatering results. In this guide, we’ll break down the steps you need to take for accurate conversions and explore why mastering this skill is so beneficial in your kitchen adventures. Get ready to elevate your culinary game!
How To Convert 220 C to F
Converting 220 C to Fmight seem daunting at first, but it’s quite simple when you break it down. The key is to use a straightforward formula that makes the math easy and quick.
Start by taking your Celsius temperature, which in this case is 220 C to F. Next, multiply that number by 9/5 or simply 1.8. This step brings you closer to finding the equivalent Fahrenheit temperature.
Now add 32 to the result from your multiplication. This final addition adjusts for the difference between the two scales and gives you an accurate reading in Fahrenheit.
When done correctly, you’ll find that 220 C to F converts to approximately 428°F. With this knowledge in hand, you’re ready to tackle any recipe calling for either measurement without a hitch!
Step 1
To start converting 220 C to F, you’ll first need to understand the basic formula. The conversion formula is simple: multiply the Celsius temperature by 9/5 and then add 32. This will give you an accurate number in Fahrenheit.
For our specific example of 220 C to F, take that number and get ready to work. Begin by multiplying it by 9/5. It might sound tricky at first, but it’s straightforward math.
When you do this calculation, you’ll arrive at a new figure that’s essential for your next steps. It’s crucial to remain focused during this process to ensure accuracy with every measurement.
Once you’ve done the multiplication, you’re one step closer to achieving perfect cooking results that suit your preferences! Understanding these conversions can truly elevate your culinary skills as you adjust recipes from different regions or cultures.
Step 2
Next, take the temperature in Celsius that you want to convert. In this case, it’s 220 C to F. This is a common baking temperature for many recipes and understanding how it translates can help ensure your dish turns out perfectly.
Once you have the number ready, you’ll need to apply the conversion formula. Multiply 220 by 1.8. This step transforms our Celsius measurement into a more familiar unit for those who use Fahrenheit regularly.
After multiplying, you’re left with a new figure: 396. That’s just part of the equation though! The final touch requires adding 32 to this result.
So now take that total of 396 and add it to 32, giving you an end result of 428°F. Just like that, you’ve successfully converted from Celsius to Fahrenheit! Perfect accuracy will lead you down the path to culinary success with every recipe.
Step 3
Once you have the temperature calculated, it’s time to preheat your oven. Set it to the newly converted Fahrenheit temperature. This ensures that your dish cooks evenly from the start.
If you’re using a digital oven, simply input the number. For older models, you may need to adjust manually with knobs or dials. Check for markings so you can fine-tune it accurately.
While waiting for the oven to reach the desired heat, gather all your ingredients and equipment. Organizing everything beforehand will save time and prevent any last-minute rushes in preparation.
Now that you’re ready with both temperature and ingredients, it’s time to move on with your cooking adventure! Just remember that precision matters when converting temperatures; this can directly impact how well your recipe turns out. Stay focused on each step for perfect results every time.
Conversion of 220 C to F
Converting 220 C to F is a straightforward process that can help ensure your recipes turn out just right. Knowing the correct temperature in both scales allows you to follow international recipes accurately. Most ovens may display temperatures in Fahrenheit, making this conversion essential for home cooks around the world.
To convert 220 C to F, you can use the formula: (°C × 9/5) + 32 = °F. Applying this formula will give you a precise result of approximately 428°F. This specific temperature is often used for baking and roasting various dishes, ensuring they cook evenly and thoroughly.
Understanding how different temperature units affect cooking times and outcomes is critical. For instance, baked goods like bread or pastries might require slightly adjusted timings when switching between Celsius and Fahrenheit.
Once you’re familiar with these conversions, you’ll feel more confident experimenting with diverse cuisines from across the globe! Enjoy exploring new flavors while mastering your kitchen skills at varying temperatures.
Recommended Conversion Formula
To convert220 C to F, you can use a simple formula that makes the process easy. The formula is: F = (C × 9/5) + 32. In this case, you replace C with 220.
First, multiply 220 by 9/5. This step gives you an intermediate result of 396. Next, add 32 to this number. So, when you add them together, you’ll get a final temperature of approximately 428°F.
Using this conversion method allows for accuracy in your cooking and baking endeavors. It ensures that you’re following recipes correctly, especially if they originate from different regions using Celsius measurements.
Remembering this formula will save time and eliminate confusion in the kitchen. You can easily whip out your calculator or do it mentally as needed while preparing delicious dishes!
Benefits of Converting
Converting temperatures from Celsius to Fahrenheit can open up a world of culinary possibilities. Many recipes, especially those from the U.S., use Fahrenheit. Understanding this conversion allows you to follow diverse recipes with confidence.
Achieving accurate cooking temperatures is crucial for perfect results. When baking or roasting, even a slight deviation can impact texture and flavor. Knowing how to convert 220 C to F ensures that your dish turns out just as intended.
This skill also enhances your kitchen versatility. Whether you’re trying international dishes or experimenting with new flavors, being able to convert temperature measurements is invaluable. It empowers you in the kitchen.
Moreover, it sparks curiosity about different cooking methods worldwide. As you explore global cuisines, you’ll find an array of techniques and traditions that might require converting measurements regularly, enriching your culinary journey further.
Usage and Applications
Understanding the conversion from 220 C to F is vital for achieving perfect cooking results. Many recipes, especially those originating in the U.S., often use Fahrenheit. This conversion allows you to follow international recipes without any hassle.
In baking, precise temperature control can make a significant difference. Whether you’re roasting vegetables, baking bread, or preparing delicate pastries, knowing that 220°C translates to approximately 428°F ensures your dish cooks evenly and achieves that desired texture.
Moreover, this knowledge isn’t limited just to home kitchens. Professional chefs also rely on accurate temperature conversions when experimenting with global cuisines or sharing their culinary creations online.
As more people embrace diverse cooking techniques and styles from around the world, understanding these conversions becomes essential for enhancing skills in the kitchen and making global dishes accessible at home.
Additional Resources
When it comes to cooking, precision is key. Converting temperatures correctly can make all the difference in your culinary creations. To help you master conversions like 220 C to F, there are several resources available.
Online conversion calculators are a quick and easy option. They allow you to input Celsius values and instantly receive Fahrenheit equivalents. Cooking apps often include built-in conversion tools as well.
You might also find cookbooks that focus on international recipes helpful. Many of these provide temperature conversions within their pages. Websites dedicated to cooking tips frequently have sections on temperature conversions too.
For those who prefer hands-on learning, consider attending a local cooking class or workshop focusing on global cuisines. These environments often emphasize precise measurements for successful dishes.
With these resources at your disposal, converting 220c to f will become second nature in no time. Happy cooking!
- Entertainment3 months ago
Celebrity Movie Archives: Hidden Gems and Iconic Performance
- Entertainment3 months ago
Javrank: Guide to Adult Entertainment & Innovative Features
- Technology2 months ago
BeTechIT.com Contacts: For 24/7 Effortless Tech Solutions
- Technology2 months ago
InfluencersGineWuld: Revolutionizing Influencer Marketing for Brands
- Business3 weeks ago
Fintechzoom.com dax40 : Insights & Trends and Updates
- Games3 months ago
Snokido: The Ultimate Online Gaming Hub for All Ages
- LifeStyle3 months ago
CumonPrintedPics: Personalized Prints and Creative Platform
- Education4 months ago
50°C to Fahrenheit: Conversion, Applications & Safety