Connect with us

Home Improvement

Potato Peelers: Types, Tips, and Best Options for Cooking

Published

on

Potato Peelers

Peeling potatoes can feel like a chore, but it doesn’t have to be. With the right potato peeler in your kitchen arsenal, this task transforms from tedious to effortless. Whether you’re prepping for a cozy family dinner or whipping up a gourmet dish, understanding the different types of potato peelers and their uses is essential for every home cook. In this guide, we’ll explore various potato peelers that cater to all preferences and needs while sharing handy tips for smooth peeling. Say goodbye to stubborn skin and hello to perfectly peeled potatoes! Let’s dive into the world of potato peelers and make your cooking experience more enjoyable.

Potato Peelers 101: Types, Uses, and Tips for Effortless Peeling

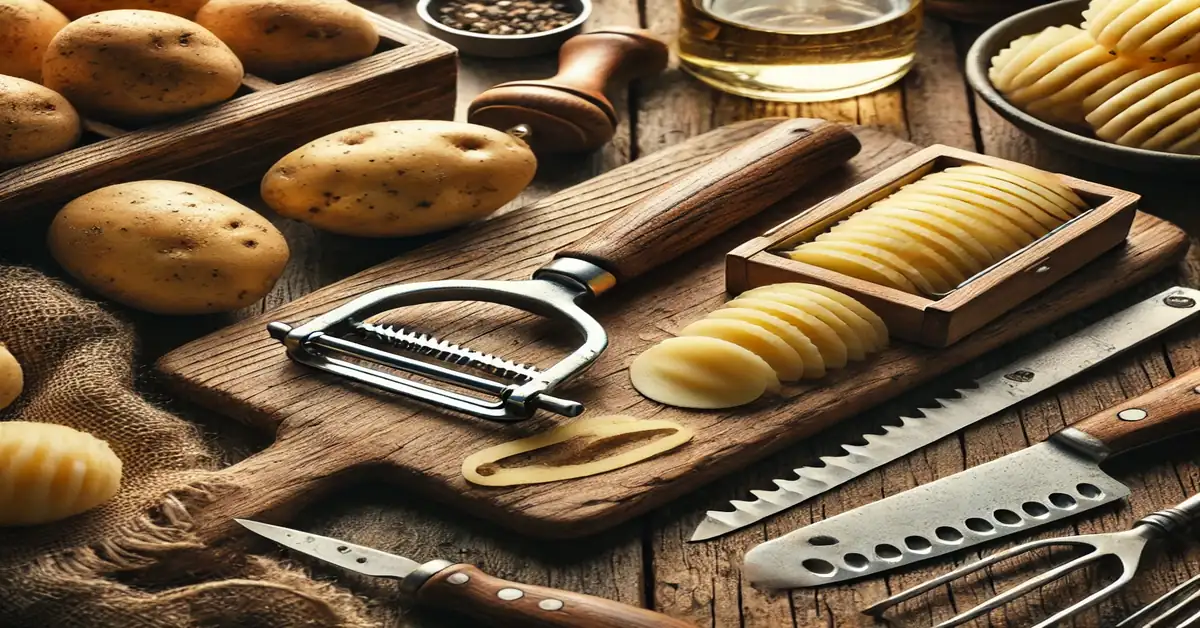
Potato peelers come in various styles, each designed for specific tasks. From classic swivel peelers to modern Y-shaped options, there’s a peeler that fits every hand and preference. These tools not only make peeling easier but can also enhance the overall cooking experience.

Understanding how to use each type of potato peelers effectively is crucial. Some potato peelers better for soft-skinned vegetables while others tackle tougher skins with ease. The right choice can save time and energy, making meal prep more efficient and enjoyable in the kitchen.

Types of Potato Peelers

Potato peelers come in various types, each designed for specific peeling needs. The most common are swivel potato peelers, which feature a flexible blade that glides over the potato’s surface. Y-peelers are also popular potato peelers, offering a horizontal design that provides excellent control and comfort during use.

Electric peelers can save time and effort if you’re handling large quantities. There are even specialty tools like serrated or dual-bladed peelers for unique textures. Choosing the right type depends on your preferences and cooking style.

Different Blade and Handle Grips to Consider

When choosing a potato peeler, the type of blade matters significantly. Swivel blades offer flexibility, allowing for easier peeling around curves and contours. Straight blades tend to provide more control for flat surfaces, making them ideal for uniform slices.

Handle grips also play a crucial role in comfort during use. Ergonomic designs can reduce hand fatigue, while non-slip materials ensure a firm grip even when wet. Consider your preferences as you search for the perfect combination that suits your cooking style and needs.

Best Potato Peelers on the Market

When it comes to the best potato peelers, several options stand out for their efficiency and ease of use. The OXO Good Grips Pro Swivel Peeler features a soft grip handle that provides comfort during prolonged peeling sessions.

For those looking for durability, the Kyocera Advanced Ceramic Horizontal Y-Peeler is an excellent choice due to its sharp ceramic blade. Meanwhile, the Spring Chef Premium Peelers offer versatility in design and function, making them favorites among home cooks. Each option brings unique qualities to your kitchen tool collection.

READ MORE:The://Vital-Mag.net Blog: Diverse and Affordable Streaming

OXO Good Grips Pro Swivel Peeler

The OXO Good Grips Pro Swivel Peeler is a standout tool in the kitchen. With its sharp stainless steel blade, it glides effortlessly over potatoes and other vegetables. The swivel design allows for easier maneuverability, ensuring you can tackle even the curviest shapes.

Comfort is key, and this peeler delivers with an ergonomic handle that provides a secure grip. It’s perfect for those long cooking sessions when you need to peel several pounds of produce without discomfort or strain on your hands.

Kyocera Advanced Ceramic Horizontal Y-Peeler

The Kyocera Advanced Ceramic Horizontal Y-Peeler stands out for its sleek design and durability. Its ultra-sharp ceramic blade effortlessly glides through even the toughest skins, ensuring a smooth peeling experience without risk of rusting.

With an ergonomic handle, this potato peelers provides excellent grip and control, making it comfortable to use for extended periods. Lightweight yet robust, it’s perfect for both everyday cooks and culinary enthusiasts looking to enhance their kitchen tools collection. Plus, it’s easy to clean—simply rinse it under water or place it in the dishwasher.

Spring Chef Premium Swivel Vegetable Peeler

The Spring Chef Premium Swivel Vegetable Peeler stands out for its ergonomic design and sharp stainless steel blade. It effortlessly glides over various vegetables, making peeling a quick task. The swivel action adapts to the contours of your produce, ensuring minimal waste.

With a comfortable grip, this peeler reduces hand fatigue during extended use. It’s dishwasher safe too, which makes cleanup a breeze. If you’re looking for efficiency combined with comfort in your kitchen tools, this peeler is an excellent choice.

LINDEN SWEDEN Original Jonas Vegetable Peeler

The LINDEN SWEDEN Original Jonas Vegetable Peeler is a masterpiece of design and functionality. Crafted in Sweden, this peeler combines traditional craftsmanship with modern materials for an unbeatable peeling experience. Its sharp stainless steel blade glides effortlessly through skin, making it perfect for potato peelers.

The ergonomic handle fits comfortably in your hand, reducing strain during use. Lightweight yet sturdy, this peeler makes quick work of any peeling task while ensuring safety and efficiency in the kitchen. It’s a reliable tool that chefs trust!

KitchenAid Spiralizer Plus with Peel, Core, and Slice

The KitchenAid Spiralizer Plus is a versatile tool that goes beyond just peeling. It allows you to peel, core, and slice fruits and vegetables with ease. This multi-functional gadget can save time in the kitchen while also adding creative flair to your meals.

Its sturdy design ensures stability during use, making it perfect for various types of produce. Whether you’re preparing apples for pie or zucchini noodles for pasta, this spiralizer makes food prep fun and efficient. Enjoy experimenting with new recipes while enjoying perfectly peeled ingredients!

Tips for Effortless Peeling

Start by using a sharp potato peeler to make the job easier. A dull blade potato peelers can lead to frustration and uneven peeling, so invest in quality tools.

To prevent peeled potatoes from turning brown, soak them in cold water immediately after peeling. This keeps them fresh until you’re ready to cook. If you need to peel sweet potatoes, consider leaving some skin on for added flavor and nutrients—it’s a delicious alternative!

Can potatoes be peeled ahead of time?

Yes, potatoes can be peeled ahead of time. If you’re prepping for a big meal or just want to save some time in the kitchen, peeling them earlier is an option.

Just remember to store the peeled potatoes in water to prevent them from drying out and turning brown. Keeping them submerged will also help maintain their freshness until you’re ready to cook.

How to prevent peeled potatoes from turning brown

To prevent peeled potatoes from turning brown, keep them submerged in water. This limits their exposure to air, which causes oxidation. Use cold water for the best results and add a splash of lemon juice or vinegar for extra protection.

If you’re not ready to cook them right away, consider storing the potatoes in an airtight container filled with water in the refrigerator. This method keeps your spuds fresh and vibrant until you’re ready to use them without compromising flavor or texture.

READ MORE:Hamro Solar LLC: Leading Solar Energy Solutions Provider

Should you peel sweet potatoes?

Peeling sweet potatoes is a matter of personal preference. Their skin is packed with nutrients and adds texture to dishes. Leaving the peel on enhances the flavor and can make your meal more visually appealing.

On the other hand, some people find the skin tough or unpalatable. If you’re making dishes where smoothness matters, like mashed sweet potatoes, peeling might be best. Experimenting with both options can help you discover what suits your taste buds and recipes better.

Can you freeze peeled potatoes?

Freezing peeled potatoes is possible, but there are a few important steps to follow. Raw potatoes can turn mushy and develop an unpleasant texture when thawed. To prevent this, blanch the peeled potatoes in boiling water for a couple of minutes before freezing.

After blanching, cool them quickly in ice water and drain well. Once dry, place the potato pieces in freezer bags or airtight containers to avoid freezer burn. This way, you can enjoy your peeled potatoes without compromising on quality later!

Factors to Consider When Choosing a Potato Peeler

When selecting a potato peeler, consider the type of blade material. Stainless steel is durable and effective, while ceramic blades offer precision without rusting. Choose based on your cooking habits and preferences.

Handle comfort is another crucial factor. Look for ergonomic designs that fit well in your hand to reduce strain during use. Weight distribution also matters; a balanced peeler makes peeling potatoes more effortless, allowing you to glide through tasks efficiently.

READ MORE:Dec Calendar 2023: Holidays, Events, and Festive Traditions

Final Thoughts and Recommendations

Choosing the right potato peeler can elevate your cooking experience. Consider factors like blade design and grip to find what suits you best. Don’t hesitate to try different types until you discover your favorite.

Investing in a quality peeler pays off in efficiency and ease. Whether opting for ceramic or stainless steel, each has its unique benefits. Remember, the perfect tool can make all the difference when preparing delicious meals with fresh ingredients at home. Happy peeling!

Continue Reading
Click to comment

Leave a Reply

Your email address will not be published. Required fields are marked *

Uncategorized

Board and Batten Siding: Styles, Costs & Benefits Explained

Published

on

Board and Batten Siding

Board and batten siding has been a popular choice for home exteriors for centuries. Originally used in barns and rural buildings, it has since evolved into a stylish and durable siding option for modern homes. This classic design features alternating wide boards and narrow battens, creating a distinctive vertical pattern that adds depth and texture to any exterior.

If you’re considering board and batten siding, this guide will walk you through its benefits, material options, installation process, costs, and maintenance tips.

What is Board and Batten Siding?

Board and batten siding is a type of vertical siding that consists of wide boards spaced apart with narrow strips (battens) covering the seams. This creates a layered look that enhances the architectural appeal of homes.

Traditionally used in barns and farmhouses, board and batten siding has gained popularity in contemporary home designs due to its rustic charm, durability, and ability to suit a variety of aesthetics.

Benefits of Board and Batten Siding

Choosing board and batten siding offers several advantages:

1. Timeless Aesthetic Appeal

  • Creates a rustic yet modern look suitable for farmhouse, craftsman, and contemporary homes.
  • The vertical lines add height and visual interest to a building’s exterior.

2. Durability and Strength

  • When made from quality materials, board and batten siding can withstand harsh weather conditions.
  • Offers excellent insulation when properly installed.

3. Versatile Design Options

  • Works well with different architectural styles.
  • Can be painted or stained in various colors to match different design preferences.

4. Low Maintenance

  • Requires minimal upkeep, especially when using materials like vinyl or fiber cement.
  • Resistant to rot, warping, and pests (depending on the material chosen).

Types of Materials for Board and Batten Siding

There are several material options available for board and batten siding, each with unique pros and cons.

1. Wood

  • Classic and traditional choice.
  • Offers a natural aesthetic but requires regular maintenance (sealing and staining).
  • Common types: Cedar, pine, and redwood.

2. Vinyl

  • Affordable and low maintenance.
  • Resistant to moisture, rot, and insects.
  • Available in various colors and textures but may not have the same authentic feel as real wood.

3. Fiber Cement

  • Highly durable and weather-resistant.
  • Mimics the appearance of wood without requiring frequent maintenance.
  • Fire-resistant and pest-proof.

4. Metal

  • Modern and industrial aesthetic.
  • Extremely durable and resistant to fire, moisture, and pests.
  • Higher upfront cost but long-lasting.

5. Composite

  • Made from a blend of wood fibers and synthetic materials.
  • Resistant to rot, insects, and moisture.
  • Provides a natural look with reduced maintenance.

Board and Batten Siding Installation Process

Installing board and batten siding involves the following steps:

1. Preparation

  • Measure the exterior walls to determine the amount of material needed.
  • Clean and prep the surface for installation.

2. Installing the Boards

  • Start by attaching wide vertical boards to the wall with nails or screws.
  • Ensure consistent spacing between boards to allow for expansion and contraction.

3. Adding the Battens

  • Place the narrow battens over the seams between the boards.
  • Secure them with nails to create a watertight barrier.

4. Finishing Touches

  • Seal the siding with paint or stain for enhanced durability.
  • Add trim pieces around windows and doors for a polished look.

Cost of Board and Batten Siding

The cost of board and batten siding depends on the material used, labor costs, and the size of the project.

Average Costs by Material:

MaterialCost per Square Foot
Wood$4 – $12
Vinyl$2 – $7
Fiber Cement$5 – $10
Metal$7 – $15
Composite$6 – $12

Additional Cost Factors:

  • Labor Costs: $2 – $5 per square foot.
  • Prep Work: If removing old siding, additional labor costs may apply.
  • Painting/Staining: An extra $1 – $4 per square foot.

Maintenance and Longevity

Proper maintenance extends the lifespan of board and batten siding:

  • Wood: Requires sealing or staining every 3-5 years.
  • Vinyl & Fiber Cement: Only occasional washing needed.
  • Metal: Minimal maintenance; occasional repainting.
  • Composite: Low-maintenance, occasional cleaning recommended.

Popular Board Siding Colors and Styles

Trending Colors:

  • Classic white
  • Charcoal gray
  • Navy blue
  • Earthy tones (beige, brown, sage green)

Style Variations:

  • Traditional farmhouse
  • Modern minimalist
  • Two-tone color contrast for added depth

Final Thoughts

Board and batten siding is a beautiful and durable choice for homeowners seeking a timeless yet modern aesthetic. Whether you choose wood, vinyl, fiber cement, or metal, this siding option enhances curb appeal and provides lasting protection for your home.

If you’re considering a board and batten siding upgrade, consult a professional contractor to explore the best material and design for your home. Share this guide with others looking for exterior siding inspiration!

Frequently Asked Questions (FAQs)

1. Is board and batten siding energy-efficient?

Yes, when properly insulated, it provides excellent energy efficiency.

2. Can batten siding be installed over existing siding?

In some cases, yes, but it depends on the condition of the existing siding.

3. Does board and batten siding work for modern homes?

Absolutely! It’s versatile and works well with both traditional and contemporary designs.

4. How long does board and batten siding last?

With proper maintenance, it can last 20-50 years, depending on the material used.

5. Can I install board and batten siding myself?

Yes, but professional installation ensures longevity and proper sealing against moisture.

Continue Reading

Home Improvement

Hiring a General Contractor: A Complete Guide

Published

on

General Contractor:

Hiring a general contractor can transform your construction dreams into reality. Whether you’re planning a simple renovation or a major build, finding the right contractor is crucial. But where do you start? The process might seem daunting, but it doesn’t have to be.

In this guide, we’ll walk you through everything you need to know about hiring a general contractor—from understanding their role in your project to ensuring safety and quality throughout the construction journey. With the right information at hand, you’ll feel empowered to make informed decisions that will lead to successful outcomes for your project. Let’s dive in!

Understanding a General Contractor

A general contractor serves as the project manager for construction or renovation projects. They oversee all aspects, from planning and budgeting to execution and completion. This role is crucial in ensuring that everything runs smoothly.

Typically, a general contractor coordinates between various subcontractors like electricians, plumbers, and carpenters. Their expertise allows them to select skilled professionals while maintaining timelines and budgets. Communication with clients is another essential part of their job.

Understanding what a general contractor does helps you appreciate their value in any building project. They not only bring technical expertise but also ensure compliance with local regulations and safety standards—making your vision come to life efficiently.

Licensing and Qualifications

When hiring a general contractor, verifying their licensing and qualifications is crucial. Each state has specific requirements that contractors must meet to operate legally. These licenses often indicate a level of expertise and adherence to local building codes.

Beyond basic licensing, many contractors hold additional certifications in specialized areas such as project management or safety protocols. This additional training can ensure your project runs smoothly and meets industry standards.

Always ask for proof of these credentials before signing any contracts. A qualified general contractor will be transparent about their licenses and experience, giving you confidence in their ability to manage your construction project efficiently without legal complications.

Responsibilities and Role

A general contractor plays a crucial role in any construction project. They serve as the main point of contact, coordinating all aspects from start to finish. They manage subcontractors, suppliers, and schedules while ensuring that everything adheres to the established timeline.

Communication is key. The general contractor keeps clients informed about progress, challenges, and changes throughout the project lifecycle. They also handle permits and inspections to ensure compliance with local regulations.

Additionally, they oversee quality control on-site. This involves regular checks on workmanship and materials used. By maintaining high standards, they help ensure that projects are completed not only efficiently but also safely and correctly.

Benefits of Hiring a General Contractor

Hiring a general contractor can streamline your construction project significantly. With their expertise, you save time and reduce stress. They manage everything from scheduling to budgeting, allowing you to focus on other priorities.

General contractors have established relationships with subcontractors and suppliers. This network can lead to better pricing and improved quality of work. Their negotiation skills often result in savings that benefit your overall budget.

Additionally, a knowledgeable general contractor ensures adherence to building codes and regulations. This compliance minimizes the risk of costly fines or delays due to legal issues. Their experience brings peace of mind as they handle unforeseen challenges effectively throughout the project lifecycle.

Step-by-Step Guide to Hiring a General Contractor

Hiring a general contractor involves a careful approach. Start by defining your project’s scope and budget. This will help you identify what type of contractor best fits your needs.

Next, seek recommendations from friends or family, or check online reviews to create a shortlist of potential candidates. Make sure they have the necessary experience in projects similar to yours.

Once you’ve narrowed down your options, interview each candidate. Ask about their licensing, insurance, and previous work history. Request references and follow up with them to gauge satisfaction levels. Ensure you get detailed quotes before making your final decision; this will help avoid surprises later on during the project execution.

Tools and Technology for General Contractors

In today’s fast-paced construction industry, tools and technology have transformed how general contractors operate. From project management software to advanced estimating tools, these innovations streamline workflows and enhance productivity. Contractors can easily track budgets, timelines, and resources with just a few clicks.

Mobile apps are also game-changers for on-site communication. They allow real-time updates between team members and clients, ensuring everyone is on the same page regarding progress or changes. This instant connectivity minimizes delays caused by miscommunication.

Moreover, technologies like Building Information Modeling (BIM) enable contractors to visualize projects in 3D before breaking ground. This foresight helps identify potential issues early on, saving time and money while improving accuracy throughout the construction process. Embracing these tools empowers general contractors to deliver superior results efficiently.

Ensuring Safety and Compliance

Ensuring safety and compliance is paramount when hiring a general contractor. Construction sites can be hazardous, so it’s essential that your contractor prioritizes worker safety. A reliable general contractor should have comprehensive safety protocols in place to protect both their team and the surrounding community.

Moreover, adherence to local building codes and regulations cannot be overlooked. Your contractor must stay updated on these guidelines to avoid potential fines or delays. This ensures that all work meets legal standards while safeguarding your investment.

Regular inspections are also crucial for identifying any issues early on. By collaborating with a knowledgeable general contractor who values safety and compliance, you create an environment where quality work flourishes without compromising health or legality in the project’s execution.

Managing Construction Quality

Managing construction quality is crucial for the success of any project. A general contractor plays a pivotal role in ensuring that all work meets established standards and specifications. This involves regular inspections and adherence to building codes throughout the process.

Quality management begins with selecting reliable materials and skilled subcontractors. The contractor should maintain open lines of communication, addressing potential issues before they escalate. Feedback from both clients and workers can help identify areas for improvement.

Documentation is key in tracking progress and maintaining quality benchmarks. Regular reports on inspections, material usage, and labor performance will provide insights into how well the project aligns with its initial goals. By prioritizing these aspects, a general contractor ensures not only compliance but also overall satisfaction for everyone involved.

Tracking Project Progress

Tracking project progress is essential when working with a general contractor. Regular updates provide insights into timelines and milestones, ensuring that the project stays on track. You can use tools like Gantt charts or project management software to visualize progress easily.

Frequent communication between you and your contractor helps address any issues that arise promptly. Weekly check-ins can be beneficial for assessing the current status of work and discussing next steps. This keeps everyone aligned with the project’s goals.

Documenting daily activities also plays a crucial role in tracking progress. Encourage your general contractor to maintain logs detailing labor hours, materials used, and completed tasks. These records will not only help in managing timelines but also serve as evidence if disputes occur later on.

Communication and Stakeholder Involvement

Effective communication is crucial when hiring a general contractor. It helps establish clear expectations from the start, ensuring everyone is on the same page. Regular updates keep stakeholders informed and engaged throughout the project.

Involving key stakeholders early in the process fosters collaboration and trust. This includes homeowners, subcontractors, suppliers, and even local authorities if necessary. When all parties feel heard, it can reduce misunderstandings and conflict later on.

Utilizing technology can enhance communication efforts as well. Project management tools allow for real-time updates and shared access to important documents. This transparency not only streamlines workflows but also ensures accountability among all involved in the construction project.

Resources for General Contractors

For those seeking to hire a general contractor, it’s essential to tap into the right resources. Online directories, such as Angie’s List and HomeAdvisor, can help you find qualified professionals in your area. Additionally, local trade associations often provide listings of licensed contractors.

Don’t underestimate the power of social media groups focused on home improvement or renovation. These platforms allow for real-time feedback and recommendations from community members.

Books and online courses about construction management can offer insights into what makes a good contractor. They also prepare homeowners to ask the right questions during interviews.

Don’t forget about personal referrals from friends or family who have had positive experiences with contractors. Each resource offers unique perspectives that can aid in making an informed decision when hiring a general contractor for your project.

Continue Reading

Home Improvement

From 220 C to F: Simple Temperature Conversion for Cooking

Published

on

220 C to F

Are you trying to perfect your baking skills, only to be stumped by temperature conversions? If you’ve ever found yourself Googling “220 C to F,” you’re not alone. Understanding how to convert Celsius to Fahrenheit is essential for cooking and baking enthusiasts alike. Whether it’s a savory dish or a sweet treat, getting the temperature just right can make all the difference in achieving mouthwatering results. In this guide, we’ll break down the steps you need to take for accurate conversions and explore why mastering this skill is so beneficial in your kitchen adventures. Get ready to elevate your culinary game!

How To Convert 220 C to F

Converting 220 C to Fmight seem daunting at first, but it’s quite simple when you break it down. The key is to use a straightforward formula that makes the math easy and quick.

Start by taking your Celsius temperature, which in this case is 220 C to F. Next, multiply that number by 9/5 or simply 1.8. This step brings you closer to finding the equivalent Fahrenheit temperature.

Now add 32 to the result from your multiplication. This final addition adjusts for the difference between the two scales and gives you an accurate reading in Fahrenheit.

When done correctly, you’ll find that 220 C to F converts to approximately 428°F. With this knowledge in hand, you’re ready to tackle any recipe calling for either measurement without a hitch!

Step 1

To start converting 220 C to F, you’ll first need to understand the basic formula. The conversion formula is simple: multiply the Celsius temperature by 9/5 and then add 32. This will give you an accurate number in Fahrenheit.

For our specific example of 220 C to F, take that number and get ready to work. Begin by multiplying it by 9/5. It might sound tricky at first, but it’s straightforward math.

When you do this calculation, you’ll arrive at a new figure that’s essential for your next steps. It’s crucial to remain focused during this process to ensure accuracy with every measurement.

Once you’ve done the multiplication, you’re one step closer to achieving perfect cooking results that suit your preferences! Understanding these conversions can truly elevate your culinary skills as you adjust recipes from different regions or cultures.

Step 2

Next, take the temperature in Celsius that you want to convert. In this case, it’s 220 C to F. This is a common baking temperature for many recipes and understanding how it translates can help ensure your dish turns out perfectly.

Once you have the number ready, you’ll need to apply the conversion formula. Multiply 220 by 1.8. This step transforms our Celsius measurement into a more familiar unit for those who use Fahrenheit regularly.

After multiplying, you’re left with a new figure: 396. That’s just part of the equation though! The final touch requires adding 32 to this result.

So now take that total of 396 and add it to 32, giving you an end result of 428°F. Just like that, you’ve successfully converted from Celsius to Fahrenheit! Perfect accuracy will lead you down the path to culinary success with every recipe.

Step 3

Once you have the temperature calculated, it’s time to preheat your oven. Set it to the newly converted Fahrenheit temperature. This ensures that your dish cooks evenly from the start.

If you’re using a digital oven, simply input the number. For older models, you may need to adjust manually with knobs or dials. Check for markings so you can fine-tune it accurately.

While waiting for the oven to reach the desired heat, gather all your ingredients and equipment. Organizing everything beforehand will save time and prevent any last-minute rushes in preparation.

Now that you’re ready with both temperature and ingredients, it’s time to move on with your cooking adventure! Just remember that precision matters when converting temperatures; this can directly impact how well your recipe turns out. Stay focused on each step for perfect results every time.

Conversion of 220 C to F

Converting 220 C to F is a straightforward process that can help ensure your recipes turn out just right. Knowing the correct temperature in both scales allows you to follow international recipes accurately. Most ovens may display temperatures in Fahrenheit, making this conversion essential for home cooks around the world.

To convert 220 C to F, you can use the formula: (°C × 9/5) + 32 = °F. Applying this formula will give you a precise result of approximately 428°F. This specific temperature is often used for baking and roasting various dishes, ensuring they cook evenly and thoroughly.

Understanding how different temperature units affect cooking times and outcomes is critical. For instance, baked goods like bread or pastries might require slightly adjusted timings when switching between Celsius and Fahrenheit.

Once you’re familiar with these conversions, you’ll feel more confident experimenting with diverse cuisines from across the globe! Enjoy exploring new flavors while mastering your kitchen skills at varying temperatures.

Recommended Conversion Formula

To convert220 C to F, you can use a simple formula that makes the process easy. The formula is: F = (C × 9/5) + 32. In this case, you replace C with 220.

First, multiply 220 by 9/5. This step gives you an intermediate result of 396. Next, add 32 to this number. So, when you add them together, you’ll get a final temperature of approximately 428°F.

Using this conversion method allows for accuracy in your cooking and baking endeavors. It ensures that you’re following recipes correctly, especially if they originate from different regions using Celsius measurements.

Remembering this formula will save time and eliminate confusion in the kitchen. You can easily whip out your calculator or do it mentally as needed while preparing delicious dishes!

Benefits of Converting

Converting temperatures from Celsius to Fahrenheit can open up a world of culinary possibilities. Many recipes, especially those from the U.S., use Fahrenheit. Understanding this conversion allows you to follow diverse recipes with confidence.

Achieving accurate cooking temperatures is crucial for perfect results. When baking or roasting, even a slight deviation can impact texture and flavor. Knowing how to convert 220 C to F ensures that your dish turns out just as intended.

This skill also enhances your kitchen versatility. Whether you’re trying international dishes or experimenting with new flavors, being able to convert temperature measurements is invaluable. It empowers you in the kitchen.

Moreover, it sparks curiosity about different cooking methods worldwide. As you explore global cuisines, you’ll find an array of techniques and traditions that might require converting measurements regularly, enriching your culinary journey further.

Usage and Applications

Understanding the conversion from 220 C to F is vital for achieving perfect cooking results. Many recipes, especially those originating in the U.S., often use Fahrenheit. This conversion allows you to follow international recipes without any hassle.

In baking, precise temperature control can make a significant difference. Whether you’re roasting vegetables, baking bread, or preparing delicate pastries, knowing that 220°C translates to approximately 428°F ensures your dish cooks evenly and achieves that desired texture.

Moreover, this knowledge isn’t limited just to home kitchens. Professional chefs also rely on accurate temperature conversions when experimenting with global cuisines or sharing their culinary creations online.

As more people embrace diverse cooking techniques and styles from around the world, understanding these conversions becomes essential for enhancing skills in the kitchen and making global dishes accessible at home.

Additional Resources

When it comes to cooking, precision is key. Converting temperatures correctly can make all the difference in your culinary creations. To help you master conversions like 220 C to F, there are several resources available.

Online conversion calculators are a quick and easy option. They allow you to input Celsius values and instantly receive Fahrenheit equivalents. Cooking apps often include built-in conversion tools as well.

You might also find cookbooks that focus on international recipes helpful. Many of these provide temperature conversions within their pages. Websites dedicated to cooking tips frequently have sections on temperature conversions too.

For those who prefer hands-on learning, consider attending a local cooking class or workshop focusing on global cuisines. These environments often emphasize precise measurements for successful dishes.

With these resources at your disposal, converting 220c to f will become second nature in no time. Happy cooking!

Continue Reading

Trending