Education
Convert 40 Degrees Celsius to Fahrenheit: Complete Guide

Temperature scales are essential tools in understanding weather, cooking, and scientific measurements. One of the most common conversions people encounter is converting 40 degrees Celsius to Fahrenheit. This conversion is not just a mathematical exercise; it helps bridge the gap between two widely used temperature scales, making it easier to interpret and communicate data across regions and applications.
The Importance of Temperature Scales
Temperature is a fundamental aspect of our daily lives. Whether we’re checking the weather, baking a cake, or conducting scientific research, understanding how to interpret and convert temperature scales is critical. The Celsius and Fahrenheit scales are the most frequently used systems, and knowing how to convert between them is a valuable skill.
Celsius Scale
The Celsius scale, also known as the centigrade scale, is used worldwide and is part of the metric system. It designates 0 degrees Celsius as the freezing point of water and 100 degrees Celsius as its boiling point under standard atmospheric pressure. This intuitive scale is favored for its simplicity and alignment with the metric system.
Fahrenheit Scale
Primarily used in the United States and a few other countries, the Fahrenheit scale sets the freezing point of water at 32 degrees Fahrenheit and the boiling point at 212 degrees Fahrenheit. Developed by Daniel Gabriel Fahrenheit in the early 18th century, this scale uses a 180-degree interval between freezing and boiling points, making it distinct from the 100-degree interval of Celsius.
READ MORE:Converting 48 Celsius to Fahrenheit: Insights and Impacts
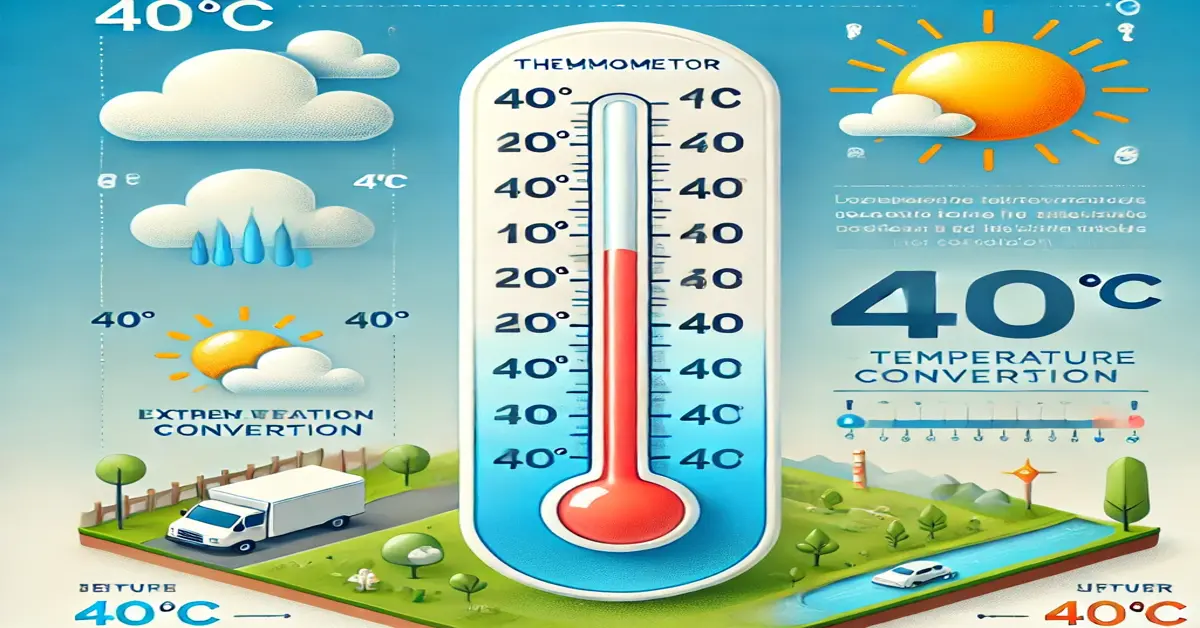
How to Convert 40 Degrees Celsius to Fahrenheit
To convert Celsius to Fahrenheit, the formula is:
°F = (°C × 9/5) + 32
For 40 degrees Celsius:
- Multiply 40 by 9/5: 40 × 9/5 = 72
- Add 32 to the result: 72 + 32 = 104
Thus, 40 degrees Celsius equals 104 degrees Fahrenheit.
This straightforward calculation provides a precise conversion, helping you understand temperatures in a different context.
Significance of 40 Degrees Celsius to Fahrenheit
A temperature of 40 Degrees Celsius to Fahrenheit is exceptionally high and has various implications:
Health Impacts
- Heat-Related Illnesses: At 40 degrees Celsius, the risk of heat exhaustion and heatstroke increases significantly. Staying hydrated and avoiding strenuous activity during peak heat is crucial.
- Vulnerable Populations: Elderly individuals, young children, and those with pre-existing health conditions are particularly at risk.
Environmental Effects
- Heatwaves: Extended periods of 40-degree temperatures can lead to heatwaves, causing droughts, wildfires, and ecological stress.
- Agriculture: High temperatures can stress crops, reduce yields, and increase the need for irrigation.
Infrastructure Challenges
- Energy Consumption: Increased reliance on air conditioning puts pressure on power grids.
- Road and Railway Damage: Prolonged heat can warp roads and railway tracks, leading to infrastructure damage.
READ MORE:35 Celsius to Fahrenheit: Learn the Conversion and Its Uses
Historical Context of Temperature Scales
The development of temperature scales was a milestone in the history of science:
- Fahrenheit Scale: Introduced by Daniel Gabriel Fahrenheit in 1724, this scale was based on reference points such as the freezing point of brine and the human body’s approximate temperature (originally set at 96°F).
- Celsius Scale: Developed by Anders Celsius in 1742, the original scale had water boiling at 0°C and freezing at 100°C. This was later reversed to its current format.
These scales reflect different approaches to measuring temperature, each with its advantages and applications.
Applications of Converting 40 Degrees Celsius to Fahrenheit
1. Travel
For travelers moving between regions that use different temperature scales, understanding how to convert temperatures is essential. Knowing that 40 Degrees Celsius to Fahrenheit can help you prepare for extreme heat.
2. Cooking
Recipes often list oven temperatures in either Celsius or Fahrenheit. Accurate conversion ensures that your dishes are cooked correctly, whether you’re following a European recipe or an American one.
3. Scientific Research
Scientists often work with Celsius but may need to interpret Fahrenheit in collaborative studies or when reviewing older research.
READ MORE:50°C to Fahrenheit: Conversion, Applications & Safety
Quick Conversion Methods
While the formula provides precise results, quick approximations can be handy:
- Celsius to Fahrenheit: Double the Celsius temperature and add 30. For 40°C, (40 × 2) + 30 = 110°F (approximate).
- Fahrenheit to Celsius: Subtract 30 from the Fahrenheit temperature and divide by 2. For 104°F, (104 – 30) / 2 = 37°C (approximate).
These methods are useful for rough estimates but should be verified with the exact formula for precision.
Global Use of Temperature Scales
Celsius Dominance
The Celsius scale is used in most countries, including Europe, Asia, and Australia. Its integration with the metric system makes it the standard for scientific and everyday applications.
Fahrenheit Usage
The Fahrenheit scale remains the standard in the United States, its territories, and a few Caribbean nations. Its historical significance and familiarity make it prevalent in these regions.
Understanding both scales is crucial for effective communication in an increasingly interconnected world.
READ MORE:Convert 20°C to Fahrenheit: Formula, Applications, and More
Tips for Handling 40 Degrees Celsius to Fahrenheit
When faced with such high temperatures, consider these tips:
- Stay Hydrated: Drink plenty of water to avoid dehydration.
- Seek Shade: Limit outdoor activities during peak heat hours.
- Wear Light Clothing: Opt for loose, breathable fabrics.
- Monitor Vulnerable Individuals: Ensure the safety of children, the elderly, and pets.
Conclusion
Converting 40 degrees Celsius to Fahrenheit reveals a temperature of 104 degrees, a significant benchmark in understanding extreme heat. This knowledge is invaluable for travelers, cooks, scientists, and anyone navigating different temperature scales. By mastering this conversion, you enhance your ability to interpret and communicate temperature data effectively.
FAQs
1. What is the formula to convert Celsius to Fahrenheit?
The formula is: °F = (°C × 9/5) + 32.
2. How hot is 40 degrees Celsius in Fahrenheit?
40 degrees Celsius equals 104 degrees Fahrenheit.
3. Why do some countries use Celsius while others use Fahrenheit?
The choice depends on historical and cultural factors. Celsius is part of the metric system, while Fahrenheit has historical roots in the U.S.
4. Is 40 degrees Celsius dangerous?
Yes, prolonged exposure to 40°C can lead to heat-related illnesses like heatstroke and dehydration.
5. Can I estimate Celsius to Fahrenheit conversions without a calculator?
Yes, approximate by doubling the Celsius temperature and adding 30. For example, 40°C is roughly 110°F.
6. Where is Fahrenheit still commonly used?
Fahrenheit is primarily used in the United States and a few other regions, such as the Bahamas and Cayman Islands.
Education
Cute Easy Drawings for Beginners: Fun & Creative Ideas

Drawing doesn’t have to be intimidating. Whether you’re a child doodling for fun or an adult looking for a calming hobby, cute easy drawings offer a perfect starting point. These fun, simple sketches don’t require professional skills—they just need a dash of creativity and a pinch of inspiration.
In this guide, we’ll explore beginner-friendly drawing ideas, essential tools, easy tutorials, and tips to level up your artistic journey, even if you’re just starting.
Why Cute Easy Drawings Are So Popular
Cute easy drawings appeal to people of all ages for a reason:
- Stress-relief: Drawing cute characters like kittens, bunnies, or smiling suns is therapeutic.
- Beginner-friendly: You don’t need technical knowledge—just basic shapes and imagination.
- Instagrammable: Simple doodles often go viral on social media platforms.
- Fun & approachable: Great for kids, art therapy, or just passing time creatively.
Plus, the rise of aesthetic journals and bullet journaling has made easy cute doodles a must-try trend.
Tools You’ll Need to Get Started
Getting into drawing doesn’t require expensive materials. Here’s what you need:
- Pencils (HB, 2B): For sketching soft outlines
- Eraser: Preferably a kneaded eraser to avoid smudging
- Sketchbook or plain paper
- Fine liners or markers: For inking outlines
- Color pencils or markers: To bring your drawings to life
Optional:
- Drawing apps like Procreate or Sketchbook if you’re going digital
Top 10 Cute Easy Drawings You Can Try Today
Here are some adorable and simple ideas for cute easy drawings to get your sketching journey started:
- Baby animals (puppies, kittens, bunnies)
- Chibi characters (tiny anime-style people)
- Food with faces (kawaii sushi, donuts, fruits)
- Cartoon clouds, stars, and moons
- Tiny dinosaurs or dragons
- Cute seasonal items (pumpkin with a face, snowman, ice cream)
- Sleeping cats and dogs
- Penguins in scarves
- Magical creatures (unicorns, fairies)
- Cactus with smiley faces
These ideas use basic shapes like circles and ovals, so they’re great for all skill levels.
Step-by-Step Drawing Tutorials
Let’s go through a few easy tutorials for popular cute doodles.
Easy Cat Drawing
- Draw a round head.
- Add two triangle ears.
- Sketch two circles for eyes.
- Add a tiny “3” shape for the mouth.
- Finish with whiskers and a little tail.
Cute Donut with a Face
- Draw a large circle with a smaller one inside.
- Create wavy frosting on top.
- Add small dots for sprinkles.
- Draw two big oval eyes and a tiny “u” for the mouth.
- Use soft colors to shade.
Kawaii Rainbow
- Draw three to four arcs to form a rainbow.
- Add a fluffy cloud on each end.
- Give the clouds little smiling faces.
- Color the rainbow with pastel tones.
Tips to Improve Your Drawing Skills
You don’t need to be born an artist to get better. Here’s how:
- Draw daily, even if it’s just 5 minutes
- Use references from Pinterest or YouTube tutorials
- Break objects into simple shapes (circle, square, triangle)
- Try tracing first to understand proportion
- Join online drawing challenges (like Inktober or Doodlewash)
Most importantly: don’t aim for perfection—aim for progress.
Real-Life Examples & Inspiration
Real people are turning cute easy drawings into passion projects and businesses:
- Instagram artists like @doodlemeeple post viral simple art daily.
- Teachers use simple sketches for student engagement.
- Parents doodle with kids for bonding and motor skill development.
- Freelancers sell cute illustrations on Etsy as stickers, prints, and coloring pages.
You can even use your sketches in bullet journals, greeting cards, or as digital art for social media.
Conclusion
Cute easy drawings are more than just doodles—they’re a doorway into creativity, mindfulness, and personal expression. Whether you’re an aspiring artist or just doodling for fun, these drawings offer a relaxing way to explore your imagination.
So grab your sketchbook, start with a smiling donut or sleepy kitten, and let your creative journey begin. Remember, it’s not about perfection—it’s about having fun.
FAQs
Q1: What are the easiest things to draw for beginners?
A: Start with basic shapes like hearts, stars, clouds, and cartoon animals like cats, bunnies, or pandas.
Q2: How can I make my cute easy drawings?
A: Use round shapes, big eyes, pastel colors, and simple smiling faces. The “kawaii” style is a great reference.
Q3: Are there apps for learning cute drawings?
A: Yes! Try Procreate (iPad), Sketchbook (Android), or How to Draw Cute Things app for guided tutorials.
Q4: Can I turn my cute drawings into a business?
A: Absolutely. Many artists sell their art as digital prints, stickers, or even NFTs.
Q5: How often should I practice to get better?
A: Even 10 minutes daily can help build consistency and improve your sketching skills over time.
Call-To-Action
Ready to start your drawing adventure?
Share your favorite sketch in the comments or tag us on social media using #CuteEasyDrawings!
Want more art tips and tutorials? Subscribe to our newsletter for weekly creative inspiration.
Education
8mm to Inches Conversion Guide: Quick & Accurate Tips

Whether you’re working on a DIY project, buying hardware, dealing with product specs, or sewing a garment, precise measurements matter. Many countries use the metric system (millimeters, centimeters, meters), while the U.S. and a few others rely on the imperial system (inches, feet). This often creates confusion, especially with small measurements like 8mm. Understanding how to convert 8mm to inches bridges this gap and ensures accuracy.
The Quick Answer: What is 8mm to Inches?
8 millimeters = 0.31496 inches (rounded to 5 decimal places)
To make it simpler: 8mm ≈ 0.315 inches
This tiny number can make a big difference, especially in technical or professional settings. Let’s dive deeper into the math behind this conversion.
Understanding the Metric vs. Imperial Systems
The metric system is decimal-based and used by most of the world. It’s precise, consistent, and based on powers of 10. The imperial system, on the other hand, is rooted in older measurements and is still commonly used in the U.S.
System | Unit | Equivalent |
---|---|---|
Metric | Millimeter (mm) | 1/1000 of a meter |
Imperial | Inch | 1/12 of a foot |
When dealing with small measurements like 8 millimeters, the differences between these systems become more noticeable.
Conversion Formula: 8mm to Inches Explained
To convert 8mm to inches, use this simple formula:
inches = millimeters ÷ 25.4
Example:
CopyEdit8 ÷ 25.4 = 0.31496 inches
So, 8mm is equal to 0.31496 inches.
Here are a few other useful conversions for context:
- 1 mm = 0.03937 inches
- 5 mm = 0.19685 inches
- 10 mm = 0.39370 inches
8mm to Inches Chart for Quick Reference
Millimeters (mm) | Inches (in) |
---|---|
1 mm | 0.03937 in |
5 mm | 0.19685 in |
8 mm | 0.31496 in |
10 mm | 0.39370 in |
12 mm | 0.47244 in |
15 mm | 0.59055 in |
Having a chart like this saves time when you’re converting on the go.
Common Uses of 8mm in Daily Life
You’d be surprised how often 8mm shows up in everyday situations:
- Jewelry sizes: Chains, rings, and earrings often list sizes in mm.
- Camera lenses: 8mm lenses are popular in vintage or action cameras.
- Bolts and nuts: Many metric fasteners are 8mm in diameter.
- Pens and tools: Pen barrel diameters and drill bits often measure 8mm.
- Home improvement: Tiles, spacers, or wood panels may come in 8mm thickness.
8mm in Inches: Real-Life Object Comparisons
To give you a better feel for what 8mm looks like, here are some relatable comparisons:
- Standard pencil lead = approx. 7–8mm in diameter
- A stack of 8 sheets of paper = close to 8mm thick
- Two stacked nickels = around 7.9mm thick
- A woman’s wedding band = often around 6–8mm wide
These visuals help make the abstract number more tangible.
Digital Tools for Conversion
While it’s great to understand the manual formula, you can also use:
Conversion Tools:
- Google Search: Just type “8mm to inches” and Google gives the answer instantly.
- Online Calculators: Tools like RapidTables or UnitConverters.net.
- Mobile Apps: Apps like “Unit Converter” or “ConvertPad” are handy on the go.
These tools are helpful when dealing with odd values like 8.4mm, 8.75mm, or precision measurements in engineering or crafting.
Why Precision Matters in Measurement
Accurate conversion isn’t just about numbers—it’s about avoiding costly errors.
Here’s how incorrect conversions can affect real-life scenarios:
- Construction: An error of even 1mm can throw off the alignment of tiles or panels.
- Mechanical engineering: An 8mm bolt won’t fit into a 5/16″ (7.9375mm) hole.
- Fashion design: Small sizing mistakes can alter how a garment fits.
- 3D printing: Precision down to the millimeter ensures your model prints correctly.
Bottom line: Don’t round too much unless it’s for casual purposes.
Conclusion: Measure Smart, Stay Accurate
Converting 8mm to inches may seem minor, but it plays a significant role in accurate measurements across many industries. Knowing that 8mm equals approximately 0.315 inches helps you bridge the gap between the metric and imperial systems confidently.
Whether you’re building, crafting, or shopping online, always double-check your measurements!
FAQs: 8mm to Inches Conversion
Q1: Is 8mm less than half an inch?
Yes, 8mm is about 0.315 inches, which is less than 0.5 inches (1/2 inch).
Q2: How do I convert 8mm to inches without a calculator?
Use the rule of thumb:
1 mm ≈ 0.04 inches
So, 8mm ≈ 8 x 0.04 = 0.32 inches
Q3: Why is the conversion factor 25.4?
Because 1 inch is defined as exactly 25.4 millimeters by international agreement since 1959.
Q4: What’s the difference between 8mm and 5/16 inch?
- 8mm = 0.315 inches
- 5/16 inch = 0.3125 inches
They are very close but not identical. Use the right one for exact fits.
Q5: Can I use 8mm and 5/16 inch interchangeably?
In casual use, maybe. But in precision work like carpentry, mechanics, or engineering, use the correct size.
Call-to-Action
Found this guide helpful? Share it with your friends, bookmark it for future use, or leave a comment below!
Want more quick measurement guides? Subscribe to our newsletter for tips, charts, and tools sent to your inbox weekly!
Education
Wolf Drawing: Techniques for Realistic and Easy Sketches

Drawing a wolf can be a rewarding artistic challenge, whether you’re a beginner or an experienced artist. Wolves have a majestic, powerful appearance, making them a favorite subject for wildlife drawings. This guide will walk you through the essential steps, techniques, and tips to create a realistic wolf drawing. From sketching basic shapes to refining fur details and expressive eyes, you’ll learn how to bring your wolf artwork to life.
Tools and Materials for Wolf Drawing
Before starting your wolf drawing, gather the right materials. The choice of tools depends on your preferred drawing style, whether it’s pencil sketching, ink drawing, or digital art.
Recommended Tools:
- Pencils: HB, 2B, 4B, and 6B for shading and depth.
- Erasers: Kneaded erasers for soft corrections and precision erasers for fine details.
- Blending tools: Tortillons, tissue paper, or cotton swabs for smooth shading.
- Fine liners or ink pens: For a defined, stylized look.
- Digital drawing tablet: If working in Procreate, Photoshop, or another digital medium.
Step-by-Step Guide to Drawing a Wolf
Step 1: Sketch Basic Shapes
Start with simple shapes to define the wolf’s structure. Use:
- A large oval for the head.
- A slightly elongated oval for the snout.
- Triangle shapes for the ears.
- Basic circles for the body structure.
Step 2: Outline the Wolf’s Features
- Sketch light guidelines for facial symmetry.
- Define the placement of the eyes, nose, and mouth.
- Adjust the ears for accurate positioning.
Step 3: Refine the Face and Add Details
- Draw the almond-shaped eyes with an intense gaze.
- Add the nose with slight shading for a wet, reflective look.
- Sketch the mouth slightly open or closed for expression.
Step 4: Define the Fur Texture
- Use short, directional pencil strokes to simulate fur.
- Layer different shades to create depth and realism.
- Focus on fur flow, especially around the neck and face.
Step 5: Add Shading and Depth
- Identify a light source to guide your shading.
- Use a blending tool for smooth transitions.
- Darken shadows around the snout, ears, and fur creases for dimension.
Step 6: Final Touches
- Erase unnecessary guidelines.
- Deepen dark areas for contrast.
- Add highlights to the eyes and nose for a lifelike effect.
Tips for a Realistic Wolf Drawing
1. Study Wolf Anatomy
- Observe real-life wolf photos.
- Understand their skeletal and muscular structure.
- Pay attention to fur patterns and density.
2. Experiment with Different Poses
- A standing wolf shows strength and alertness.
- A howling wolf adds drama and emotion.
- A resting wolf captures calmness and serenity.
3. Use References
- Look at wildlife photography.
- Study other artists’ techniques.
- Practice sketching from different angles.
4. Digital vs. Traditional Drawing
- Digital tools offer easier corrections and layering.
- Pencil drawings provide texture and depth through shading.
- Experiment with both to find your style.
Conclusion
Drawing a wolf requires patience and practice, but with the right techniques, anyone can create stunning artwork. By mastering anatomy, fur texture, and shading, you can bring your wolf drawings to life. Grab your sketchpad, follow these steps, and start drawing today!
Frequently Asked Questions (FAQs)
- 1. How can I make my wolf drawing look more realistic?
Focus on accurate proportions, detailed fur texture, and expressive eyes.
- 2. What is the hardest part of drawing a wolf?
Capturing the fur texture and facial expression can be challenging but improves with practice.
- 3. Can beginners draw wolves easily?
Yes! Start with basic shapes, practice shading, and gradually refine details.
- 4. What’s the best way to learn wolf drawing?
Use reference images, follow step-by-step guides, and practice regularly.
- Entertainment3 months ago
Celebrity Movie Archives: Hidden Gems and Iconic Performance
- Entertainment3 months ago
Javrank: Guide to Adult Entertainment & Innovative Features
- Uncategorized1 month ago
Board and Batten Siding: Styles, Costs & Benefits Explained
- Technology2 months ago
BeTechIT.com Contacts: For 24/7 Effortless Tech Solutions
- Technology2 months ago
InfluencersGineWuld: Revolutionizing Influencer Marketing for Brands
- Business3 weeks ago
Fintechzoom.com dax40 : Insights & Trends and Updates
- Games3 months ago
Snokido: The Ultimate Online Gaming Hub for All Ages
- LifeStyle3 months ago
CumonPrintedPics: Personalized Prints and Creative Platform