Fashion
Microblading 101: Everything Need to Know for Perfect Brows
Are you tired of filling in your brows every morning or dealing with uneven patches? You’re not alone. Microblading has taken the beauty world by storm, offering a semi-permanent solution to achieve the perfect arches without daily hassle. If you’ve been considering this game-changing treatment but are unsure what to expect, you’re in the right place. We’ll guide you through everything from understanding what microblading is and who can benefit from it, to navigating your first session like a pro. Say goodbye to brow woes and hello to effortlessly stunning eyebrows!
What is Microblading?
Microblading is a semi-permanent cosmetic tattooing technique designed to enhance the appearance of your eyebrows. Unlike traditional tattoos, microblading uses a handheld tool with tiny needles to create fine, hair-like strokes that mimic natural brow hairs. This results in fuller brows that look lush and realistic.
The process involves depositing pigment into the upper layer of skin, allowing for beautifully defined shapes tailored to each individual’s facial features. It’s an art form as much as it is a beauty treatment.
One of the most appealing aspects of microblading is its longevity; results typically last between one to three years before any touch-ups are needed. However, factors such as skin type and aftercare can affect how long your brows stay flawless.
Whether you have sparse eyebrows or simply wish to refine their shape, microblading offers a personalized solution that enhances your natural beauty without looking overdone. It’s become a go-to option for anyone wanting effortlessly perfect brows every day.
READ MORE:Pink Pearls are Classic Ones: Discover Timeless Elegance
Who is a Good Candidate for Microblading?
Microblading is an excellent option for many, but not everyone. Ideal candidates typically have sparse or thinning eyebrows and wish to enhance their shape. Those who want a more defined look without the daily hassle of makeup find microblading particularly appealing.
Individuals with oily skin may experience different results due to excess oil affecting pigment retention. It’s essential to consult with your technician if you fall into this category, as they can offer tailored advice based on your skin type.
People with certain medical conditions should also approach microblading cautiously. If you’re on blood thinners or have autoimmune disorders, it’s crucial to disclose this in your initial consultation.
Pregnant or nursing women are often advised against undergoing the procedure due to potential hormonal fluctuations and sensitivity issues that can affect healing and results. A thorough discussion with a professional will help determine if microblading is right for you.
Understanding the Process
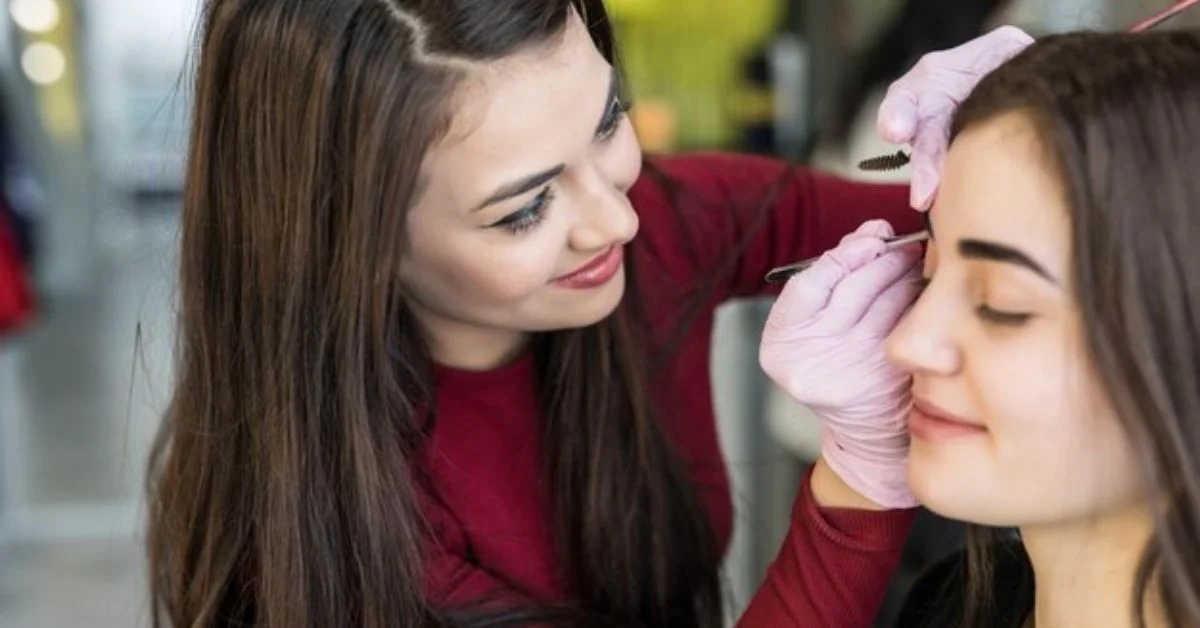
Microblading is an intricate art form that requires precision and skill. During your first session, the technician will start by assessing your natural brow shape and color. They’ll discuss your desired look with you to ensure both parties are on the same page.
Once everything is set, a topical numbing cream is applied to minimize discomfort. After waiting for it to take effect, the artist uses a specialized tool with tiny needles to create hair-like strokes in the skin. This technique mimics natural eyebrow hairs to achieve a fuller appearance.
The process typically lasts between two to three hours. It’s essential during this time that you remain relaxed and communicate openly with your technician about any concerns or preferences.
After completing the microblading, they may apply an ointment and give you detailed aftercare instructions. You’ll leave excited about your new brows while understanding that patience is key as they heal over time.
Microblading Costs and Expectations
Microblading costs can vary significantly based on location, the artist’s experience, and the complexity of your desired look. On average, you might expect to pay between $300 to $800 for a session. This investment includes not only the initial procedure but often a touch-up appointment within 6-8 weeks.
It’s essential to remember that microblading is considered semi-permanent makeup. The results can last anywhere from one to three years, depending on factors like skin type and aftercare habits. Because of this longevity, many find it worth the expense compared to regular trips for brow pencils or powders.
When budgeting for your microblading journey, consider additional costs such as aftercare products and follow-up sessions. Quality work usually comes with a price tag because experienced artists utilize high-quality pigments and tools.
Being clear about what you want before starting will help set realistic expectations. Researching styles and discussing them with your artist ensures you leave with brows you’ll love long-term.
READ MORE:10 Amazing Uses of Agua Oxigenada for Home, Beauty & More
Pain Level and Healing Time
Microblading is often perceived as a daunting procedure, especially when it comes to pain. However, many clients report that the discomfort is minimal. Most artists apply a topical numbing cream prior to starting the microblading process, which significantly reduces any sensation you may experience during the treatment.
The procedure itself typically lasts between one and two hours. You might feel some slight scratching or pinching sensations, but these should be manageable. Each individual’s pain threshold varies, so experiences can differ from person to person.
After your session, it’s common for brows to appear slightly swollen or red—similar to what you’d expect after an eyebrow tinting appointment. This usually subsides within a few hours.
Healing time varies too; generally, initial healing occurs in about 7-14 days. During this period, your brows might flake or scab as they heal naturally. It’s essential to follow post-care instructions for optimal results and longer-lasting beauty.
Preparing for Your Microblading Appointment
Preparing for your microblading appointment is crucial for achieving the best results. Start by researching reputable artists in your area. Look at their portfolios and read reviews to ensure they have a solid track record.
A week before your session, avoid blood thinners like caffeine and alcohol. These can increase bleeding during the procedure, affecting the final outcome. Hydrating your skin in advance will also help; drink plenty of water and use a good moisturizer.
On the day of your appointment, arrive with clean brows—no makeup or skincare products should be applied. This lets your artist work on a fresh canvas without any barriers that could interfere with the process.
Consider bringing some comfort items, such as headphones or a stress ball. While most people report only mild discomfort during microblading, having something familiar can ease any anxiety you might feel leading up to this exciting transformation.
Post-Care Instructions
After your microblading session, proper care is essential for achieving the best results. Start by gently cleaning your brows with a mild soap and water mixture. Pat them dry softly with a clean towel to avoid irritation.
Avoid getting your brows wet for at least 7 days post-treatment. This means no swimming or steaming in saunas, as excess moisture can affect the healing process and pigment retention.
Moisturizing is key during this time; however, steer clear of any heavy creams or oils directly on the brow area. Instead, use an aftercare ointment recommended by your technician to keep the skin hydrated without overwhelming it.
Resist the urge to pick at scabs or flakes that may form as your eyebrows heal. Allowing them to fall off naturally ensures that you maintain those crisp lines created during microblading.
Finding the Right Expert
Choosing the right expert for your microblading journey is crucial. Start by doing some research. Look online for local artists, read reviews, and check their portfolios. A skilled technician should have before-and-after photos that showcase their work.
Next, consider scheduling consultations with a few different professionals. This gives you an opportunity to ask questions and get a feel for their approach. Pay attention to how they communicate and whether they make you feel comfortable.
It’s also essential to verify their certifications and training. Ensure they are licensed in your state and have completed accredited courses in microblading techniques. A well-trained artist will prioritize safety and hygiene during the process.
Trust your instincts when making this decision. Your comfort level matters immensely; it’s about finding someone whose style aligns with your vision while ensuring that you’re in capable hands throughout the entire experience.
READ MORE:Best Disposable Vapes: Top Picks for Flavor & Performance
Final Thoughts
Microblading is a game-changer for those looking to enhance their brows and simplify their beauty routine. If you’ve been curious about the process, it’s essential to approach it with an open mind and realistic expectations. Remember that every experience is unique; your results will depend on various factors, including skin type, aftercare, and the skill of your technician.
Preparing properly can help you achieve the best possible outcome. Take time to research experts in your area and don’t hesitate to ask questions during consultations. Being informed empowers you as a client.
Aftercare plays a crucial role in preserving the quality of your microblading results. Be diligent about following post-care instructions to ensure longevity while allowing your new brows time to heal gracefully.
Whether you’re seeking perfectly shaped arches or simply wanting fuller brows without makeup hassle, microblading could be just what you’re looking for. Embrace this beauty trend confidently as you embark on this exciting journey toward fabulous brows!
Fashion
Granny Square Patterns: A Creative Guide for Crochet Lovers
Granny squares Patterns are more than just nostalgic patches of crochet; they are a canvas for creativity and expression. Whether you’re an experienced crocheter or just starting out, mastering the art of granny squares opens up a world of possibilities. These colorful motifs can be used in various projects, from cozy blankets to stylish bags.
As we dive into this step-by-step guide, you’ll discover how easy it is to create stunning designs with simple stitches. Get ready to explore different Granny square patterns, techniques, and tips that will elevate your crafting game. Grab your hook and yarn—let’s embark on this delightful journey into the vibrant realm of granny square patterns!
Granny Square Patterns
Granny square patterns come in a delightful array of styles and designs. From classic motifs to modern twists, there’s something for everyone. Each pattern typically consists of repetitive stitches that create unique textures and colors.
Many beginners start with the traditional solid granny square. It’s simple yet allows for variations in color schemes. Once comfortable, you can experiment with more intricate designs like flower squares or lacey variations.
Mixing different patterns can lead to stunning results too! Consider combining large squares with smaller ones or adding borders for flair. The possibilities are endless, making it easy to personalize your projects while showcasing your creativity through each stitch.
Post navigation
Navigating through a blog can enhance your experience, especially when exploring the delightful world of Granny square patterns. Each post often includes links to related articles or guides that dive deeper into various crochet techniques. This makes it easier for you to find inspiration and learn new skills.
The “Post Navigation” section usually appears at the end of an article, providing quick access to other relevant posts. It helps keep your creativity flowing by connecting you with a variety of topics.
Taking advantage of these links allows you to broaden your understanding and refine your craft. You might stumble upon unique patterns or techniques that spark fresh ideas for your next project!
Similar Posts
If you’re diving into the world of Granny square patterns, there are plenty of related topics that can enhance your journey. Explore other crochet techniques and discover how they complement this beloved pattern. From amigurumi to tapestry crochet, these variations add depth to your skills.
You might also find interest in color theory for crochet projects. Understanding how colors interact can elevate your granny square designs significantly. Experimenting with different shades will keep your creations fresh and exciting.
Don’t forget about project ideas! Whether you’re crafting a cozy blanket or decorative coasters, there’s an endless array of possibilities using granny square patterns. Each piece is an opportunity to showcase your creativity while honing your craft further.
Comments
Comments are a vital part of any creative community. They offer a space for crafters to connect, share experiences, and ask questions about granny square patterns. Engaging with others can inspire new ideas and techniques.
When you post your project or question, don’t hesitate to invite feedback. Constructive criticism can enhance your skills and lead to beautiful results. Plus, sharing your successes encourages others in their crochet journey.
Remember to be supportive too! Offering encouragement fosters a positive environment where everyone feels valued. The more we share our thoughts, the richer the crafting experience becomes for all involved. Join the conversation today; you might just spark someone else’s creativity!
Introduction to Granny square patterns
Granny square patterns are a timeless crochet staple that has captured the hearts of crafters for generations. These delightful little motifs can be mixed and matched to create a variety of projects, from blankets to bags. Their versatility makes them perfect for beginners and seasoned crocheters alike.
The beauty of granny squares lies in their simplicity. With just a few stitches, you can create intricate designs that showcase your creativity. They come in countless colors and patterns, allowing endless possibilities for personal expression.
Whether you’re looking to make something cozy or vibrant, granny squares provide an excellent foundation. Each square tells its own story while contributing to a larger masterpiece—inviting both nostalgia and innovation into every stitch.
Essential Tools and Materials
To dive into the world of Granny square patterns, having the right tools and materials is crucial. Start with a good quality crochet hook. Sizes vary, but most beginners find a 5mm (H/8) hook ideal for standard yarn.
Next up is yarn. Choose medium-weight cotton or acrylic in vibrant colors to bring your granny square pattern to life. Remember that different textures can create unique effects, so don’t hesitate to experiment with various fibers.
Keep a pair of scissors and a yarn needle handy for weaving in ends once your squares are complete. A measuring tape may also help ensure consistent sizing for those perfect little squares you’re aiming for!
Getting Started with Granny Squares
Getting started with granny squares is both exciting and simple. Begin by choosing your yarn and hook size, as the thickness will influence your square’s appearance. Cotton or acrylic yarn works best for beginners due to their durability.
Next, familiarize yourself with basic crochet stitches: chain stitch, slip knot, double crochet, and slip stitch. These are essential building blocks for creating your first granny square pattern.
Once you have gathered materials and practiced the stitches, it’s time to dive into a beginner-friendly pattern. Follow along with online tutorials or written instructions to guide you through each step. With practice comes confidence; before long, you’ll be crafting beautiful squares in no time!
Crochet Techniques
Mastering crochet techniques is essential for creating beautiful Granny square patterns. Familiarize yourself with basic stitches like the chain, slip stitch, and double crochet. These are the building blocks of any granny square pattern.
Once you’re comfortable with these stitches, practice changing colors smoothly. This adds depth and vibrancy to your designs. Always remember to carry the yarn behind your work when switching colors to keep everything neat.
Another technique worth exploring is tension control. Keeping an even tension ensures that all your squares are uniform in size, making it easier to join them later on. Experiment with different hooks until you find one that feels just right for your grip and style.
Tips for Perfect Granny Squares
To create perfect Granny square patterns, start with a consistent tension. This ensures each stitch is uniform and your squares lie flat. If you’re struggling with tension, practice on scrap yarn until you find the right balance.
Next, choose high-quality yarn that suits your project. Soft cotton or acrylic blends work well for beginners and seasoned crafters alike. Vibrant colors can enhance your design but stick to a palette that speaks to you.
Pay attention to counting stitches accurately as you crochet. Keeping track of your rounds prevents uneven edges and maintains the integrity of the square’s shape. A stitch marker can be incredibly helpful in marking important points in your pattern.
Advanced Granny Square Designs
Advanced Granny square patterns designs open up a world of creativity. You can mix colors, textures, and patterns to create stunning visual effects. Experimenting with different yarn types adds depth and richness to your projects.
Consider exploring motifs beyond the traditional squares. Hexagons, triangles, or even circular shapes can elevate your work. Combining these shapes in one project will challenge your skills while producing unique results.
Incorporating lacework into granny squares is another exciting avenue. Delicate stitches add elegance and complexity that capture attention. The possibilities are endless when you push boundaries and try new techniques in your advanced granny square patterns.
Joining Your Granny Squares
Joining your granny squares can transform individual pieces into a cohesive masterpiece. There are several methods to consider, each offering unique effects and textures. The whip stitch, slip stitch, and even crocheting them together create different visual results.
To start, lay out your squares in the desired arrangement. This step helps visualize the final product and ensures you’re happy with the design before stitching. Once satisfied, choose your preferred joining method based on aesthetics or ease of use.
As you join, remember to maintain consistent tension for a polished look. Take your time; it’s not just about speed but also ensuring each square connects seamlessly for that perfect finish every crafter dreams of achieving.
Finishing Touches and Beyond
Once you’ve joined your granny squares and created a stunning piece, it’s time for the finishing touches. Weaving in ends helps give your project a polished look. Take care with this step; it makes all the difference.
Consider adding borders to enhance your design further. A simple single crochet or a more intricate shell stitch can elevate the overall appearance of your work.
Additionally, think about how you’ll use or display your finished project. Whether it’s a cozy blanket, handbag, or decorative wall hanging, each option offers unique opportunities for creativity.
Don’t forget to share your creations! Join online communities and showcase what you’ve made using different granny square patterns. You’ll find inspiration and support from fellow crafters who are excited about their own projects too.
So grab those hooks and yarn—your journey with granny squares has only just begun!
Fashion
UndressAI Tools: AI-Powered Personal Styling & Outfit
In a world where artificial intelligence is reshaping countless industries, the fashion realm is no exception. Enter UndressAI Tools, a game-changer that merges technology with personal style in ways we once only dreamed about. Whether you’re looking to elevate your wardrobe or simply want to experiment with new looks, this innovative tool opens doors for creativity and self-expression.
Imagine having access to an AI assistant that understands not just trends but also your unique preferences. With UndressAI Tools, users can navigate through endless fashion possibilities while receiving personalized recommendations tailored just for them. It’s not just about dressing up; it’s about discovering who you are through the art of clothing.
As we dive deeper into this fascinating tool and its alternatives, prepare to explore features that make styling easier than ever before. From understanding how it works to uncovering practical use cases, you’ll see how AI is revolutionizing our relationship with fashion—one outfit at a time!
What is UndressAI Tools?
UndressAI Tools is an innovative platform that harnesses the power of artificial intelligence to redefine personal style. It offers users a unique experience, blending technology with fashion in ways that were once unimaginable. Imagine having a digital assistant that not only understands current trends but also analyzes your individual preferences.
At its core, UndressAI Tools employs machine learning algorithms to curate personalized outfit suggestions for users. By analyzing factors such as body type, color preferences, and even occasion-specific needs, it provides tailored recommendations you can rely on. No more guesswork or endless scrolling through clothing racks!
The tool’s user-friendly interface makes navigating through various features effortless. It invites users to explore different styles while encouraging experimentation without fear of mismatches. Whether you’re aiming for casual chic or sophisticated elegance, this AI-powered assistant has got your back.
Moreover, UndressAI Tools continuously learns from user interactions. As you input feedback on outfit choices and selections you like or dislike, the system adapts its recommendations accordingly over time. This means the longer you use it, the better it becomes at understanding what works best for you.
Another standout feature is its ability to visualize outfits before putting them together physically. With advanced virtual try-on capabilities, users can see how garments may look on them without stepping foot in a store or trying things on in front of a mirror.
In essence, UndressAI Tools is all about making fashion accessible and enjoyable by leveraging cutting-edge technology to empower individuals in their styling journey.
Exploring UndressAI Tools Alternatives and Related Tools
When delving into the realm of personal styling and AI, it’s essential to explore alternatives and related tools that complement UndressAI Tools. The digital landscape is rich with innovations aimed at enhancing how we perceive fashion.
One noteworthy alternative is Fashmates. This platform allows users to create outfits by mixing and matching clothing items from various brands. It offers a social component where aspiring stylists can share their looks, making it perfect for those who enjoy community engagement alongside personal style.
Another strong contender is Stitch Fix. Unlike traditional shopping experiences, this service employs data-driven algorithms coupled with human stylists to curate personalized boxes of clothing tailored to individual tastes. Customers receive curated options regularly, which adds an element of surprise each time they open a new package.
For fashion enthusiasts who love visual inspiration, Pinterest remains invaluable. Users can discover endless outfit ideas by searching for specific styles or trends. By pinning favorite looks, individuals can craft mood boards that reflect their unique aesthetic preferences.
Then there’s Lookiero, a styling service designed primarily for women seeking convenience in their wardrobe choices. Clients fill out an online style quiz and receive hand-picked outfits delivered right to their doorsteps—no more endless scrolling through e-commerce sites required!
Consider Polyvore as another engaging tool for creating outfit collages using pieces from different retailers. Though its original format has evolved over time since its closure in 2018, many similar platforms have emerged inspired by its concept—allowing creativity without limits when designing fashionable ensembles.
Top 5 UndressAI Tools Features
UndressAI Tools stands out for its impressive array of features that seamlessly integrate artificial intelligence with personal style. One of the most notable aspects is its virtual fitting room technology. This feature allows users to try on clothes virtually, eliminating the hassle of returning ill-fitting items.
Another appealing element is the AI-driven style recommendations. By analyzing user preferences and current trends, UndressAI Tools suggests outfits tailored to individual tastes. This personalization makes choosing an outfit much more enjoyable and less stressful.
The platform also excels in fabric simulation. Users can visualize how different materials drape and fit without having to see or touch a physical garment. This capability helps shoppers make informed decisions based on their unique body shapes and sizes.
Additionally, UndressAI Tools offers a powerful wardrobe management tool. It enables users to catalog their existing clothing pieces, making it easier to mix and match outfits effortlessly. With this feature, users can maximize their wardrobe’s potential while minimizing unnecessary purchases.
Collaboration features are another highlight worth mentioning. Users can share their favorite looks with friends or even get feedback from fashion experts within the community—fostering a sense of belonging among like-minded individuals passionate about fashion.
Accessibility is at the forefront of UndressAI Tools’ design ethos. The platform aims to cater not just to fashionistas but also everyday individuals looking for styling solutions that fit diverse lifestyles and budgets.
Top 5 UndressAI Tools Use Cases
UndressAI Tools is revolutionizing how we perceive personal style. One of the standout use cases lies in virtual fitting rooms. Users can try on outfits digitally, which eliminates the hassle of returns and enhances online shopping experiences.
Another compelling application is personalized fashion recommendations. The AI analyzes user preferences and body types to suggest garments that best suit individual tastes. This tailored approach encourages more confident clothing choices.
Fashion designers also benefit from UndressAI Tools by streamlining their design process. They can visualize how garments will look on various body shapes before finalizing designs, saving time and resources during production.
Social media influencers find immense value in creating engaging content with this tool. By showcasing different outfit combinations using AI-generated visuals, they elevate their posts while providing followers with fresh styling ideas.
Brands utilize UndressAI for targeted marketing campaigns. By integrating user data into promotional strategies, businesses can reach audiences more effectively and boost conversion rates through personalized ads based on consumer behavior patterns.
These diverse applications illustrate how UndressAI Tools is at the forefront of integrating artificial intelligence with personal style, making it an invaluable resource for users across various sectors.
Final Thoughts
As we navigate the evolving landscape of personal style, tools like UndressAI Tools provide valuable insights. By leveraging cutting-edge artificial intelligence, users can enhance their wardrobe choices and embrace trends that resonate with their individuality. The seamless integration of technology into fashion makes this tool an essential companion for anyone looking to refine their appearance.
While UndressAI is a standout option in its field, exploring alternatives and related tools expands your options. Each platform offers unique features that cater to different needs. From AI-driven outfit suggestions to virtual fitting rooms, the possibilities are vast and exciting.
The features of UndressAI Tools stand out as remarkable resources for both novices and seasoned fashion enthusiasts. Its ability to analyze body types, suggest complementary colors, and predict upcoming trends ensures that your style remains fresh and relevant.
Use cases abound; whether you’re preparing for a significant event or simply refreshing your daily wear, these tools empower you with confidence in every choice you make. The practicality they offer fosters creativity while alleviating decision fatigue commonly associated with dressing up.
Embracing technology in fashion isn’t just about convenience—it’s about self-expression too. As more individuals turn toward platforms like undressai.tools for guidance on their stylistic journeys, we’re sure to see an ongoing evolution in how we perceive personal style at large. This intersection between AI innovation and individual flair holds promising potential as it continues shaping our wardrobes today and into the future.
Fashion
Ultimate Guide to Microneedling: Benefits, Prep, and Results
Microneedling has taken the beauty world by storm, promising a plethora of skin benefits with minimal downtime. If you’ve been scrolling through Instagram or any skincare blog lately, you’ve likely come across this trending treatment. But what exactly is microneedling? Is it right for you? And how can you prepare to get the most out of your session?
Whether you’re looking to diminish fine lines, reduce acne scars, or simply achieve that coveted glow, understanding microneedling is crucial before diving in. This guide will walk you through everything from expectations and preparation to risks and finding the perfect dermatologist for your needs. Ready to unlock smoother, rejuvenated skin? Let’s explore what microneedling can do for you!
Understanding Microneedling
Microneedling is a minimally invasive procedure that involves using tiny, sterile needles to create micro-injuries in the skin. These controlled injuries stimulate the body’s natural healing process and collagen production. As a result, microneedling can improve texture, firmness, and overall appearance.
The treatment is often performed with a device called a pen or roller designed specifically for this purpose. The depth of penetration can vary based on individual skin concerns and desired outcomes. This adaptability makes microneedling suitable for various skin types.
Many people seek out microneedling to address specific issues such as fine lines, wrinkles, acne scars, and enlarged pores. It’s also effective at enhancing product absorption during skincare routines since it opens up channels in the skin’s surface.
While results may not be immediate—most individuals notice improvements after several sessions—the long-term benefits are undeniably appealing. With proper care before and after treatments, many find themselves enjoying smoother, more youthful-looking skin over time without surgical intervention.
Microneedling Results and Expectations
Microneedling is renowned for delivering transformative results, but understanding what to expect can help set realistic goals. Many clients notice improvements in skin texture and tone within a few days following their session. However, optimal results typically manifest after several weeks as collagen production increases.
The number of sessions you’ll need depends on your skin concerns. For issues like fine lines, acne scars, or enlarged pores, practitioners often recommend multiple treatments spaced a month apart. This gradual approach allows the skin to heal and regenerate between sessions.
Post-treatment redness and sensitivity are common but usually subside within 24 to 48 hours. During this recovery period, it’s crucial to avoid sun exposure and harsh skincare products that could irritate your newly treated skin.
Long-lasting benefits include firmer skin and reduced signs of aging; however, these outcomes vary based on individual factors such as age and overall health. Keeping expectations aligned with personal circumstances will enhance satisfaction with the microneedling experience.
Preparing for Your Microneedling Session
Preparing for your microneedling session is crucial to achieving the best results. Start by consulting with your dermatologist. Discuss any skin concerns and medical history. They will guide you on what to expect and tailor the treatment to your needs.
A few days before your appointment, avoid sun exposure. Sunburned or tanned skin can complicate the procedure and recovery time. If you’re using any retinol products, stop them at least a week prior. These can increase sensitivity during treatment.
Staying hydrated is also key in the lead-up to your session. Drink plenty of water; it helps maintain skin elasticity, making it more responsive during microneedling. Consider incorporating hydrating serums into your skincare routine as well.
Arrive at the clinic without makeup on that day. Clean skin allows for better penetration of needles and ensures a smoother process overall. Taking these steps will help set you up for an effective microneedling experience that leaves you satisfied with the outcome.
During and After Microneedling: What to Expect
During your microneedling session, the dermatologist will first prepare your skin. A topical anesthetic is applied to minimize discomfort, allowing you to relax as the procedure begins. The practitioner uses a specialized device with fine needles to create tiny micro-injuries in your skin. This stimulates collagen production and enhances overall texture.
After the treatment, it’s common for your skin to feel sensitive and look slightly red, akin to a mild sunburn. These effects typically subside within a few hours but can last up to 48 hours in some cases. You may experience minor swelling or pinpoint bleeding, which are normal indications that effective treatment has occurred.
Post-treatment care is crucial for optimal results. Your dermatologist will provide specific instructions on how to soothe and protect your skin afterward. Hydration is key—using gentle moisturizers can help alleviate dryness and promote healing.
It’s essential to avoid direct sunlight during recovery and refrain from using makeup for at least 24 hours post-session. Following these guidelines ensures you get the best possible outcome from your microneedling experience while minimizing any potential side effects.
Risks and Benefits of Microneedling
Microneedling has gained popularity for its potential to rejuvenate skin, but it’s essential to weigh both risks and benefits before committing. One of the main advantages is improved skin texture. Many people report smoother, firmer skin after just a few sessions.
Another significant benefit is the enhancement of product absorption. After microneedling, your skincare products can penetrate deeper into the skin, maximizing their effectiveness. This means you may enjoy better results from your favorite serums and creams.
However, there are risks involved as well. Some individuals experience redness or swelling immediately following treatment. These effects usually subside within a day or two but can be concerning if you’re not prepared.
In rare cases, complications such as infections or scarring may occur. It’s vital to ensure that microneedling is performed in a sterile environment by qualified professionals to minimize these chances. Understanding both ends of this spectrum will help you make an informed decision about whether microneedling aligns with your skincare goals.
Who Should and Shouldn’t Consider Microneedling
Microneedling can be a game-changer for many people looking to improve their skin’s appearance. Ideal candidates are those struggling with issues like fine lines, acne scars, or overall skin texture. If you’re in good health and have realistic expectations, microneedling might be worth considering.
However, not everyone is suited for this treatment. Individuals with active skin infections or conditions such as eczema and psoriasis should avoid microneedling until these issues are resolved. It’s essential to ensure that your skin is healthy before undergoing any procedure.
Pregnant women and those with certain autoimmune diseases may also need to steer clear of microneedling. The treatment could potentially exacerbate underlying conditions or lead to complications during pregnancy.
If you’re on blood-thinning medications, consult your doctor prior to scheduling an appointment. Microneedling creates micro-injuries in the skin, which means increased bleeding could occur if precautions aren’t taken seriously. Always prioritize safety by discussing your medical history thoroughly with a professional before deciding on this treatment option.
Microneedling vs. Home Devices
Microneedling in a professional setting offers distinct advantages over home devices. Professionals use advanced equipment with precise needle depths tailored to your skin’s needs. This ensures optimal results while minimizing risks, something DIY options often can’t guarantee.
Home microneedling devices tend to have shorter needles and limited effectiveness. While they can improve product absorption and provide mild exfoliation, the results typically fall short of what you’d experience in a clinic. Many users find that without proper training, it’s easy to misuse these tools.
Moreover, professionals maintain strict hygiene standards during treatments. They understand how to prepare your skin beforehand and aftercare protocols that are crucial for healing. At-home attempts may lack this level of care, potentially leading to irritation or infection.
Cost is another factor worth considering. Although home devices seem more budget-friendly upfront, repeated purchases can add up over time without delivering significant benefits compared to a single professional treatment that yields lasting improvements in skin texture and appearance.
Finding the Right Dermatologist for Microneedling
Finding the right dermatologist for microneedling is crucial to achieving optimal results. Start by researching licensed professionals in your area who specialize in this treatment. Look for reviews and testimonials from previous clients, as these can provide insight into their experiences.
It’s important to ensure that the dermatologist has extensive training and experience specifically with microneedling techniques. Don’t hesitate to ask about their certifications or how many procedures they have performed. A knowledgeable practitioner will be able to answer your questions clearly and help you feel at ease.
Scheduling a consultation is an excellent way to gauge whether a particular provider is right for you. During this visit, discuss your skin concerns, goals, and any medical history relevant to the procedure. This conversation not only helps you understand what to expect but also allows you to assess if the dermatologist listens attentively and respects your needs.
Pay attention to the cleanliness of the clinic as well; a sterile environment is essential for safe treatments. Finding someone who communicates well and makes you feel comfortable can significantly enhance your microneedling journey while ensuring effective outcomes tailored just for you.
- Entertainment1 month ago
Javrank: Guide to Adult Entertainment & Innovative Features
- Entertainment2 months ago
Celebrity Movie Archives: Hidden Gems and Iconic Performance
- Games1 month ago
Snokido: The Ultimate Online Gaming Hub for All Ages
- LifeStyle1 month ago
CumonPrintedPics: Personalized Prints and Creative Platform
- Technology2 weeks ago
InfluencersGineWuld: Revolutionizing Influencer Marketing for Brands
- Business2 months ago
Fintechzoom.com dax40 : Insights & Trends and Updates
- Food & Drinks2 weeks ago
Çeciir: A Hearty Turkish Chickpea Stew with Rich Flavors
- Business2 weeks ago
5StarsStocks.com: Expert Stock Analysis & Investment Tools