Connect with us

Education

Conversion of 31 Celsius to Fahrenheit and Practical Uses

Published

on

31 Celsius to Fahrenheit

Converting temperatures between Celsius and Fahrenheit is a fundamental skill that finds application in everyday life, travel, cooking, and various professional fields. For example, understanding how to convert 31 Celsius to Fahrenheit can help you interpret weather forecasts, follow international recipes, or work seamlessly across scientific disciplines. This article delves into the intricacies of temperature conversion, the history of these scales, practical uses, and frequently asked questions.

Understanding Celsius and Fahrenheit

The Celsius and Fahrenheit scales are two widely used systems for measuring temperature. Each has its unique characteristics, origins, and applications.

Celsius Scale

The Celsius scale, also known as the centigrade scale, is based on the properties of water. It defines the freezing point of water as 0°C and the boiling point as 100°C under standard atmospheric conditions. The scale is part of the International System of Units (SI) and is widely used globally for scientific and everyday purposes.

Fahrenheit Scale

The Fahrenheit scale, developed by physicist Daniel Gabriel Fahrenheit in 1724, uses a different reference system. It sets the freezing point of water at 32°F and the boiling point at 212°F. While primarily used in the United States, the Fahrenheit scale also finds applications in other countries and specific fields.

The Conversion Formula

To convert temperatures from Celsius to Fahrenheit, you can use the following formula:

Here:

  • °F represents the temperature in Fahrenheit.
  • °C represents the temperature in Celsius.

Applying the Formula: 31 Celsius to Fahrenheit

Let’s calculate 31 Celsius to Fahrenheit using the formula:

  1. Multiply the Celsius value by 9:
  2. Divide the result by 5:
  3. Add 32 to the result:

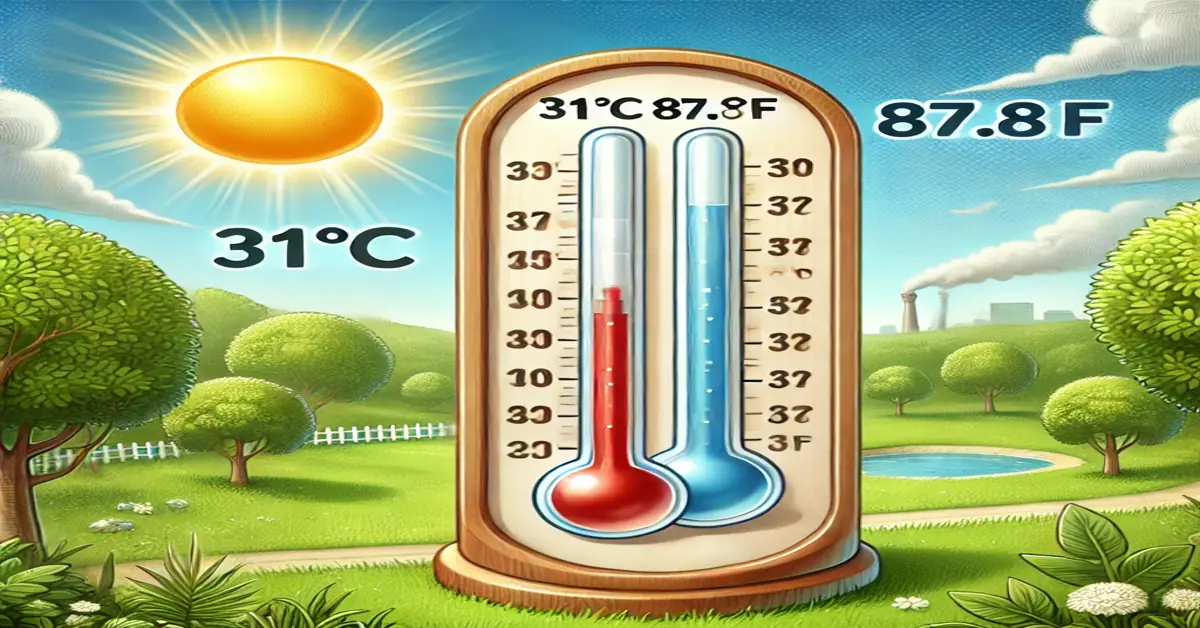
Therefore, 31 Celsius is equivalent to 87.8 Fahrenheit. This conversion is useful for understanding warm weather conditions, as 31°C is typical in summer months in many regions.

READ MORE:23 Celsius to Fahrenheit: Easy Conversion Guide For You

Practical Applications of 31 Celsius to Fahrenheit

Travel

Traveling to a country that uses a different temperature scale can be confusing. For instance, if a weather report indicates a high of 31°C, knowing that this equals 87.8°F helps you prepare appropriately for the climate.

Cooking

Many international recipes specify cooking temperatures in Celsius. Converting 31 Celsius to Fahrenheit can be helpful when baking or cooking dishes that require precise temperature settings.

Science and Engineering

Scientists and engineers often work with data in both Celsius and Fahrenheit. Accurate conversions ensure consistency in experiments, data analysis, and international collaboration.

Historical Context of Temperature Scales

Origin of the Fahrenheit Scale

Daniel Gabriel Fahrenheit introduced his temperature scale in 1724. It was based on three reference points: the freezing point of a brine solution, the freezing point of water, and the average human body temperature. These points established a practical scale for early scientific experiments.

Development of the Celsius Scale

The Celsius scale, introduced by Anders Celsius in 1742, originally had reversed values: 0°C represented the boiling point of water, and 100°C represented its freezing point. Carl Linnaeus later inverted the scale to its modern form.

READ MORE:Convert 30 Degrees C to F: Comprehensive Temperature Guide

Quick Reference Table

Here is a quick reference table for converting common Celsius temperatures, including 31 Celsius to Fahrenheit:

Celsius (°C)Fahrenheit (°F)
032
1050
2068
3086
3187.8
40104
100212

Tips for Quick Conversion

  1. Approximation Method: Double the Celsius value and add 30 for a rough estimate. For example, 31°C × 2 + 30 ≈ 92°F. While less accurate, this method is useful for quick mental calculations.
  2. Online Tools: Use online converters and mobile apps for instant and precise temperature conversions.
  3. Memorize Key Points: Familiarize yourself with common conversions, such as freezing and boiling points, to simplify calculations.

READ MORE:40 Celsius to Fahrenheit: Learn to Convert A Complete Guide

Seasonal Relevance of 31 Celsius

31 Celsius to Fahrenheit is often associated with summer weather. Understanding this temperature in context can help you adapt to seasonal changes:

  • Human Comfort: At 31°C, staying hydrated and wearing breathable clothing are essential to prevent heat-related illnesses.
  • Environmental Impact: High temperatures can affect ecosystems, leading to increased water evaporation and stress on wildlife.

Conclusion

Understanding how to convert temperatures, such as 31 Celsius to Fahrenheit, is a practical skill with numerous applications. Whether you’re traveling, cooking, or analyzing scientific data, mastering this conversion ensures accuracy and clarity in a variety of contexts. Remember, 31 Celsius to Fahrenheit—a warm and sunny day for many parts of the world.

CLICK HERE FOR MORE

FAQs

Why do we have different temperature scales? Different scales were developed based on historical and regional preferences, as well as scientific needs.

Is 31 Celsius considered hot? Yes, 31°C (87.8°F) is generally considered warm and typical of summer weather in many regions.

How can I quickly estimate Celsius to Fahrenheit? Double the Celsius temperature and add 30 for a rough approximation.

What countries use Fahrenheit? The United States, the Bahamas, and a few other countries primarily use the Fahrenheit scale.

Are online conversion tools reliable? Yes, most online tools and apps are accurate and convenient for quick temperature conversions.

Continue Reading
Click to comment

Leave a Reply

Your email address will not be published. Required fields are marked *

Education

Cute Easy Drawings for Beginners: Fun & Creative Ideas

Published

on

Cute Easy Drawings

Drawing doesn’t have to be intimidating. Whether you’re a child doodling for fun or an adult looking for a calming hobby, cute easy drawings offer a perfect starting point. These fun, simple sketches don’t require professional skills—they just need a dash of creativity and a pinch of inspiration.

In this guide, we’ll explore beginner-friendly drawing ideas, essential tools, easy tutorials, and tips to level up your artistic journey, even if you’re just starting.

Why Cute Easy Drawings Are So Popular

Cute easy drawings appeal to people of all ages for a reason:

  • Stress-relief: Drawing cute characters like kittens, bunnies, or smiling suns is therapeutic.
  • Beginner-friendly: You don’t need technical knowledge—just basic shapes and imagination.
  • Instagrammable: Simple doodles often go viral on social media platforms.
  • Fun & approachable: Great for kids, art therapy, or just passing time creatively.

Plus, the rise of aesthetic journals and bullet journaling has made easy cute doodles a must-try trend.

Tools You’ll Need to Get Started

Getting into drawing doesn’t require expensive materials. Here’s what you need:

  • Pencils (HB, 2B): For sketching soft outlines
  • Eraser: Preferably a kneaded eraser to avoid smudging
  • Sketchbook or plain paper
  • Fine liners or markers: For inking outlines
  • Color pencils or markers: To bring your drawings to life

Optional:

  • Drawing apps like Procreate or Sketchbook if you’re going digital

Top 10 Cute Easy Drawings You Can Try Today

Here are some adorable and simple ideas for cute easy drawings to get your sketching journey started:

  1. Baby animals (puppies, kittens, bunnies)
  2. Chibi characters (tiny anime-style people)
  3. Food with faces (kawaii sushi, donuts, fruits)
  4. Cartoon clouds, stars, and moons
  5. Tiny dinosaurs or dragons
  6. Cute seasonal items (pumpkin with a face, snowman, ice cream)
  7. Sleeping cats and dogs
  8. Penguins in scarves
  9. Magical creatures (unicorns, fairies)
  10. Cactus with smiley faces

These ideas use basic shapes like circles and ovals, so they’re great for all skill levels.

Step-by-Step Drawing Tutorials

Let’s go through a few easy tutorials for popular cute doodles.

Easy Cat Drawing

  1. Draw a round head.
  2. Add two triangle ears.
  3. Sketch two circles for eyes.
  4. Add a tiny “3” shape for the mouth.
  5. Finish with whiskers and a little tail.

Cute Donut with a Face

  1. Draw a large circle with a smaller one inside.
  2. Create wavy frosting on top.
  3. Add small dots for sprinkles.
  4. Draw two big oval eyes and a tiny “u” for the mouth.
  5. Use soft colors to shade.

Kawaii Rainbow

  1. Draw three to four arcs to form a rainbow.
  2. Add a fluffy cloud on each end.
  3. Give the clouds little smiling faces.
  4. Color the rainbow with pastel tones.

Tips to Improve Your Drawing Skills

You don’t need to be born an artist to get better. Here’s how:

  • Draw daily, even if it’s just 5 minutes
  • Use references from Pinterest or YouTube tutorials
  • Break objects into simple shapes (circle, square, triangle)
  • Try tracing first to understand proportion
  • Join online drawing challenges (like Inktober or Doodlewash)

Most importantly: don’t aim for perfection—aim for progress.

Real-Life Examples & Inspiration

Real people are turning cute easy drawings into passion projects and businesses:

  • Instagram artists like @doodlemeeple post viral simple art daily.
  • Teachers use simple sketches for student engagement.
  • Parents doodle with kids for bonding and motor skill development.
  • Freelancers sell cute illustrations on Etsy as stickers, prints, and coloring pages.

You can even use your sketches in bullet journals, greeting cards, or as digital art for social media.

Conclusion

Cute easy drawings are more than just doodles—they’re a doorway into creativity, mindfulness, and personal expression. Whether you’re an aspiring artist or just doodling for fun, these drawings offer a relaxing way to explore your imagination.

So grab your sketchbook, start with a smiling donut or sleepy kitten, and let your creative journey begin. Remember, it’s not about perfection—it’s about having fun.

FAQs

Q1: What are the easiest things to draw for beginners?
A: Start with basic shapes like hearts, stars, clouds, and cartoon animals like cats, bunnies, or pandas.

Q2: How can I make my cute easy drawings?
A: Use round shapes, big eyes, pastel colors, and simple smiling faces. The “kawaii” style is a great reference.

Q3: Are there apps for learning cute drawings?
A: Yes! Try Procreate (iPad), Sketchbook (Android), or How to Draw Cute Things app for guided tutorials.

Q4: Can I turn my cute drawings into a business?
A: Absolutely. Many artists sell their art as digital prints, stickers, or even NFTs.

Q5: How often should I practice to get better?
A: Even 10 minutes daily can help build consistency and improve your sketching skills over time.

Call-To-Action

Ready to start your drawing adventure?
Share your favorite sketch in the comments or tag us on social media using #CuteEasyDrawings!
Want more art tips and tutorials? Subscribe to our newsletter for weekly creative inspiration.

Continue Reading

Education

8mm to Inches Conversion Guide: Quick & Accurate Tips

Published

on

8mm to Inches

Whether you’re working on a DIY project, buying hardware, dealing with product specs, or sewing a garment, precise measurements matter. Many countries use the metric system (millimeters, centimeters, meters), while the U.S. and a few others rely on the imperial system (inches, feet). This often creates confusion, especially with small measurements like 8mm. Understanding how to convert 8mm to inches bridges this gap and ensures accuracy.

The Quick Answer: What is 8mm to Inches?

8 millimeters = 0.31496 inches (rounded to 5 decimal places)

To make it simpler: 8mm ≈ 0.315 inches

This tiny number can make a big difference, especially in technical or professional settings. Let’s dive deeper into the math behind this conversion.

Understanding the Metric vs. Imperial Systems

The metric system is decimal-based and used by most of the world. It’s precise, consistent, and based on powers of 10. The imperial system, on the other hand, is rooted in older measurements and is still commonly used in the U.S.

SystemUnitEquivalent
MetricMillimeter (mm)1/1000 of a meter
ImperialInch1/12 of a foot

When dealing with small measurements like 8 millimeters, the differences between these systems become more noticeable.

Conversion Formula: 8mm to Inches Explained

To convert 8mm to inches, use this simple formula:

inches = millimeters ÷ 25.4

Example:

CopyEdit8 ÷ 25.4 = 0.31496 inches

So, 8mm is equal to 0.31496 inches.

Here are a few other useful conversions for context:

  • 1 mm = 0.03937 inches
  • 5 mm = 0.19685 inches
  • 10 mm = 0.39370 inches

8mm to Inches Chart for Quick Reference

Millimeters (mm)Inches (in)
1 mm0.03937 in
5 mm0.19685 in
8 mm0.31496 in
10 mm0.39370 in
12 mm0.47244 in
15 mm0.59055 in

Having a chart like this saves time when you’re converting on the go.

Common Uses of 8mm in Daily Life

You’d be surprised how often 8mm shows up in everyday situations:

  • Jewelry sizes: Chains, rings, and earrings often list sizes in mm.
  • Camera lenses: 8mm lenses are popular in vintage or action cameras.
  • Bolts and nuts: Many metric fasteners are 8mm in diameter.
  • Pens and tools: Pen barrel diameters and drill bits often measure 8mm.
  • Home improvement: Tiles, spacers, or wood panels may come in 8mm thickness.

8mm in Inches: Real-Life Object Comparisons

To give you a better feel for what 8mm looks like, here are some relatable comparisons:

  • Standard pencil lead = approx. 7–8mm in diameter
  • A stack of 8 sheets of paper = close to 8mm thick
  • Two stacked nickels = around 7.9mm thick
  • A woman’s wedding band = often around 6–8mm wide

These visuals help make the abstract number more tangible.

Digital Tools for Conversion

While it’s great to understand the manual formula, you can also use:

Conversion Tools:

  • Google Search: Just type “8mm to inches” and Google gives the answer instantly.
  • Online Calculators: Tools like RapidTables or UnitConverters.net.
  • Mobile Apps: Apps like “Unit Converter” or “ConvertPad” are handy on the go.

These tools are helpful when dealing with odd values like 8.4mm, 8.75mm, or precision measurements in engineering or crafting.

Why Precision Matters in Measurement

Accurate conversion isn’t just about numbers—it’s about avoiding costly errors.

Here’s how incorrect conversions can affect real-life scenarios:

  • Construction: An error of even 1mm can throw off the alignment of tiles or panels.
  • Mechanical engineering: An 8mm bolt won’t fit into a 5/16″ (7.9375mm) hole.
  • Fashion design: Small sizing mistakes can alter how a garment fits.
  • 3D printing: Precision down to the millimeter ensures your model prints correctly.

Bottom line: Don’t round too much unless it’s for casual purposes.

Conclusion: Measure Smart, Stay Accurate

Converting 8mm to inches may seem minor, but it plays a significant role in accurate measurements across many industries. Knowing that 8mm equals approximately 0.315 inches helps you bridge the gap between the metric and imperial systems confidently.

Whether you’re building, crafting, or shopping online, always double-check your measurements!

FAQs: 8mm to Inches Conversion

Q1: Is 8mm less than half an inch?

Yes, 8mm is about 0.315 inches, which is less than 0.5 inches (1/2 inch).

Q2: How do I convert 8mm to inches without a calculator?

Use the rule of thumb:
1 mm ≈ 0.04 inches
So, 8mm ≈ 8 x 0.04 = 0.32 inches

Q3: Why is the conversion factor 25.4?

Because 1 inch is defined as exactly 25.4 millimeters by international agreement since 1959.

Q4: What’s the difference between 8mm and 5/16 inch?

  • 8mm = 0.315 inches
  • 5/16 inch = 0.3125 inches
    They are very close but not identical. Use the right one for exact fits.

Q5: Can I use 8mm and 5/16 inch interchangeably?

In casual use, maybe. But in precision work like carpentry, mechanics, or engineering, use the correct size.

Call-to-Action

Found this guide helpful? Share it with your friends, bookmark it for future use, or leave a comment below!
Want more quick measurement guides? Subscribe to our newsletter for tips, charts, and tools sent to your inbox weekly!

Continue Reading

Education

Wolf Drawing: Techniques for Realistic and Easy Sketches

Published

on

Wolf Drawing

Drawing a wolf can be a rewarding artistic challenge, whether you’re a beginner or an experienced artist. Wolves have a majestic, powerful appearance, making them a favorite subject for wildlife drawings. This guide will walk you through the essential steps, techniques, and tips to create a realistic wolf drawing. From sketching basic shapes to refining fur details and expressive eyes, you’ll learn how to bring your wolf artwork to life.

Tools and Materials for Wolf Drawing

Before starting your wolf drawing, gather the right materials. The choice of tools depends on your preferred drawing style, whether it’s pencil sketching, ink drawing, or digital art.

Recommended Tools:

  • Pencils: HB, 2B, 4B, and 6B for shading and depth.
  • Erasers: Kneaded erasers for soft corrections and precision erasers for fine details.
  • Blending tools: Tortillons, tissue paper, or cotton swabs for smooth shading.
  • Fine liners or ink pens: For a defined, stylized look.
  • Digital drawing tablet: If working in Procreate, Photoshop, or another digital medium.

Step-by-Step Guide to Drawing a Wolf

Step 1: Sketch Basic Shapes

Start with simple shapes to define the wolf’s structure. Use:

  • A large oval for the head.
  • A slightly elongated oval for the snout.
  • Triangle shapes for the ears.
  • Basic circles for the body structure.

Step 2: Outline the Wolf’s Features

  • Sketch light guidelines for facial symmetry.
  • Define the placement of the eyes, nose, and mouth.
  • Adjust the ears for accurate positioning.

Step 3: Refine the Face and Add Details

  • Draw the almond-shaped eyes with an intense gaze.
  • Add the nose with slight shading for a wet, reflective look.
  • Sketch the mouth slightly open or closed for expression.

Step 4: Define the Fur Texture

  • Use short, directional pencil strokes to simulate fur.
  • Layer different shades to create depth and realism.
  • Focus on fur flow, especially around the neck and face.

Step 5: Add Shading and Depth

  • Identify a light source to guide your shading.
  • Use a blending tool for smooth transitions.
  • Darken shadows around the snout, ears, and fur creases for dimension.

Step 6: Final Touches

  • Erase unnecessary guidelines.
  • Deepen dark areas for contrast.
  • Add highlights to the eyes and nose for a lifelike effect.

Tips for a Realistic Wolf Drawing

1. Study Wolf Anatomy

  • Observe real-life wolf photos.
  • Understand their skeletal and muscular structure.
  • Pay attention to fur patterns and density.

2. Experiment with Different Poses

  • A standing wolf shows strength and alertness.
  • A howling wolf adds drama and emotion.
  • A resting wolf captures calmness and serenity.

3. Use References

  • Look at wildlife photography.
  • Study other artists’ techniques.
  • Practice sketching from different angles.

4. Digital vs. Traditional Drawing

  • Digital tools offer easier corrections and layering.
  • Pencil drawings provide texture and depth through shading.
  • Experiment with both to find your style.

Conclusion

Drawing a wolf requires patience and practice, but with the right techniques, anyone can create stunning artwork. By mastering anatomy, fur texture, and shading, you can bring your wolf drawings to life. Grab your sketchpad, follow these steps, and start drawing today!

Frequently Asked Questions (FAQs)

  • 1. How can I make my wolf drawing look more realistic?

Focus on accurate proportions, detailed fur texture, and expressive eyes.

  • 2. What is the hardest part of drawing a wolf?

Capturing the fur texture and facial expression can be challenging but improves with practice.

  • 3. Can beginners draw wolves easily?

Yes! Start with basic shapes, practice shading, and gradually refine details.

  • 4. What’s the best way to learn wolf drawing?

Use reference images, follow step-by-step guides, and practice regularly.

Continue Reading

Trending